Record, edit, and share video from all sources.

Reduce Background Noise While Recording [7 Ways to Follow]

Posted by Ethan Brooke to Record Audio, Record Video Apr 16, 2025
Distracting background noise can ruin your recording and prevent it from producing its best. So, whether you’re a podcaster or simply need to record a voiceover, learning how to reduce background noise while recording is essential. All those hums, traffic, construction, and other sounds will be eliminated with minimal effort. Scroll down now to discover the 7 solutions on how to reduce background noise while recording audio . Get that clear recording in no time!
Guide List
Method 1: Use Professional Screen Recorder to Reduce Noise Method 2: Record in a Quiet Location Method 3: Experiment with a High-Quality Microphone Method 4: Get a Low-NoisePreamp/Interface Method 5: Use a Popfilter to Reduce Noise Method 6: Check on the Gain Levels Method 7: Inspect Some PlugsMethod 1: Use Professional Screen Recorder to Reduce Noise
Before doing anything else or breaking the bank for high-quality equipment to reduce background noise while recording, use this professional recording tool, the 4Easysoft Screen Recorder. It not only records your screen, audio, and webcam, but it also incorporates noise reduction technology directly within its program. With this, all those hums, static, and extra sounds will be eliminated, resulting in cleaner and more professional recordings. Aside from that, you can also adjust the audio settings to match your requirements to acquire the quality you want.

Built-in noise reduction tech that lessens background noises.
Captures smooth, high-quality recording with minimal system impact.
Export recordings in multiple formats like MP3, AAC, FLAC, and more.
Let you trim unnecessary parts in your audio and video recording before saving.
100% Secure
100% Secure
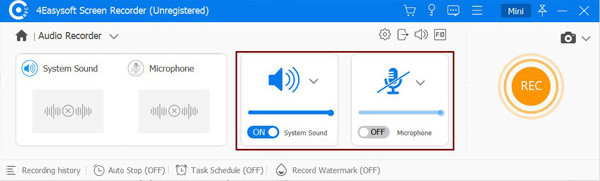
Step 1Open the 4Easysoft Screen Recorder on your desktop screen, then aim for the “Audio Recorder” button, among other options on the main interface, to record audio from the system or microphone.

Step 2Here, turn on the audio options like “System Sound” to capture your computer audio or “Microphone” if you will do some voiceovers or narrations. Adjust their volume levels by their sliders.
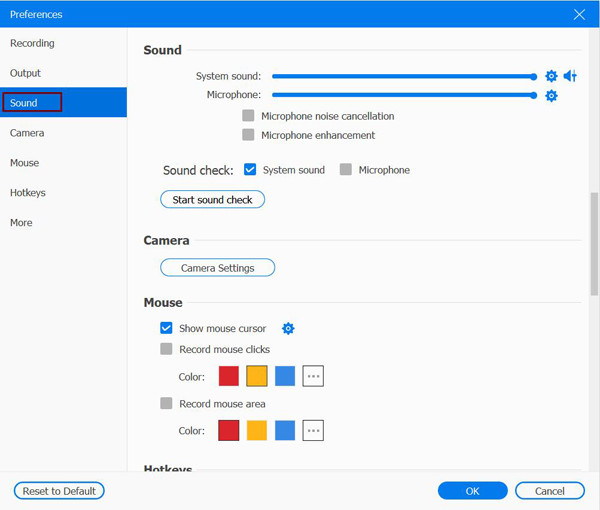
Step 3Next, hover your cursor over the “Settings” button and head to the “Output” section to adjust some recording options. Next, scroll down and find “Sound Settings”, here please reduce the background noise while recording with “Noise Cancellation”.
Click the “Recording test” button to see first what it sounds like. Click the “OK” button to save changes for background noises.
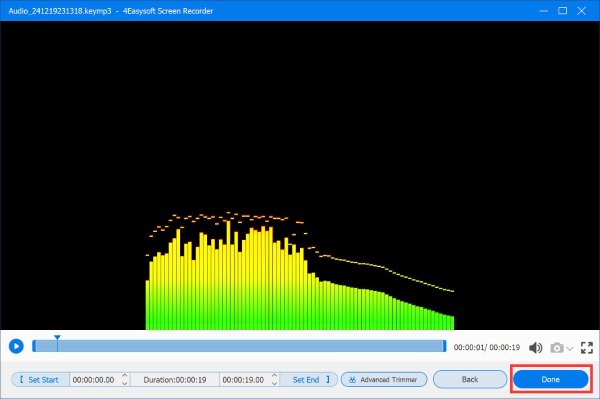
Step 4Now, on the main screen, click the “REC” button to begin capturing your audio. Once done, click the “Stop” button to set your foot in the preview window where you can eliminate extra parts before saving your audio recording.
Method 2: Record in a Quiet Location
Definitely a free solution to learn how to reduce background noise while recording is to record in a private and quiet place. Choose an area away from factors that create noises like traffic, construction, fans, and other sources. You should record in a space like a closet, your room, or even a soundproof booth if you have one. If possible, you can record during quieter times of the day when noises are not that presented.
After identifying a quiet location in your home, you can test the audio first by recording a short clip. You can turn off some appliances, too, close windows and doors, and consider having noise-cancellation headphones.
Method 3: Experiment with a High-Quality Microphone
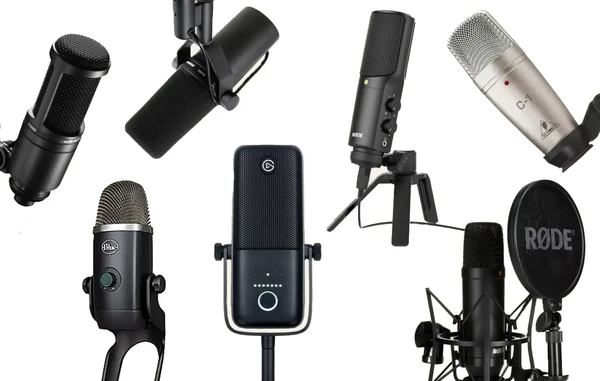
Investing in a quality microphone won’t disappoint you! This method is a simple yet effective solution to reduce background noise while recording, especially for those who have a budget. Condenser mics are more sensitive than dynamic ones, so they are more prone to picking up noises. For this, consider using directional mics that come with cardioid, hypercardioid, and super cardioid patterns that focus on sound directly from the mic and lessen noises from the sides and other areas.
Research some microphones that are perfect for your recording requirements, such as Shure SM4, RØDE NT1, etc., then once you have it, experiment with it in different positions to locate the correct placement where noises cannot be heard.
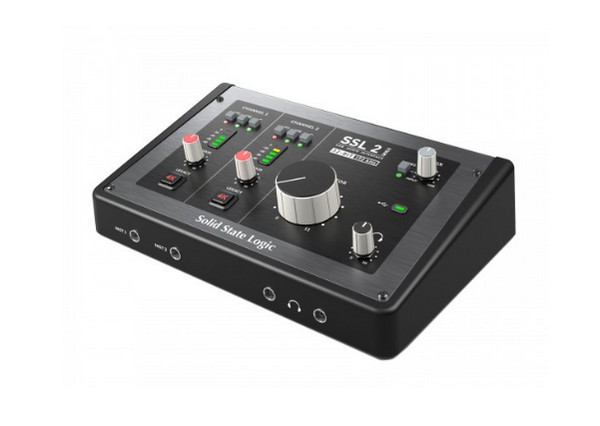
Method 4: Get a Low-NoisePreamp/Interface
After the high-quality microphone, a high-quality preamplifier (preamp) or audio interface can greatly enhance your recordings. With a low-noise preamp, you can minimize the introduction of noise during the process. Also, having a good audio interface gives you lean power to your mic and other features like gain control to optimize your audio signal, thus helping you how to reduce background noise while recording.
Once you have purchased a high-quality preamp, connect your mic to it, and then adjust the gain levels carefully to avoid getting it too high or too low. You can also experiment with different settings to determine the perfect balance between signal and noise. Of course, you can use some editors to remove the background noise from video later.
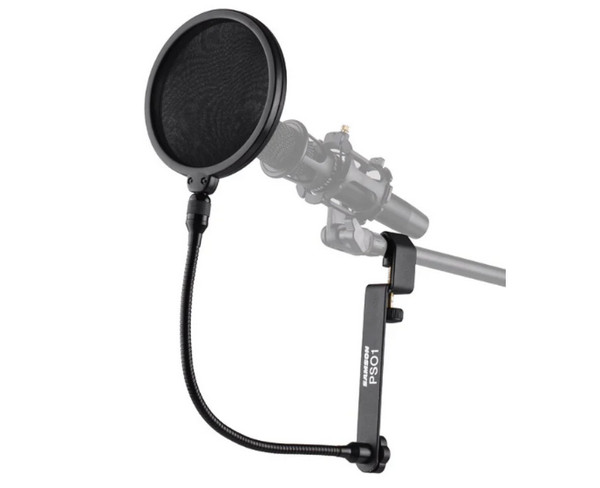
Method 5: Use a Popfilter to Reduce Noise
Aside from a high-quality microphone, a pop filter is helpful as well to reduce background noise while recording. It is a thin mesh screen between the mic and the sound source, helping lessen the impact of sounds like p, b, and t, creating a burst of air pressure. Without the pop filter, it can distort the audio signal and create unnecessary noises in your audio recording.
Make sure to position the pop filter 6-12 inches in front of the mic, then adjust their distance to find the optimal position. Try to speak or sing steadily from the mic to keep consistent audio levels.
Method 6: Check on the Gain Levels
Next, you should know that correct gain settings can help you with your ‘how to reduce background noise while recording video or audio’ issue. If the gain is set too low, the signal is weaker, making it more vulnerable to receive noise. Meanwhile, if the gain is too high, the signal can be distorted. Thus, you must check on it and maintain consistent audio levels.
Please monitor your audio levels using your chosen recording software. If needed, adjust the gain until you obtain the perfect signal level. You can also use an automatic gain control to help maintain steady audio levels during the recording session.
Method 7: Inspect Some Plugs
Another thing that needs to be checked is some plugs or cables. Loose or faulty ones can introduce noise into your recordings. So, to be able to reduce background noise while recording, inspect them all to see if there is damage or some loose connections. Make sure that all are appropriately connected to your mic, headphones, computer, preamps, interface, and computer.
After you visually inspect all cables to see if there’s damage, you can reset them all and ensure secure connections. Otherwise, use different usable cables to resolve any issues with specific cables.
Conclusion
By using those seven strategies, you can quickly minimize background noises and achieve the professional sound you want. But among those ways how to reduce background noise while recording, to ensure an effective solution and not to waste time, consider using the 4Easysoft Screen Recorder. The program has built-in noise reduction features that intelligently lessen unwanted sounds from your mics, ensuring high-quality recordings. With 4Easysoft, you can streamline all your recording tasks and achieve that professional-sound.
100% Secure
100% Secure