Record, edit, and share video from all sources.

ShareX Review: Pros, Cons, Features, and the Best Alternative

Posted by Paula Pailaga to Record Video, Review Feb 09, 2023
Are you searching for an easy application that you can use to screen capture? Many applications are available today, and ShareX is a recommended free screen recorder for Windows. In this post, you will see a comprehensive review of this open-source program, and find is it suitable for you. It is an upgraded software for you to take a screenshot of your screen. Learn more about this program in the following parts, and the best alternative program to ShareX.
Guide List
Part 1: Main Features, Pros, and Cons of ShareX Screen Capture Part 2: Simple Steps on How to Use ShareX on Any Platform Part 3: Reviews on the Best Alternative to ShareX Part 4: FAQs about the ShareX ReviewPart 1: Main Features, Pros, and Cons of ShareX Screen Capture
ShareX can assist you in capturing any active window and more with audio. It is a program available on Windows with so much to offer. It offers an excellent interface, allowing users to use it easily. You can use this to record team tasks, and record your webcam and computer screen. Once you download ShareX, you will see its main features in the main interface, like Capture, Upload, Workflows, and Tools.
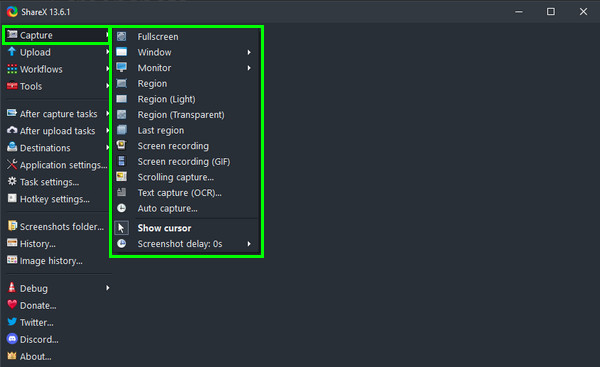
1. Capture
In Capture, it offers you options on how you like the way you’ll capture your screen, such as full screen, region, windows, scrolling capture, etc. Moreover, it provides a different way to capture your screen with the region light, region transparent, and last region.
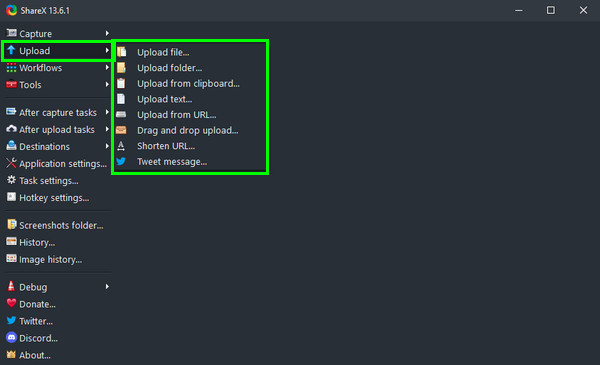
2. Upload
For the Upload feature, ShareX allows you to Drag and Drop upload, wherein you drop your file into the program; Upload from Clipboard, wherein you’ll right-click the image then copy it; and Upload from URL, find then copy the image URL.
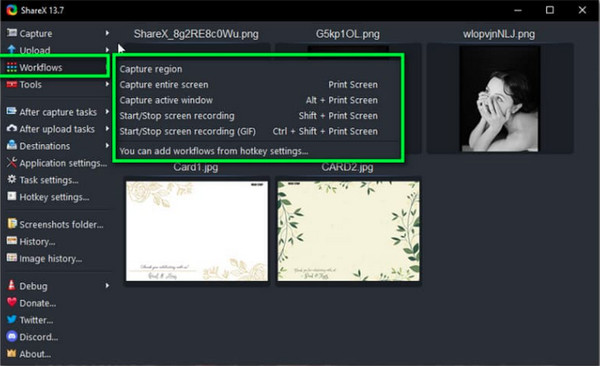
3. Workflows
In Workflows, you can choose here how you will capture your screen. You can capture your entire computer screen, by region, or just a specific window. By choosing to capture by region, you have to select the part you want to capture.
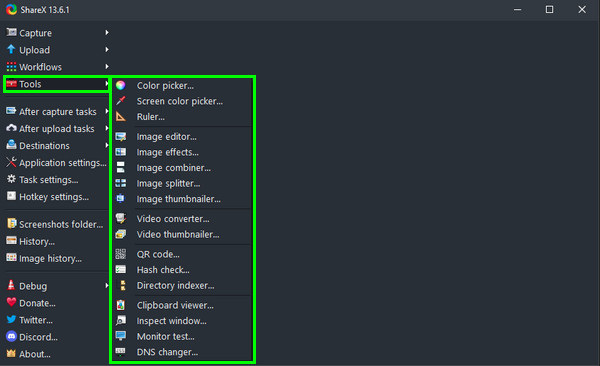
4. Tools
Lastly, for the main feature, Tools, you can find the other tools provided by ShareX. Starting from editing and adding effects to splitting images and creating thumbnails, this application can help you. Aside from image editing tools, ShareX offers a video converter and thumbnail creator. It also provides a Color Picker to select any color from the image.
Besides the mentioned main features above, ShareX offers a lot of features that make it ideal for recording, editing, and video sharing. Below are some of the key features offered by the program, including the its advantages and disadvantages.
Screenshot and GIFs. It enables users to capture screenshots of their screens and quickly create GIFs of what they have captured.
Automatic Capture. It allows you to capture the screen automatically, and once you set the time, ShareX will capture your screen repeatedly after the set seconds. Then, it will be saved automatically.
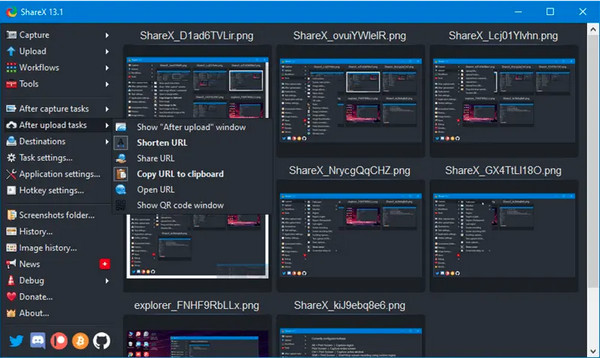
After Capture Tasks. Copies the screenshot to the clipboard so you can paste it anywhere you want. The program allows you to upload images on Google Drive, OneDrive, Dropbox, and more. You can also share them on various social media platforms.
Recording Area. Select if you want to capture the entire screen, any active windows, or the region of the screen. It also allows you to select from other monitors if you are using multiple monitors.
- Pros
- Provide features to capture and edit your recordings.
- Support the easy drag-and-drop upload.
- Show after-capture tasks and after-upload tasks.
- Allow you to scroll capture, text capture, and auto-capture
- Cons
- Available in Windows only.
- For beginners, it won't be very easy
- The scroll window capture doesn't always work.
Part 2: Simple Steps on How to Use ShareX on Any Platform
If you are a Windows PC user, you can use ShareX to capture the screen. Download it from its official website. On its homepage, click the Download tab and the file will be downloaded on your Windows PC. Follow the installation process, and then you are ready to use the program.
Taking a Screenshot
Step 1When you have launched ShareX, go to Capture. Here you can choose to capture a selected window, an entire screen, or a region on the screen.
Step 2After you have taken a screenshot, an option After Capture will appear that allows you to choose what to do with the image you just took. You can add a watermark, border, shadow, text, or other annotations.
Step 3Save it to the clipboard or hard drive, or upload it to more than 25 storage services. You can choose to save it immediately or upload it.
Screen Recording
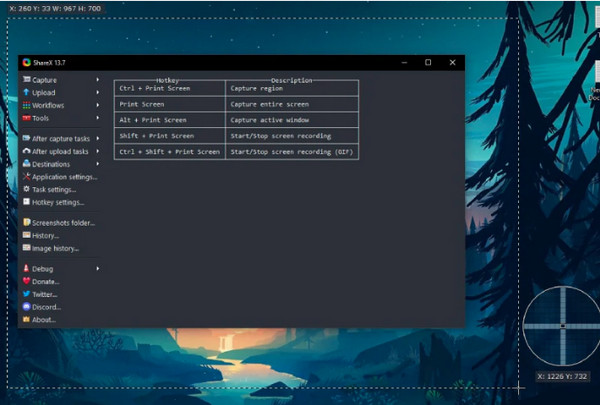
Step 1Open the window you want to record, then press the Shift and Print screen keys. The cursor will change to a cross. Drag the cross to the upper left corner of the window you want to record.
Step 2Press the left mouse button to select the area. Release it then the recording will start. Stop and Abort buttons will appear.
Step 3Once done, go to ShareX; then, in the right pane, you will see the screen recording you made.
Edit Images
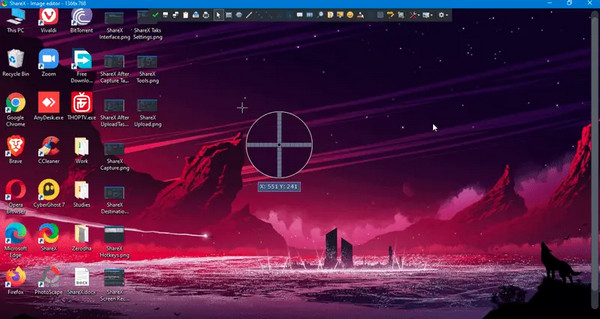
Step 1When you’re done taking a screenshot, click Tools on the main interface of the program. Select the Image Editor.
Step 2Load the photo from the clipboard, or open the file from the file location. Then you can start editing the image. Apply filters, adjust settings, combine multiple images, insert colors, texts, and more.
Part 3: Reviews on the Best Alternative to ShareX
The best alternative tool to ShareX for screen recording on Windows/Mac is the 4Easysoft Screen Recorder. This tool offers you a high-quality output with up to 60fps and 4K resolution. Whether you want to record screen tutorials and online lectures, take screenshots, capture gameplay, etc., you can do it all with this program. Not only it offers screen capturing tools, but it also allows you to add text, lines, shapes, and more while recording. You can also edit and clip your recorder tutorials and other videos according to your requirements.

It offers an area selection wherein you can choose to capture the entire screen, a fixed window, or desired region.
Captures GIFs and supports all popular video, audio, and image formats to export.
Provides custom hotkeys, making it easy for you to start/pause/stop the recording, take screenshots, and record quickly.
Supports recording your computer’s camera and your screen at the same time.
100% Secure
100% Secure
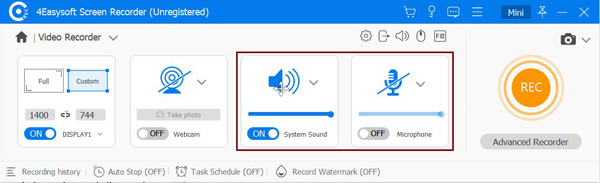
Step 1To screen record, launch the 4Easysoft Screen Recorder, the best alternative to ShareX. Then, click the Video Recorder button. Choose the Full option if you want to record the entire screen, or click Custom to select the desired window.
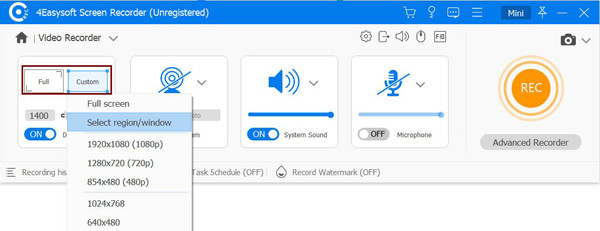
Step 2Record video with audio by turning on the System Sound and Microphone options. You can adjust the volume by pulling the slider. Then click the REC button to start the screen recording.
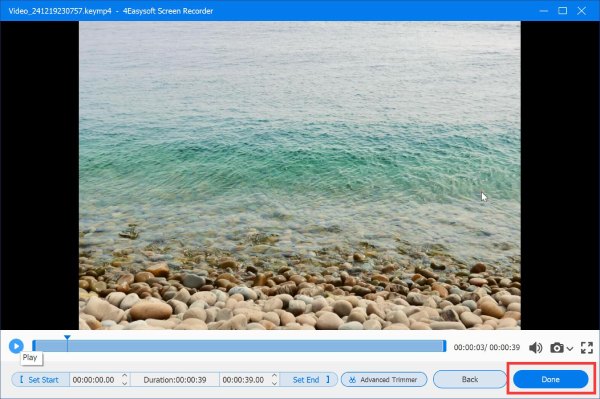
Step 3Click the Stop button when you’ve finished recording. Clip the unwanted beginning and ending parts in the preview window. Then, click Save to export.
Part 4: FAQs about the ShareX Review
-
Does ShareX have a time limit?
ShareX is a free and open-source program that allows users to record their screens for as long as they want. You don’t have to worry about the length of your recording file.
-
Is ShareX free from the watermark?
Once you take a screenshot, ShareX will put a watermark automatically. If you want to delete it, go to Image Effect or disable it when in the After Capture task.
-
Can ShareX record a webcam?
When you have downloaded ShareX and followed the installation process, you have to install the FFmpeg tool if you want to capture the screen and webcam video.
Conclusion
ShareX is your best choice if you want to upgrade how you take a screenshot of your screen and how you record your screen. But, if you are a first-time user, you might need help to use the program because of its complicated settings, which is why there is the best alternative tool for ShareX. The 4Easysoft Screen Recorder can capture all screen activities - available on both Windows and Mac. It also offers features to capture and edit the recorded file. Record all you want with simple clicks using this screen recorder.
100% Secure
100% Secure