
Record video, audio, webcam, and gameplay on Windows/Mac with high quality.
How to Screen Record on iPhone [Beginner-Friendly]

Posted by Ethan Brooke to Record Video Aug 27, 2026
This post provides a detailed explanation of how to screen record on an iPhone. The entire process is very simple. All you need to do is use the built-in method to capture screen activity on your iPhone quickly. However, the default tool offers only very limited recording controls and editing functions. Therefore, an additional powerful screen recorder has also been recommended in this post. Now start reading to begin the iPhone screen recording.
Guide List
Preparations Before Learning How to Screen Record on iPhone How to Screen Record on iPhone Under Any Circumstances How to Screen Record on iPhone with Your Microphone on For 8 or Older Models: How to Screen Record on iPhone Where to Find the Recordings After Screen Recording on iPhone [Bonus] The Best Way to Screen Record on iPhone SmoothlyPreparations Before Learning How to Screen Record on iPhone
Before starting the recording process, there is an important preparatory step you need to know about. Since some users may find it difficult to access the default screen recording option directly, you first need to learn how to enable screen recording on iPhone so you can access it quickly. You can quickly add the default screen recording tool to your iPhone's control panel by following the steps below.
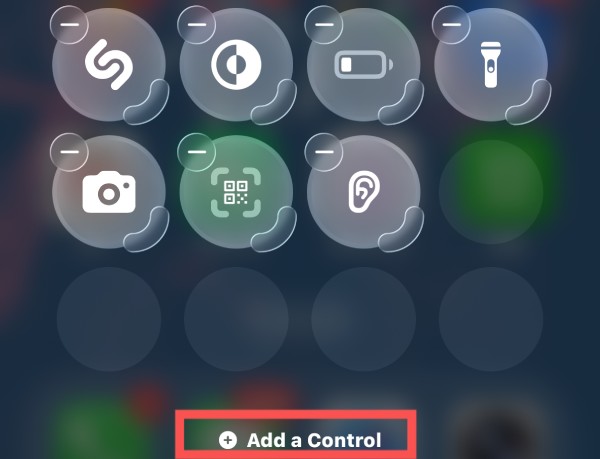
Step 1Swipe down from the top on your iPhone and tap the "Add a Control" button.
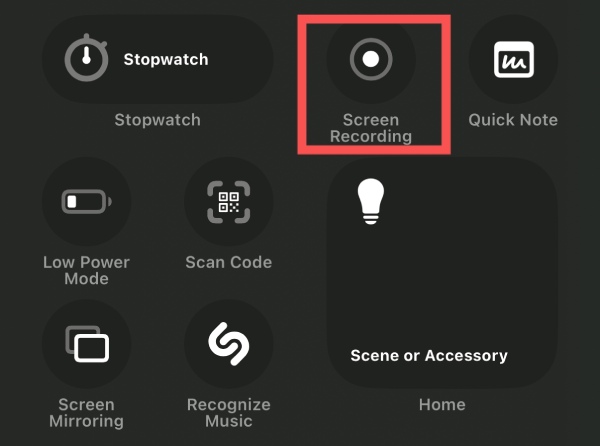
Step 2Find and tap the "Screen Recording" button to add the recording to the iPhone for future use.
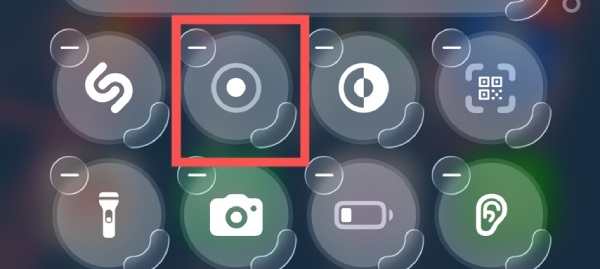
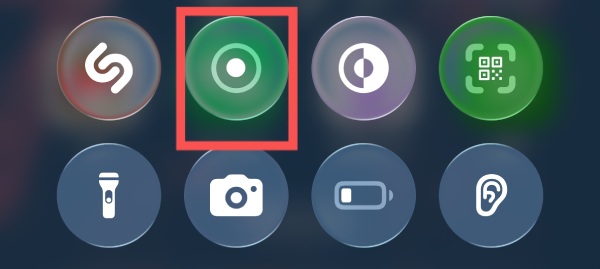
Step 3Now, if you swipe down from the top of your iPhone again, you can see the "Record" button displayed here.
How to Screen Record on iPhone Under Any Circumstances
Now you have learned how to add screen recording on an iPhone. The next step is to open this function on your iPhone and start recording quickly. Some users may think that the default tool is the best screen recorder for iPhone. It does make sense. However, it should also be noted that while the built-in tools are convenient and applicable to multiple scenarios, they offer very few additional features. Both the marking function during recording and the editing function after recording are very limited. This might not be conducive to you turning the screen recording into a professional and entertaining piece.
Step 1Navigate to where you want to record, then swipe down from the top of your iPhone to tap the "Record" button.
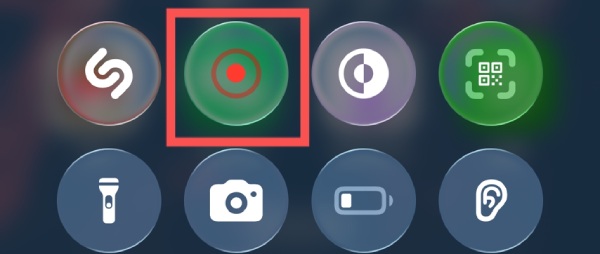
Step 2Long-press the "Record" button on the top, and the process will be displayed.
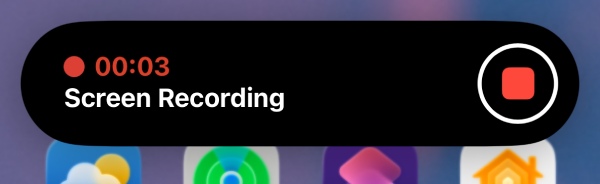
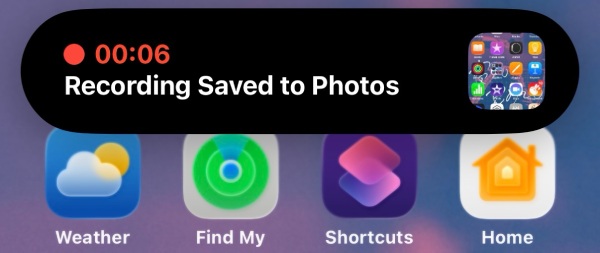
Step 3Tap the "Stop" button to finish recording the screen on the iPhone. The recording will be saved to the Photos app.
How to Screen Record on iPhone with Your Microphone on
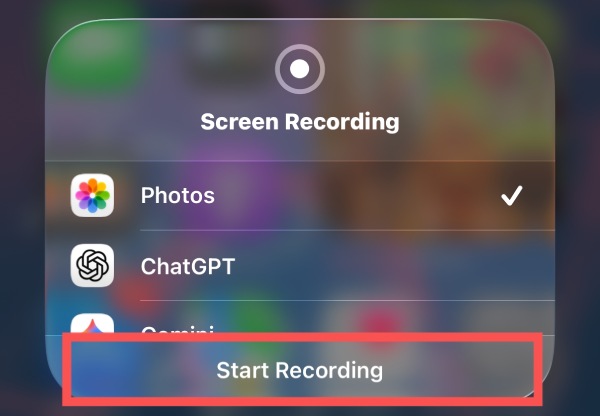
Although it is convenient, the default iPhone recording tool has another major drawback. Its default settings do not support recording the screen with the microphone. If you want to use it as an iPhone screen recorder with audio, you will need to take an additional step to enable the microphone in the recording. If you are not sure how to access this screen and the voice recorder on your iPhone, follow the detailed steps below.
Step 1Swipe down from the top on your iPhone and long-press the "Record" button to summon a new window.
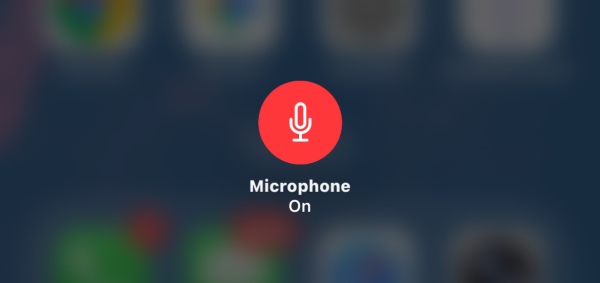
Step 2In the pop-up window, tap the "Microphone" button to adjust iPhone screen recording settings with the microphone.
Step 3To start recording, tap the "Start Recording" button after selecting the app.
For 8 or Older Models: How to Screen Record on iPhone
For users of older iPhone models, the steps for setting up iPhone screen recording may differ slightly. This is due to reasons such as the system version. Although the overall operational logic is similar, many people may still feel confused. If you want to record a screen on an iPhone 8 or an older model, you can quickly complete the process by following the steps in this section. First, you also need to add this function to the Control Center.
Step 1Launch the Settings app on your iPhone, scroll down to find and tap the "Control Center" button.
Step 2Tap the "Customize Controls" button, and then you can add the "Record" button to the Control Center of your iPhone.
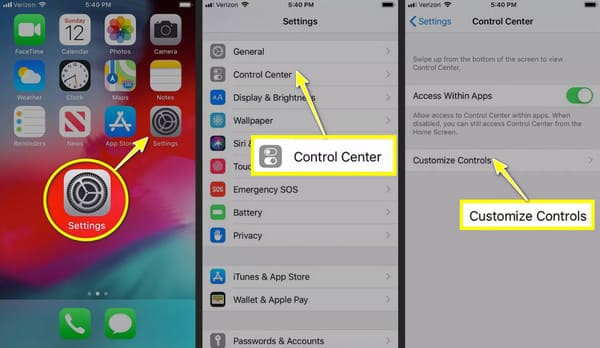
In this way, you can start screen recording on your iPhone 8 or any older model. Its operation method is also very simple. You can follow the steps below to quickly learn how to record the screen on iPhone 8 or older models.
Step 1Navigate to the activities you want to record on iPhone. Swipe up from the bottom of your iPhone to summon the Control Center.
Step 2Tap the "Record" button to activate screen recording on iPhone, and the process will start after a 3-second countdown.
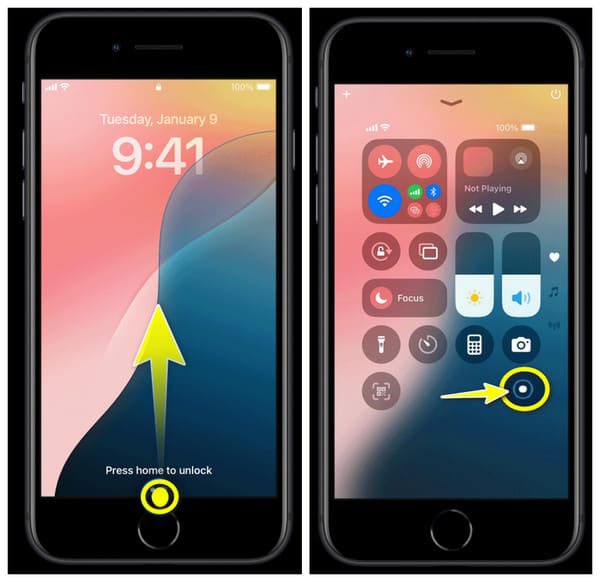
Step 3Once finished, tap the "Stop" button to stop the recording. The recording will be saved automatically.
Where to Find the Recordings After Screen Recording on iPhone
Some users might already know how to record an iPhone screen, but they still have difficulty quickly accessing their recordings, especially those recorded a long time ago. Since many people already have a large number of pictures or videos stored in their photo libraries, manually searching through them by memory or date is inefficient. To access specific types of screen recordings, follow the steps below to open the appropriate folder.
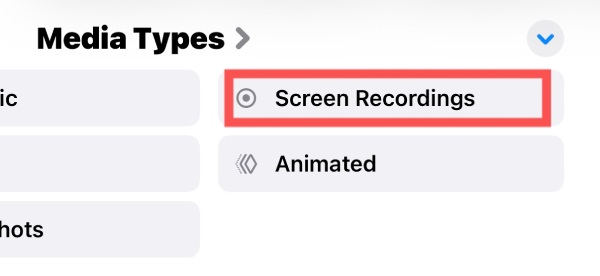
Step 1Launch the Photos app on your iPhone. Scroll down and navigate to the "Media Types" tab.
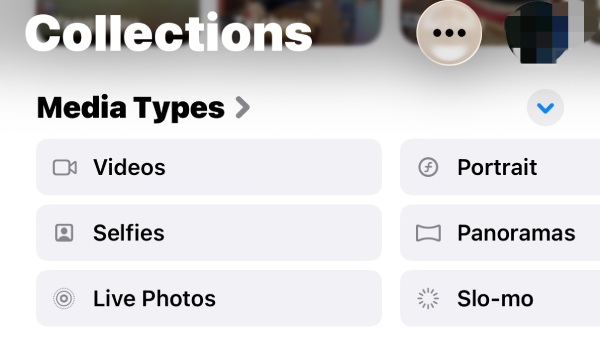
Step 2Under the "Media Types" tab, find and tap the "Screen Recordings" button to enter a new page.
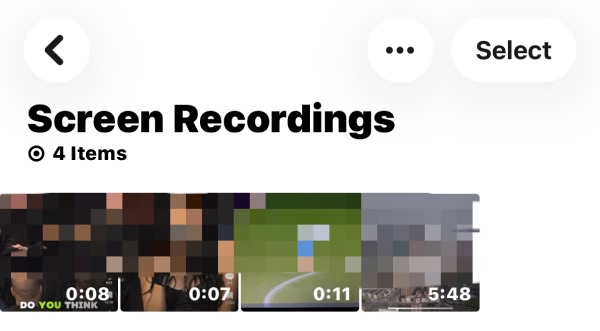
Step 3All screen recordings are saved here after the iPhone screen recording process completes.
Tips
Since all recordings are saved with photos and other videos, the storage space on your iPhone determines how long you can screen record. Make sure you have enough storage space before the process if you want to take it a long time.
[Bonus] The Best Way to Screen Record on iPhone Smoothly
You have now mastered recording the iPhone screen using the default tool. Although the built-in tools are very convenient for many people, their limitations are quite numerous. This led them to seek a professional tool that could offer higher quality, more editing features, and greater customization. 4Easysoft Screen Recorder can perfectly meet your needs. It applies to any scenario and helps you capture smooth, high-quality screen recordings with minimal memory usage. It enables you to obtain perfect recordings through customized editing.
Record your iPhone screen and audio in the highest quality.
Change the quality, resolution, frame rate, and more freely.
Export your iPhone screen recording to MP4, MOV, AVI, etc.
Preview and edit your iPhone recordings before saving them.
100% Secure
100% Secure
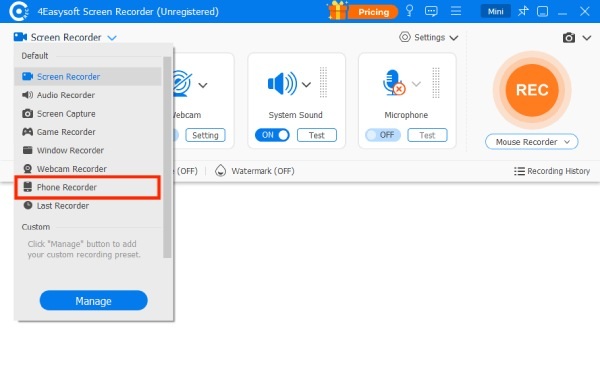
Step 1Launch 4Easysoft Screen Recorder on your Windows/Mac and click the "Phone Recorder" button under the "Screen Recorder" tab.
Step 2Connect your iPhone to the device using a USB cable. Then, click the "iOS Recorder" button and follow the detailed instructions.
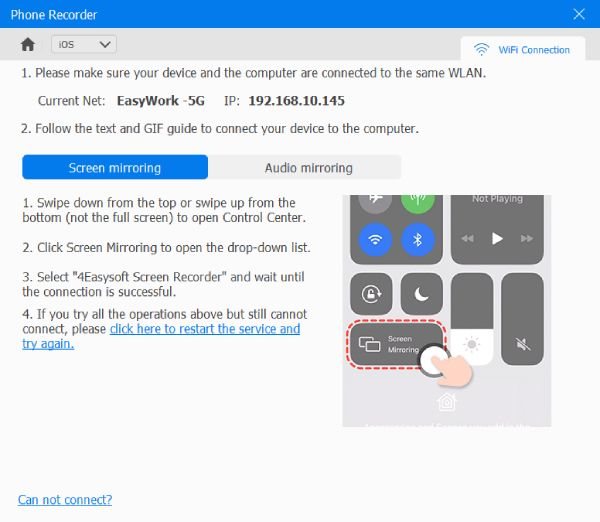
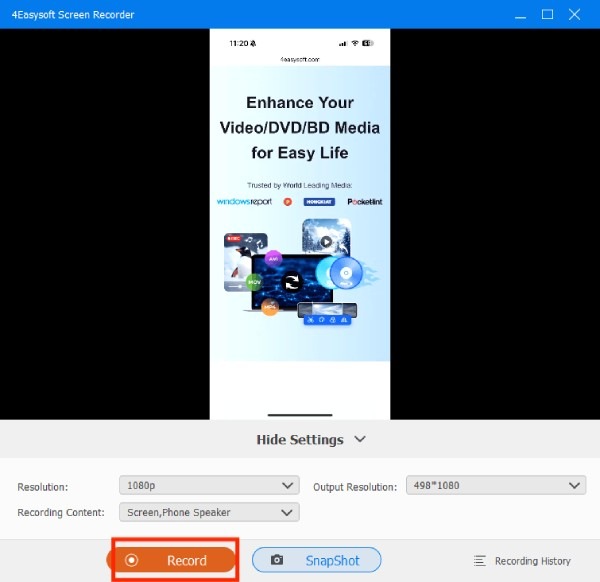
Step 3Now all activities on your iPhone will be displayed. Click the "Record" button to start a screen recording on iPhone at original quality.
Conclusion
This post introduces the complete process for iPhone screen recording. Now you can quickly record and save the content on the screen during any activity, tailored to your needs. However, due to the limited functionality of the built-in recording tool, you may need 4Easysoft Screen Recorder for more customization options and additional features to produce higher-quality, more attractive recordings.
100% Secure
100% Secure