Record video, audio, gameplay, and webcam to record precious moments easily.

How to Record Audio: 4 Ways to Record Audio from a Computer

Posted by Ethan Brooke to Record Audio May 15, 2025
Learning how to record audio from a computer is a great way to fulfill the need to acquire audio from a voice call, online meeting, and a particular video. If you are looking for a post that can guide you on recording audio from your PC, then you landed on the right page! Here, you get to explore four easy yet effective ways to record audio from various platforms on your computer. So, take your first step in learning how to record audio on the computer by jumping below.
Guide List
Part 1: How to Record High-Quality Audio from a Computer [Windows/Mac] Part 2: Step-by-Step Guide on How to Record Audio on PC Using Audacity Part 3: Steps to Record Audio from Computer Using Windows Voice Recorder Part 4: How to Record Desktop Audio Using Screen Capture| Audio Recorder Tools | Unique Features | Audio Quality Output | Best for |
| 4Easysoft Screen Recorder | It supports options to tweak audio recording settings (format, quality, and codec) and simultaneously capture audio from the microphone and system. | Highest and Lossless audio quality | Recording high-quality audio from the system and microphone. |
| Audacity | Multi-track recording, real-time noise reduction, and advanced audio editing. | High | Professional audio recording and editing. |
| Windows Voice Recorder | Straightforward audio recording with basic trimming and audio editing. | Standard | Quick audio recording on the computer. |
| Screen Capture | Records computer audio with screen video. | Varies | Record on-screen audio for tutorials and presentations. |
Part 1: How to Record High-Quality Audio from a Computer [Windows/Mac]
The first way how to record audio from a computer that this post would like to share is by using the professional 4Easysoft Screen Recorder. Aside from this tool’s capability of capturing high-quality screens, it can also record any audio from your computer with superior sound quality. This tool lets you record your favorite music, video audio from streaming platforms, your voice on a microphone for voiceover, and more. It is also equipped with advanced noise-cancellation technology and voice enhancement features. These features enable the tool to deliver high-quality audio recordings. Moreover, it also offers various audio export formats to support and ensure compatibility with different platforms, workflows, and your needs.

Allow you to tweak audio recording settings, such as audio format, codec, and quality.
Offer options to adjust system sound and microphone volume to fine-tune their loudness.
Enable you to schedule when to stop and start audio recording automatically.
Support trimming to cut off your audio recording's unwanted beginning and ending parts.
100% Secure
100% Secure
Step 1Install the 4Easysoft Screen Recorder on your computer. After that, access the audio you want to record and launch the installed recorder. Then, select the “Audio Recorder” option on the tool.

Step 2Next, turn “ON” the “System Sound” to record the audio from your computer. You can also switch “ON” the “Microphone” if you wish to record your voice as well simultaneously.
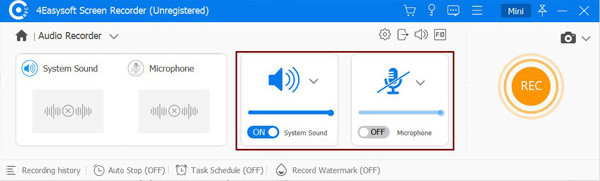
Step 3Then, click “REC” to start recording the audio you wish to record. You can adjust the “System Sound” and “Microphone” while recording based on your preferences.
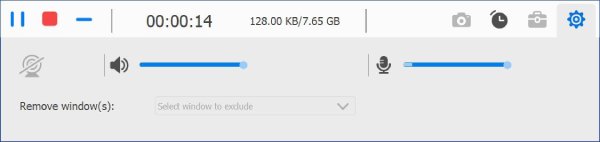
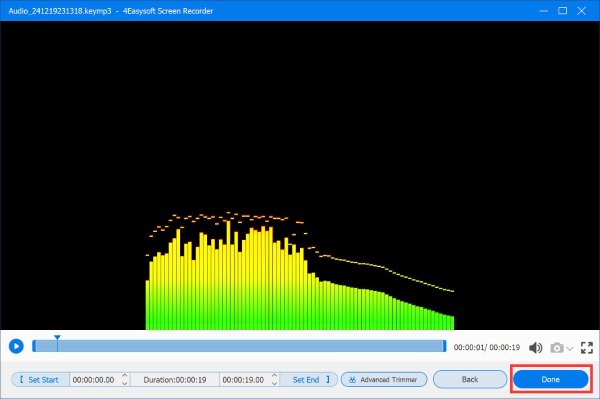
Step 4Once done recording, click the “Stop” button. Then, you can preview the recorded audio in the new window and trim the unwanted parts. After that, click “Save” to export the recordings! Those are the steps on how to record audio using this tool!
Part 2: Step-by-Step Guide on How to Record Audio on PC Using Audacity
Apart from the first audio recording tool, you can also utilize Audacity to record audio from your computer. Audacity is a free and open-source audio recording tool that supports various audio-related features. Some of these audio recording features include the ability to record multiple tracks simultaneously, apply audio-related effects, and options to redefine your recordings. The best part of using Audacity is that it offers you advanced features that are enough to support your audio editing needs. However, it has a challenging interface with a daunting number of settings. That makes Audacity not an excellent option for you if you are a beginner and have limited knowledge in terms of audio editing. But, if you still wish to try this one, then here are the steps on how to record audio on Mac and Windows using Audacity:
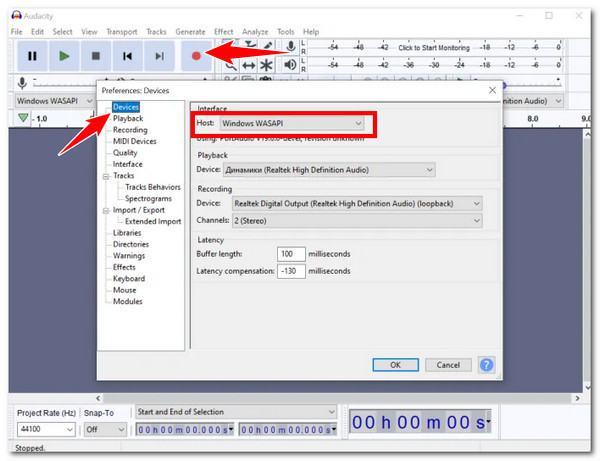
Step 1Download and install the Audacity tool from its official website on your computer. After that, if you are recording audio from Windows, you must choose the “Windows WASAPI” audio host. Then, select “Stereo Mix” in the loopback device menu to capture the internal audio.
Step 2Next, when you are done setting those up, access the audio you wish to record and click the “Record” icon to start recording.
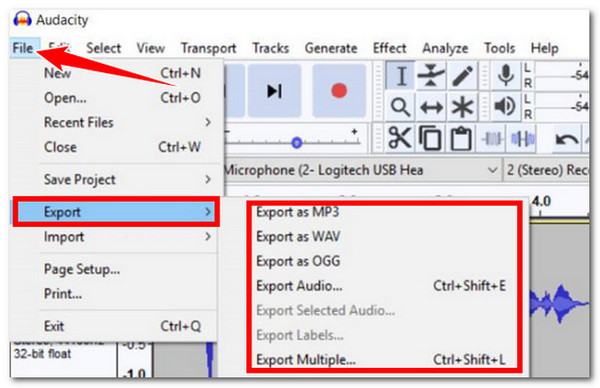
Step 3Once you are done recording, click “Stop”. Then, export the recording by clicking the “File” tab, selecting “Export”, and choosing an output format based on your preferences. That’s it! Those are the steps on how to record audio from a computer using this tool.
Part 3: Steps to Record Audio from Computer Using Windows Voice Recorder
If you find Audacity to be a too complicated tool to use to record audio from a computer, you can use Windows Voice Recorder as an alternative. This free tool offers a simple process to record audio from a computer and your voice from a microphone. You can simultaneously record the system sound or voice from a microphone, speakers, or all. Although it lacks advanced features, it is enough to record your computer’s audio. Now, how to record audio on PC using Windows Voice Recorder? Here is the guide for you.
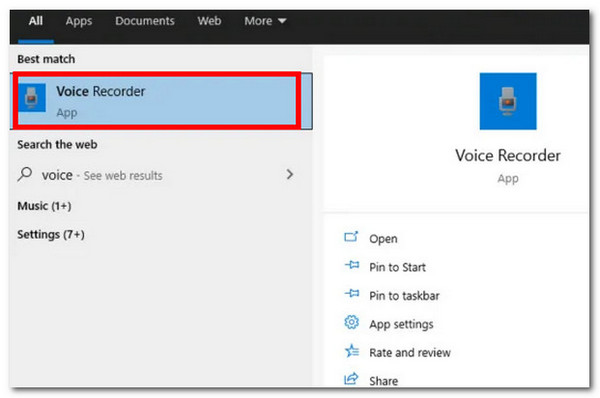
Step 1On your Windows computer, launch the “Start” menu and search for the “Windows Voice Recorder” application (Windows Sound Recorder if you are utilizing Windows 11).
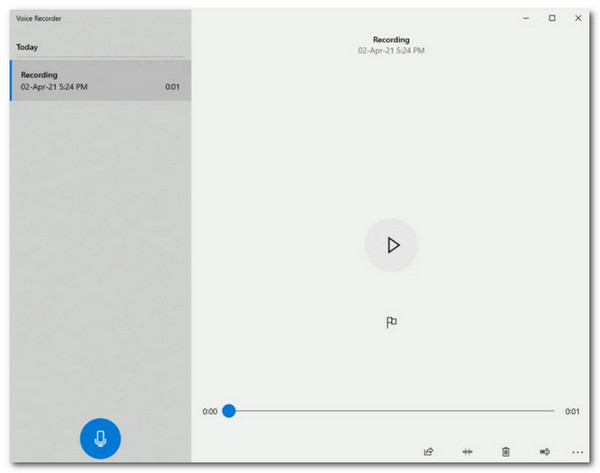
Step 2Then, click “Microphone” to initiate recording. Once done recording, click the “Stop recording” button. Then, your recordings will be automatically saved on your computer’s local storage. Now, those are the easy steps on how to record audio using this tool.
Part 4: How to Record Desktop Audio Using Screen Capture
Aside from those tools, this post also features an online tool solution that enables you to record your computer’s audio: Screen Capture. This free online tool offers you the easiest and fastest way to record audio from speakers, video, and internal audio. Additionally, it also supports the capability to record audio and screen simultaneously. Sadly, Screen Capture doesn’t support editing tools and choices for output formats, unlike earlier tools. Now, if you wish to try this one as well, here are the steps showing you how to record desktop audio using Screen Capture:
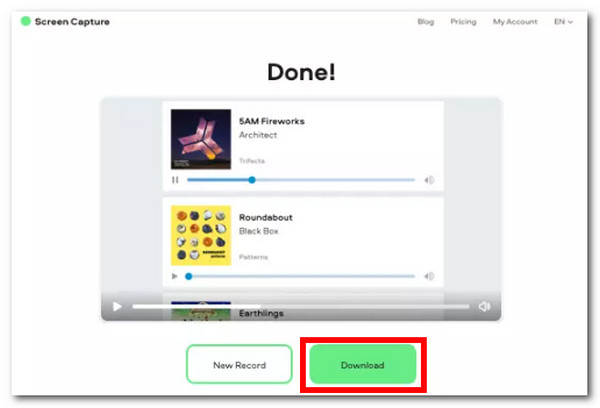
Step 1Access Screen Capture’s official website to record audio on your computer. After that, enable the “Sound” icon to record audio from your computer. You can activate the “Microphone” icon if you want to record your voice.
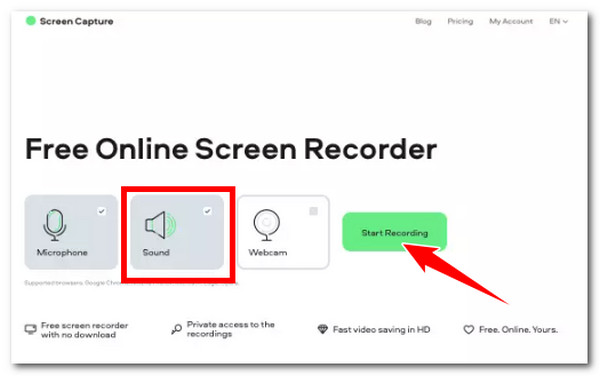
Step 2Once you are all set, click the “Start Recording” button to record the audio you wish to capture. Once you are done, download the recorded audio from the website to save it on your local storage.
Conclusion
There you have it! Those are the four best ways how to record audio from the computer. Through them, you can now quickly fulfill the need to record any audio from your computer, whether from a voice call, online meeting, a particular video, etc. If you want to record audio from a computer easily, quickly, and efficiently, then the 4Easysoft Screen Recorder tool is what you need! With this tool’s powerful audio recording-related features, you can record high-quality audio from your computer! Visit this tool’s official website and try using it today!
100% Secure
100% Secure