Reliable video converter, editor, and compressor for daily tasks.

How to Crop a Video on Mac? Explore the 5 Easy Ways to Try!

Posted by Aira Lesly Escoto to Edit Video/Audio Jun 20, 2025
You may be searching for a practical reference on how to crop a video on Mac on the internet for a specific reason. It might be due to crowds getting into your footage, unwanted parts like black bars, watermarks, or unnecessary frames. Well, whatever it might be, all of them can draw attention away from the video’s subject. Thankfully, you landed here! This post highlights a guide on how to crop a video on Mac effectively. Dive in below.
Guide List
Professional Way to Crop Videos on Mac with Stunning Effects How to Crop Videos on Mac with Built-in QuickTime Player Use Photos Software to Crop A Video on Mac [Only for the Latest Mac] How to Use iMovie to Crop A Video on Mac to 16:9 Detailed Steps to Crop A Video on Mac through VLCIf you are looking for a professional tool that offers simple steps on how to crop a video on Mac, the 4Easysoft Mac Video Converter tool is a solid choice. This tool is infused with a Video Cropper feature that enables you to efficiently and effectively crop unwanted areas of your video. It allows you to crop a video by entering crop area values or choosing an aspect ratio option, including 9:16, 16:9, 1:1, and more. It also supports an option that enables you to easily track the center of the video to make frames even and equal. Aside from that, it also supports extra features that you can use to enhance the appearance of your video. Some of these features include adding filters and adjusting the effects of your video!
Cover all aspect ratios supported by popular social media platforms.
Infused with a preview feature, you can see the changes you’ve made in real time.
Allow you to infuse subtitles into your video and modify their appearance.
Offer you an option to tweak your video’s audio by adjusting its loudness and delay.
100% Secure
100% Secure
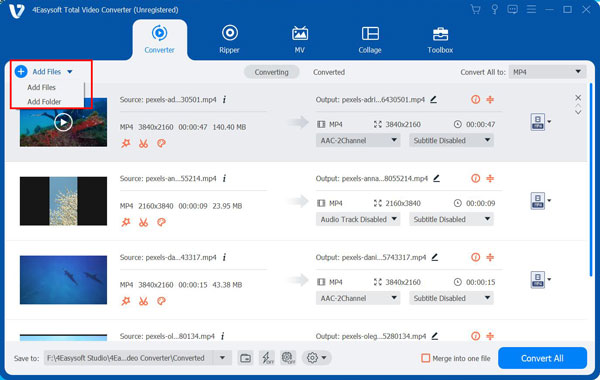
Step 1Download and install the 4Easysoft Mac Video Converter tool on your Mac desktop/laptop. After that, launch the tool and click “Add Files” to import or upload the video you wish to crop.
Step 2Next, click the "Edit" button with the "Starwand" icon to access editing options. Then, in the "Rotate & Crop" window, click "Aspect Ratio" and select your preferred aspect ratio to crop the video on Mac. Select “Freely” and enter specific crop area values to get other sizes.

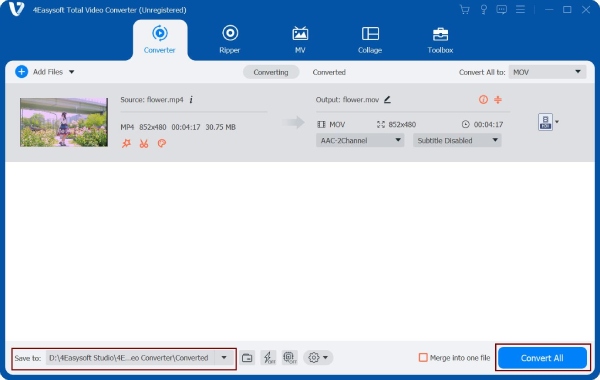
Step 3Once you’ve cropped the video, click the "OK" button to save your cropped setup. Then, click the "Convert All" button in the lower right corner to export your cropped video! Those are the steps on how to crop a video on Mac using this tool.
How to Crop Videos on Mac with Built-in QuickTime Player
Another tool to crop a video on Mac is its built-in media player, QuickTime. Although this tool is primarily designed to play various media files, it also supports other features that you can use. However, cropping video is not included in that set of features. But if you’re using its Pro version and Photoshop, you can make the video cropping process possible. So, how to crop a video on Mac QuickTime? Here are the steps to follow:
Step 1Take an image of the clip you wish to crop on the video using QuickTime Pro on your Mac. After that, export it as an image sequence in JPG format.
Step 2Next, head to Photoshop, click "Edit", select the "Copy" option, and paste the image into Photoshop. Then, utilize "Rectangular Marquee" to choose the area you wish to keep and fill it with black. After that, the remaining regions were invented and filled with white as a mask.
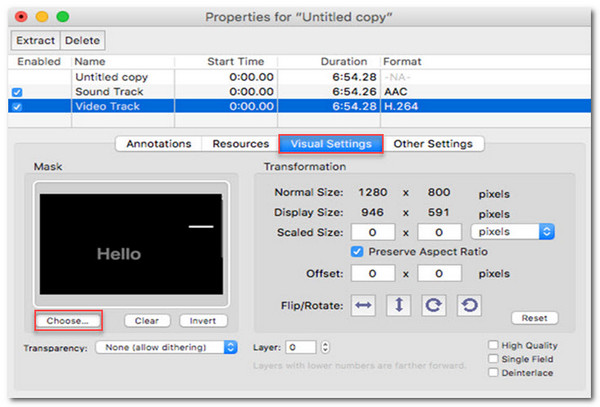
Step 3Then, open the mask and the video in QuickTime Pro. Go to the "Window", select "Show Movie Properties", click the "Visual Settings", and add the mask file.
Step 4After applying the mask, the extra areas will be hidden. Then, save it by clicking the "File" button, and select "Export". And that’s the steps on how to crop a video on Mac using QuickTime and Photoshop.
Use Photos Software to Crop A Video on Mac [Only for the Latest Mac]
If you find QuickTime and Photoshop quite complicated solutions for cropping video on a Mac, try Apple’s Photos app. This app is a photo management and editing application for Apple’s devices. After the macOS Big Sur/Monterey update, the Photos app’s capabilities expanded by infusing extra features, including the crop feature. Now, if you wish to know how to crop a MP4 video on Mac using the Photos app, here are the simple steps you need to follow:
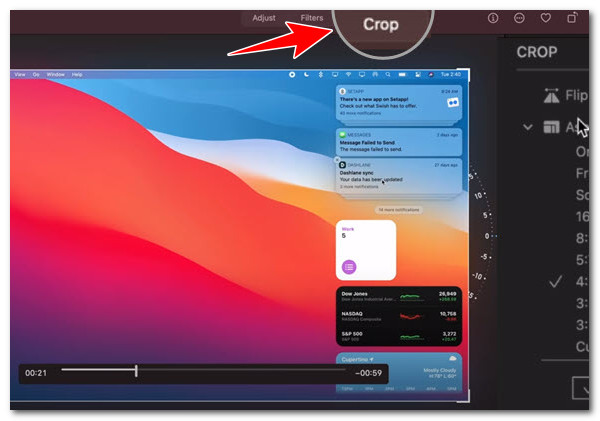
Step 1Ensure you use a Mac with the Big Sur or Monterey version. Then, open the video you wish to crop using the Photos app. After that, click the "Crop" icon at the top, and then on the app’s editing page, choose an aspect ratio to crop your video.
Step 2You can also crop the video in freeform; adjust the crop frame’s corners until you can eliminate the area you wish to remove. Once done, click "Done" in the upper right corner to save it. Those are the steps on how to crop a video on Mac using the Photos app.
How to Use iMovie to Crop A Video on Mac to 16:9
Apart from the Photos app, you can also use iMovie to remove unwanted areas or objects from your video. The same goes for the Photos app; iMovie also offers a quick and efficient way to crop your videos. The difference is that iMovie only lets you crop video in 16:9. If that’s okay for you, here are the steps on how to crop a video in iMovie on Mac:
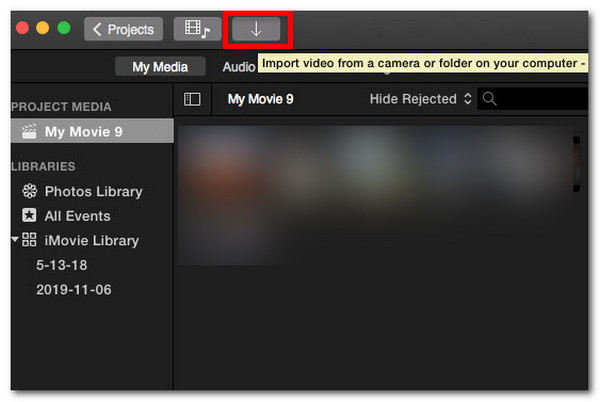
Step 1Open the iMovie program on your Mac and click the "Add" button in the "Project" section to create a new project. After that, access the video from a camera or a folder and click the “"Import" icon.
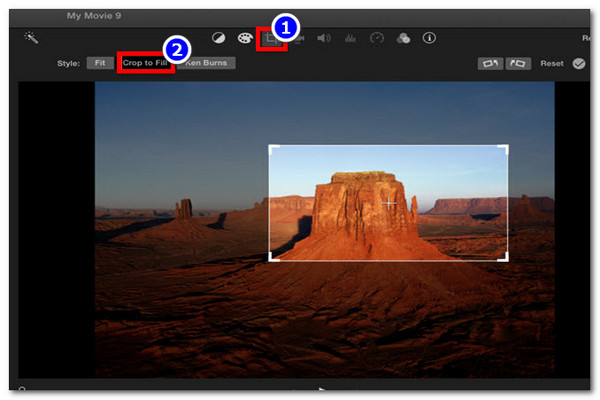
Step 2Next, right-click on the start and end points of the clip, and click "Cut" to trim the video you wish to crop. After that, click the "Crop" icon in the upper left corner and select “Crop to Fill”. Then, drag the crop frame and adjust its corners to crop the video on iMovie.
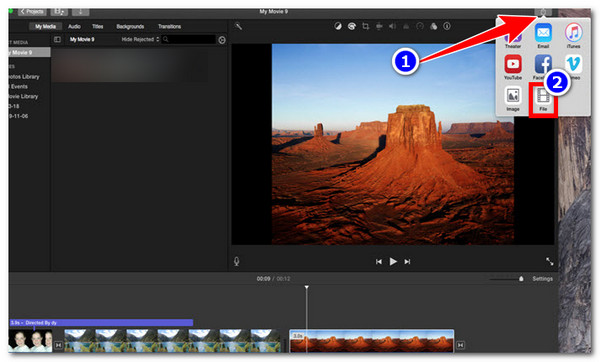
Step 3Once done, click the "Export" icon in the upper right corner and choose the "File" option to save it as a video file on your Mac. Those are the steps on how to crop a video on Mac using iMovie.
Detailed Steps to Crop A Video on Mac through VLC
The last option to crop a video on a Mac is VLC. The same goes with QuickTime; VLC is also primarily made to play various media files. The difference is that this one doesn’t require you to purchase a pro version of an app to crop a video. Also, it doesn’t need extra software to make the cropping process possible. However, VLC has a complicated video cropping process, unlike iMovie and the Photos app. If you don’t mind, here are the steps on how to crop a video on Mac for free using VLC.
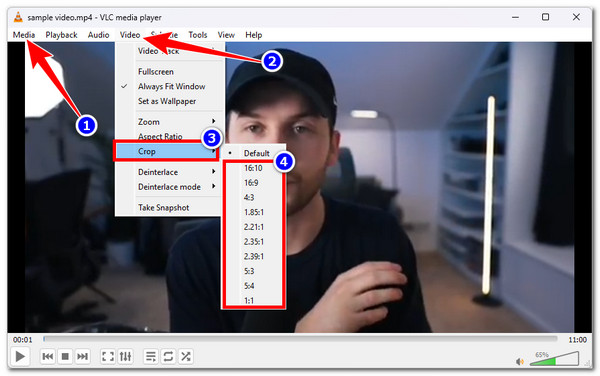
Step 1Launch VLC on your Mac, click "Media", and select the "Open File" option to import the video you want to crop. After that, click the “Video” tab, select the “Crop” option, and choose your preferred aspect ratio to crop the video.
Step 2Click the "Tool" tab and select the "Preferences" tab. Then, tick the "All" radio button at the lower left corner and scroll down to find the video. Next, click "Filters" on the list of options and select "Crop". Enter specific pixels for top, bottom, left, and right, and click "Save".
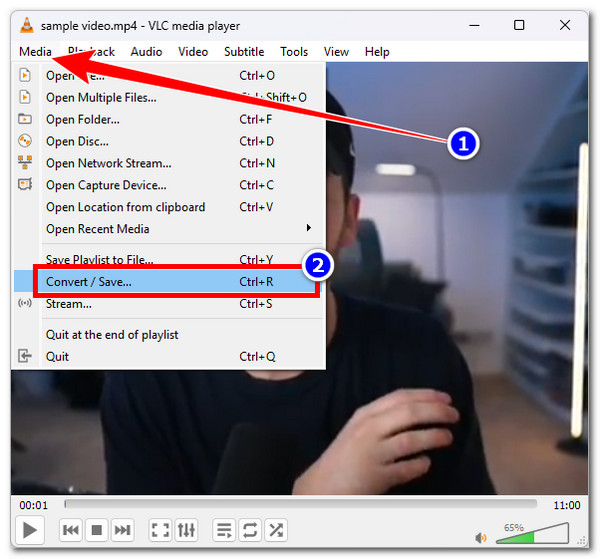
Step 3On VLC’s main interface, click the "Media" tab, select the "Convert/Save" option, and click the "Convert" button to set the video’s file destination. After that, click “Start” to save the cropped video. Those are the steps on how to crop a video on Mac through VLC.
Conclusion
To sum up everything, this post highlights various ways how to crop a video on Mac using different Mac-compatible tools. Those tools featured above, as you can see, are capable of helping you eliminate crowds getting into your footage, unwanted parts like black bars, watermarks, or unnecessary frames that make your video look distracting. If you are considering using a solution that offers an efficient way to crop a video, you need to install 4Easysoft Total Video Converter,which is your best option! Visit this tool’s official webpage and use it today.
100% Secure
100% Secure