Record, edit, and share video from all sources.

A Detailed Guide: How to Screen Record on Windows PC [2025]

Posted by Ethan Brooke to Record Video May 27, 2025
Screen recording on Windows 10/11 is vital for gameplay, creating tutorials, saving essential details, and more. Fortunately, you can find different solutions under Windows depending on your needs. Whether with a built-in tool or dedicated software, a comprehensive guide here will share with you the best six tools for how to screen record on Windows. So, read the following parts and discover today the perfect tool for your screenshotting needs.
Guide List
Comparison Table of Screen Record On Windows 10/11 Best Way to Screen Record on Windows 10/11 Built-in Tools to Screen Record on Windows 10/11 More Best Tools to Screen Record on Windows 10/11Comparison Table of Screen Record On Windows 10/11
| Tool | Editing Tools | Quality | Preview | Additional Feature |
| 4Easysoft Screen Recorder | Basic (Trim, Annotations) | Up to 4K | Yes | Scheduled Recording |
| Snipping Tool (Windows 11) | None | Standard (Screenshots only) | Yes (for screenshots) | Quick Screenshot Capture |
| Xbox Game Bar | None | Up to 1080p | No | Game Mode Optimization |
| OBS Studio | Advanced (Multi-layer editing) | Up to 4K | Yes | Live Streaming Support |
| Apowersoft Free Online Screen Recorder | Basic (Trim, Annotations) | Up to 1080p | Yes | Cloud Saving |
| ScreenCapture.com | None | Up to 1080p | Yes | Browser-Based Recording |
Best Way to Screen Record on Windows 10/11
As a competent yet user-friendly screen recorder, 4Easysoft Screen Recorder provides the best possibilities on how to screen record on Windows 10/11. This software offers excellent screen recording with customizable settings for gameplay with tutorials, video conferences, and other content. Features at 4Easysoft allow users to record videos of the Windows screen while enabling system sounds, built-in microphones, and webcams.

Capture the whole screen, a selected region, and a specific window.
Support system sound, microphone input, or both with no quality loss.
Set a timer to start or stop recording automatically without manual intervention.
Save recordings in formats like MP4, WMV, AVI, and more to suit different needs.
100% Secure
100% Secure
- Pros
- Have a tremendous intuitive interface and usability.
- There is no lag or stutter during the playback.
- No time limits for recording and watermarks.
- Offer a shortcut to record screen on Windows 11 for faster access.
- Cons
- Only provide basic editing features, including simple trimming.
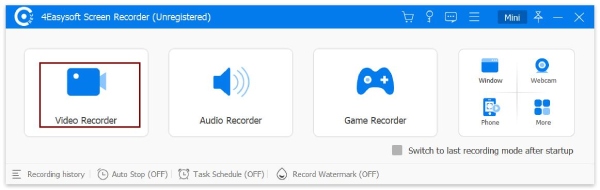
Step 1Launch the 4Easysoft Screen Recorder. Choose “Video Recorder”, then select full-screen to capture the entire screen or custom region to select specific areas.
Step 2Enable system sound, microphone, or both to record the audio. Adjust the audio volume for both sources as needed. Also, you can change the quality, frame rate, and more settings before recording.

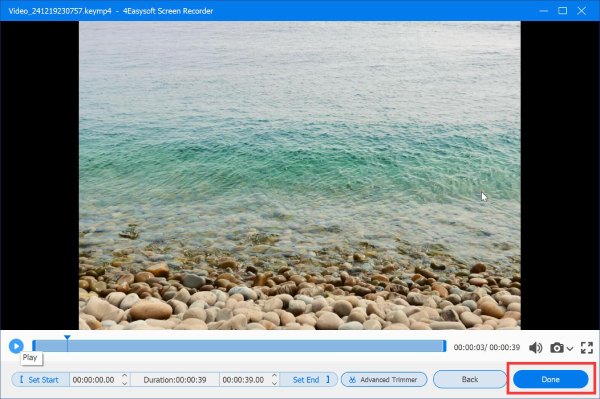
Step 3Click the “REC” button to begin recording on Windows PC. Use the real-time annotation tools during the session via the toolbar. Once done, click the “Stop” button, preview the recording, and save it in the preferred format.
Built-in Tools to Screen Record on Windows 10/11
1. Snipping Tool (Windows 11)
The Snipping Tool is another essential tool for learning how to screen record on Windows 11; thus, it is not limited to simple screenshots. This tool remains a hidden alternative for anyone wanting to capture short videos without a cumbersome installation of further software. However, it is not meant for great editing or recording sound, thus definitely doing just fine for a quick screen recording.
Key Features of Snipping Tool:
• Simple and clean interface for easy navigation.
• Allow screen recording of a specific window or selected region.
• Integrated directly into Windows 11 with no extra installation required.
• Quick sharing options for saved recordings.
- Pros
- No option to screen record on Windows with audio; it captures video only.
- Lack editing features like annotations or trimming.
- Limited file format options for saving recordings.
- Cons
- Choose the part of the screen you want to capture. Click the “Record” button and save your video to your desired location once finished.
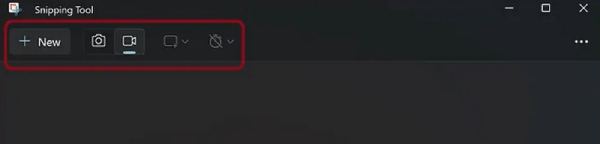
How to Record Screen on Windows 11 Using Snipping Tool:
• Choose the part of the screen you want to capture. Click the “Record” button and save your video to your desired location once finished.
2. Xbox Game Bar
The Xbox Game Bar is another powerful built-in tool on how to record screen video on Windows without any additional apps. Developed primarily with gamers in mind, the Xbox Game Bar is also adept at recording apps, browsers, and presentations. Besides being more versatile than the Snipping Tool, this default game recorder also allows audio recording.
Key Features of Xbox Game Bar:
• Allow both video and audio recording (system sounds and microphone).
• Provide quick access to performance stats, audio settings, and widgets.
• Built-in shortcuts for quick start and stop of recordings.
- Pros
- Pre-installed on Windows 10 and 11; no extra setup needed.
- Great for capturing both gameplay and app-based activities.
- Offer a shortcut to record screen on Windows 11.
- Cons
- Cannot record the entire desktop or File Explorer—only apps and games.
- Limited editing options after recording.
- Not ideal for complex recordings or professional tutorials.
How to Screen Record on Windows with Xbox Game Bar:
Step 1Press “Windows + G” to open the overlay. Click the “Capture” button or use “Windows + Alt + R” to start recording immediately.
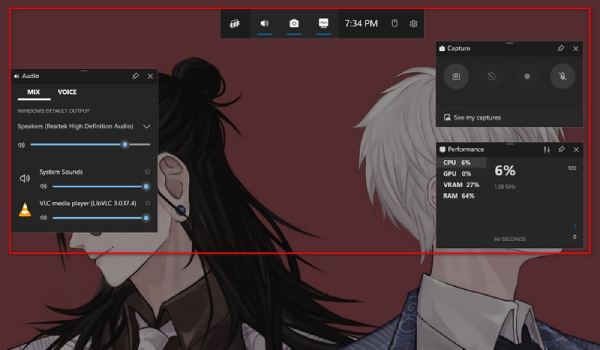
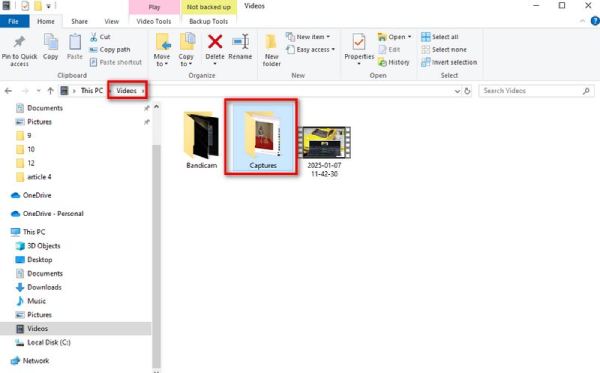
Step 2Turn on the system audio and microphone if needed. Click the “Record” button or use the shortcut again to stop. Your recording will be stored in the “Captures” folder, which you will find on Videos.
More Best Tools to Screen Record on Windows 10/11
1. OBS Studio
OBS Studio (Open Broadcaster Software) is a free, open-source tool for setting up streaming from such sources and utilizing it for recording Windows screen purposes. As one of the best screen recorder for Windows 11, this high-paced tool works well with customizable settings and output resolutions. It’s more complex to learn but is for everyone in need of an advanced recording tool for multi-source capture, live-streaming, and very detailed scene transitions. OBS is the go-to tool for users wondering how to record screen video on Windows with professional quality and customization.
Key Features of OBS Studio:
• Produce multi-source recordings, such as screen, webcam, and audio inputs.
• Professional-grade audio mixer with noise suppression and gain adjustment.
• Real-time video and audio editing functions, including transition inserts and overlays.
- Pros
- Do not bind you with any watermark or time limitation.
- Customizable configurations for professional recording quality.
- With plugins, you can extend its functionality and features.
- Cons
- Being so complex makes it difficult for beginners.
- Quite resource-hungry for recording screen on Windows.
- Require a manual approach for best configuration.
How to Screen Record on Windows with OBS Studio:
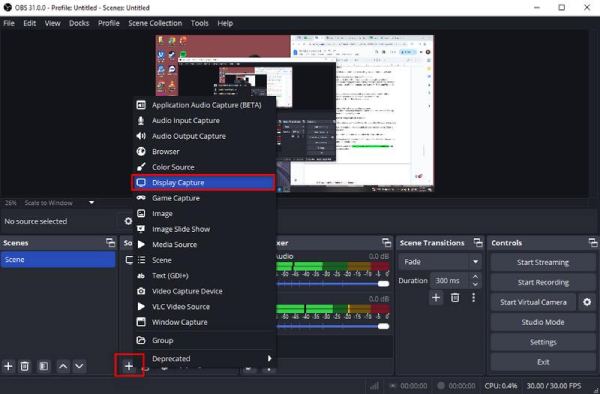
Step 1Open OBS software to create a new scene and add your desired sources (Display Capture, Window Capture, etc).
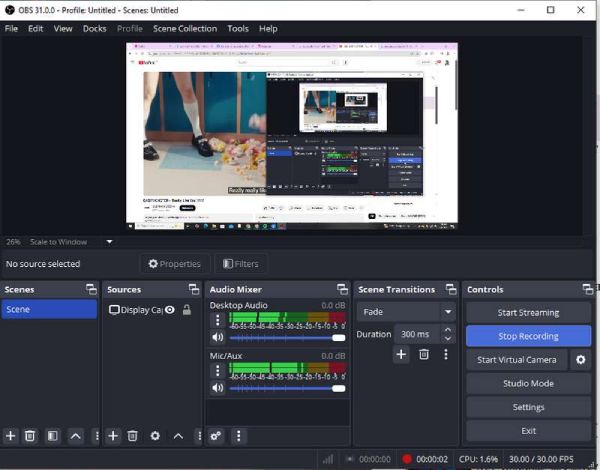
Step 2Select the correct audio input to screen record on Windows with audio. Click “Start Recording” from the main dashboard. Once done, click “Stop Recording”, and your file will be saved in the default folder.
2. Apowersoft Free Online Screen Recorder
Apowersoft Screen Recorder is an online screen recording tool that does not require installation. It comes in handy when a user needs a quick and almost effortless way to record the screen without the hassle of downloading software. Being an online tool is not the end since it offers excellent features like flexible recording modes and audio options.
Key Features of Apowersoft Free Online Screen Recorder:
• Record the entire screen, specific windows, or selected regions.
• Support system audio, microphone input, and webcam overlay.
• Offer options to save in multiple formats, including MP4, WMV, and AVI.
- Pros
- No software installation is required.
- Support screen recording on Windows with audio from the system and microphone.
- Free to use with no watermarks on recordings.
- Cons
- Demand a steady internet connection for optimal performance.
- Limited editing features compared to desktop software.
How to Record Screen Video on Windows Using Apowersoft:
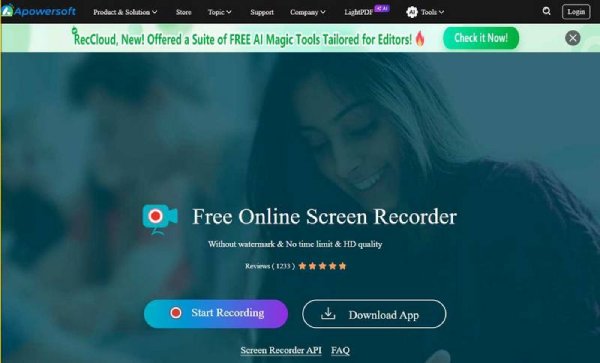
Step 1Navigate to the official Apowersoft Free Online Screen Recorder page. Click on “Start Recording”; if it is your first time, you will need to install a small launcher.
Step 2Choose whether to record the whole screen or a specific window and enable audio if needed.
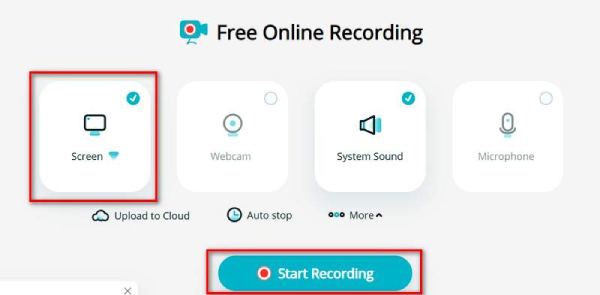
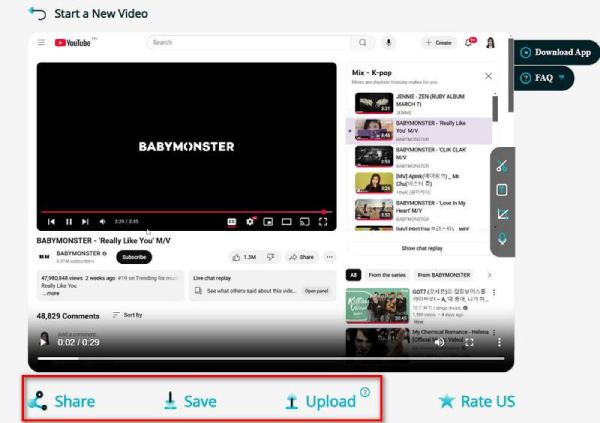
Click the “Record” button to begin, and once finished, save your recording in the desired format.
3. ScreenCapture.com
ScreenCapture.com is another top-tier online screen recorder offering quick and easy screen recording for Windows without software downloads. It is designed for simplicity and is ideal for users who need to capture screens on the fly with minimal setup.
Key Features of ScreenCapture.com:
• Support screen, webcam, and audio recording.
• Capture videos in HD quality with no time restrictions.
• Ensure privacy with secure data handling and no data storage on servers.
- Pros
- Extremely user-friendly with no complicated settings.
- Shortcut to record screen on Windows 11 via browser-based recording.
- Free to use with optional upgrades for advanced features.
- Cons
- Free version adds a watermark to recordings.
- No built-in editing tools for post-production.
How to Record Screen on Windows 10 Using ScreenCapture.com:
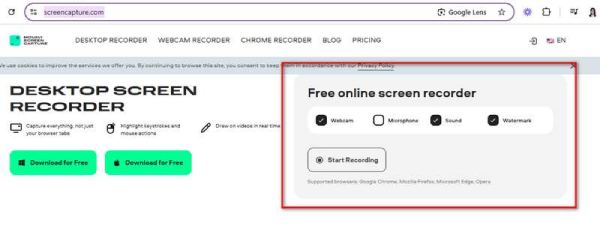
Step 1Launch your browser and go to the tool's official website. Grant the necessary permissions for screen and audio recording.
Step 2Select whether to record your screen, webcam, or both, and enable audio if needed. Click “Start Recording”, and once you are finished, download your video directly from the site.
Conclusion
To sum up, many solutions can help you capture the screen on Windows 10/11, starting from its built-in facilities like Snipping Tool and Xbox Game Bar to advanced tools such as OBS Studio and online recorders. Yet, if you are looking for something that covers everything and is simple to use, look no further than 4Easysoft Screen Recorder- it's the best. From high-definition recordings to customizable functions and an intuitive interface, it is truly a jewel for novices and experts alike. 4Easysoft Screen Recorder has got you covered if your concern is how to record screen on Windows 10 or grab videos with sound; performance and ease of use are unmatched.
100% Secure
100% Secure