Record, edit, and share video from all sources.

How to Find Zoom Recordings: 2 Default Ways Do Find it [Windows/Mac]

Posted by Paula Pailaga to Record Video Feb 10, 2023
Zoom provides users with an easy way to do video calls or virtual conferences. However, people begin to consult Zoom and the internet with the question, "Where do zoom recordings go?". This is more likely to ask when people need to playback their previous Zoom sessions. If you can't find it, let this post help you with it. This article features two default ways to find where your Zoom recordings go and an alternative tool to record your Zoom meeting with an easy-to-find directory!
Guide List
Part 1. Where Do Zoom Recordings Go on Windows/Mac Part 2: How to Capture Zoom without Finding the Zoom Recordings Part 3. FAQs about Where Do Zoom Recordings GoPart 1. Where Do Zoom Recordings Go on Windows/Mac
Even though recording every meeting session on Zoom is easy, looking where these recordings are saved is quite complicated. That is why people rock the internet with the question, "Where do Zoom recordings go?".
By default, Zoom saves your recordings on your local storage, specifically under the Documents folder (Windows) or Finder (Mac). Access the following directories depending on your computer device, and you’ll see all the Zoom sessions you recorded before:
- For those who utilize Windows computer: C:/Users/[Username]/Documents/Zoom
- Otherwise, for those who use Mac computer: /Users/[Username]/Documents/Zoom
But it is different for those who have paid Zoom accounts. Your recorded meeting sessions are stored and can access in the Zoom Cloud. Here’s how to find Zoom recordings on Zoom Cloud:
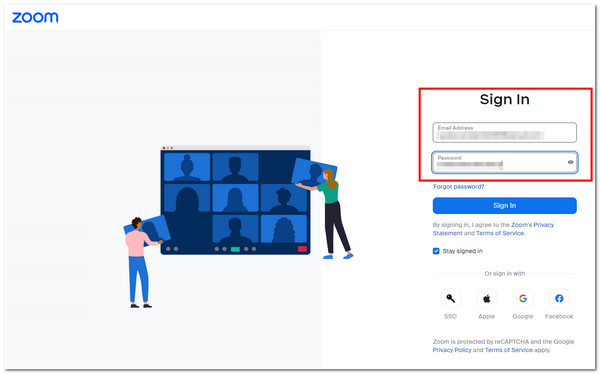
Step 1On your Windows or Mac browser, access your account on Zoom Web Portal by signing in to your account.
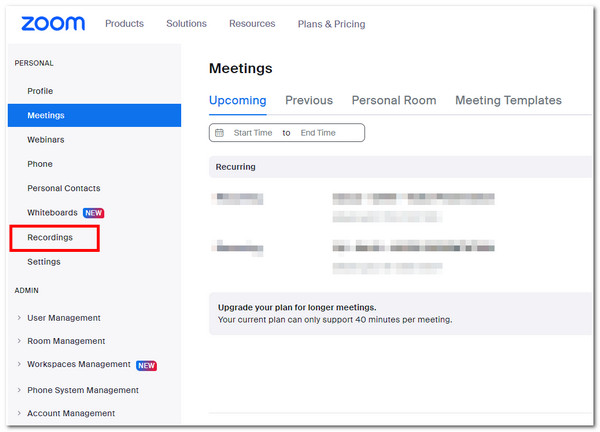
Step 2Next, tick the Recordings option in the Navigation Menu; the Zoom portal will show you the list of all the cloud recordings you’ve done before.
Part 2: How to Capture Zoom without Finding the Zoom Recordings
After knowing the default ways on how to find zoom recordings on your local storage or in the Cloud, you might also try using the 4Easysoft Screen Recorder tool when you are tired of finding recordings. This tool allows you to capture your Zoom meeting sessions and save your recordings according to your preferred folder directories. This tool promotes hassle-free recordings and allows you to choose where to save them.
Aside from that, this tool is equipped with an easy to understand features you can use to capture all your Zoom meeting sessions. That includes the ability to record the whole window of your Zoom or select a specific region. This tool also lets you record your voice on your microphone while recording and enhance it with a noise-cancellation feature. Furthermore, you can also document your Zoom sessions by capturing images through its built-in snapshot feature. This tool has what it takes to get free from consulting the internet on "how to find zoom recordings."

Infused with the ability to record your screen and webcam simultaneously for Zoom meeting sessions.
Equipped with output tweaking options to ensure having the best quality Zoom recordings.
This tool can export your recordings into various video formats such as MP4, WebM, MOV, etc., offered.
Support the Scheduled Recording feature, which allows you to put a date or time to start and stop your screen recordings depending on your Zoom meeting schedule.
100% Secure
100% Secure
How to Record Meetings on Zoom through the use of the 4Easysoft Screen Recorder Tool:
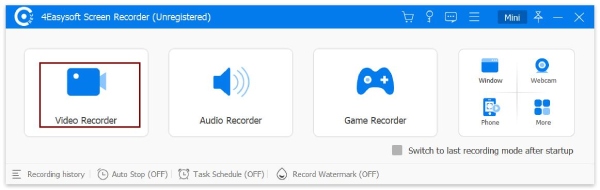
Step 1Visit the 4Easysoft Screen Recorder website to download and install the tool on your Windows or Mac computer. After that, on the tool’s interface, click the Video Recorder option.
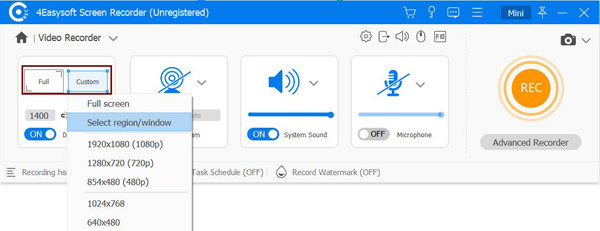
Step 2Then, tick the Full option to capture your computer’s screen. Otherwise, click the Custom button and use the borderlines to capture the area you wish to record. You can also select between the offered screen resolution options.
Step 3Next, click the System Sound option to capture your Zoom meetings’ video and audio. Otherwise, you can also select the Microphone option to capture your voice and the meeting simultaneously. Use the tool’s built-in Volume Slider to adjust the volume of both options.

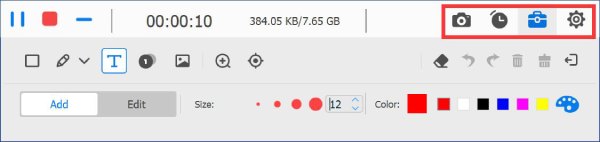
Step 4After those setups, tick the REC button in the right corner to start recording your Zoom meeting. Then, the tool will show you the toolbox containing buttons for Stop, Pause, Add Shapes, Lines, and Callouts, and take screenshots of your Zoom meetings while recording.
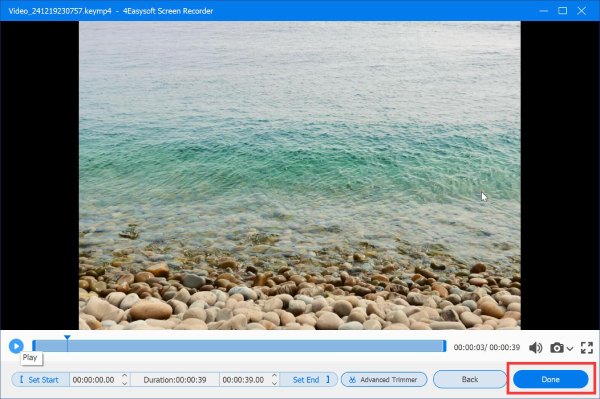
Step 5Once your Zoom meeting sessions have ended, click the Stop icon to finish the recording. After that, the tool will bring you to its built-in preview section. You can trim your Zoom recording’s unwanted beginning and end parts here. Then, tick the Save button, and a file folder window will pop up on your screen. Choose the file folder designation where you wish to save your Zoom recordings. In this way, you don’t need to find where do Zoom meetings go.
Part 3. FAQs about Where Do Zoom Recordings Go
-
Can I change the local file directory of my Zoom recordings?
Yes, you can! You can change it to easily find where do Zoom meetings go on your computer. After your Zoom meeting session, click the Stop Video button and tick the Video Settings from the pop-up. Then, under the Recording tab, click the Change button. You can change the default Zoom folder directory and select a new one.
-
How long can I record my zoom meeting as a free user?
Zoom will only allow you to record your Zoom meeting sessions for 40 minutes. It would be best to use the Pro version to go beyond that time limit.
-
Does Zoom produces high-quality recordings?
Yes, it does. Zoom is capable of providing you with high-quality recordings. However, it depends on how stable your connection is. Zoom platform will automatically adjust the quality during the recording based on your internet connection. So basically, if you are currently experiencing a poor connection, you won’t be able to receive a high-quality recording.
Conclusion
Voila! Those are the default ways how to find zoom recordings on your Windows and Mac computers. You need to access your Documents folder (Windows) or Finder (Mac) directories and look for a folder named Zoom or Zoom Recordings. On the other hand, for those who utilize Zoom Cloud storage, the option named ‘Recordings’ is provided for you. Here you can check and access all of your recordings easily. We also recommend you try the 4Easysoft Screen Recorder tool, which is not only developed to record your Zoom meetings. But it also provides you with folder selection functionality which provides a free way of choosing a folder directory. Feel free to download the tool and experience its capabilities now!
100% Secure
100% Secure