For Windows
 For Mac
 Free Online Solutions
Content
Basics
Introduction
4Easysoft Screen Recorder is a powerful screen recorder for Windows. You can choose the desired mode to record video, audio, gameplay, phone screen, and webcam in full screen or a selected area. With customized settings, you can capture any activity with original quality and save it in MP4, WMV, AVI, MOV, and GIF formats according to your needs. In addition, it has three screenshot modes to capture any position of the screen freely. And a real-time drawing function that can help you add annotations using tools such as shapes, lines, text, and annotations. You can learn more about using 4Easysoft Screen Recorder in the following.
Register
The trial version of 4Easysoft Screen Recorder has limitations, including a 3-minute recording, no video clipper to trim extra parts, and no noise cancellation and voice enhancement.
To register 4Easysoft Screen Recorder and get the full version with all functions, you can click the Register this product button with a lock shape on the main interface. Moreover, you can also click the Menu button and choose the Register button to find the registration entrance.

Then enter your email address and paste the registration code you received from us. After that, click the Activate button to register this software.
Email Address: Should be the email you used to purchase this software.
Registration Code: Copy the registration code from the order confirmation letter.

Update
New updates will provide new features or fix bugs to improve users’ experience. You can always check whether it’s the latest version through the following methods.
Method 1:Check Update Manually
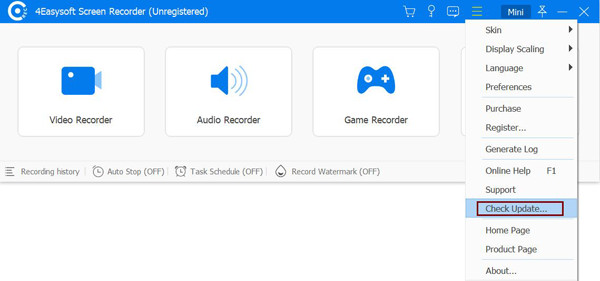
Click the Menu button on the main interface and choose the Check Update option. After a few seconds of detection, you can download and install the new version if there is an update.
Method 2: Turn on the Auto Update
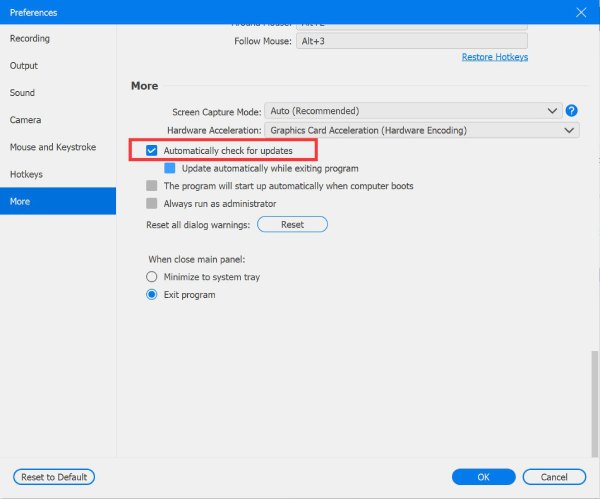
Click the Menu button and choose the Preference option. Then click the More button and tick the Automatically check for updates option. In this way, you will receive the update notification without a manual check.
Preference
By clicking the Menu button and choosing the Preferences option, you can adjust the recording settings, quality, format, sound, hotkeys, and more according to your needs.
General
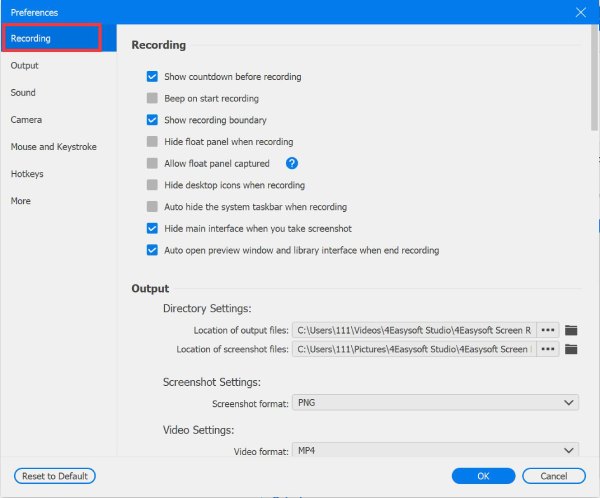
In the General tab, you can change the settings before and while recording, including showing a countdown before recording, showing the recording boundary, hiding the float bar when recording, etc. You can easily choose the desired settings for your convenience.
Recording Panel
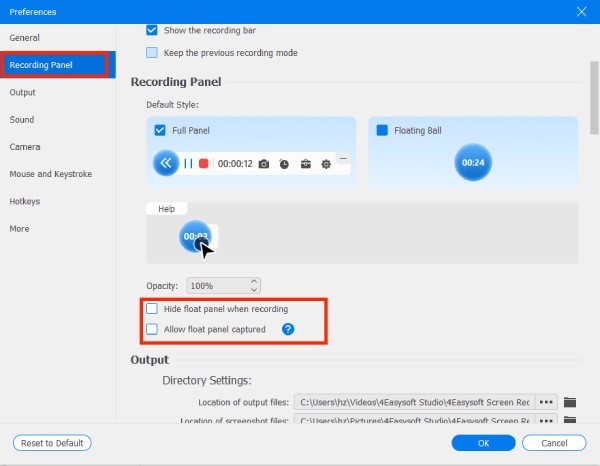
In the Recording Panel tab, you can choose the style and opacity of the recording panel. You can also set whether to hide the recording panel during recording and whether to allow it to be captured.
Output
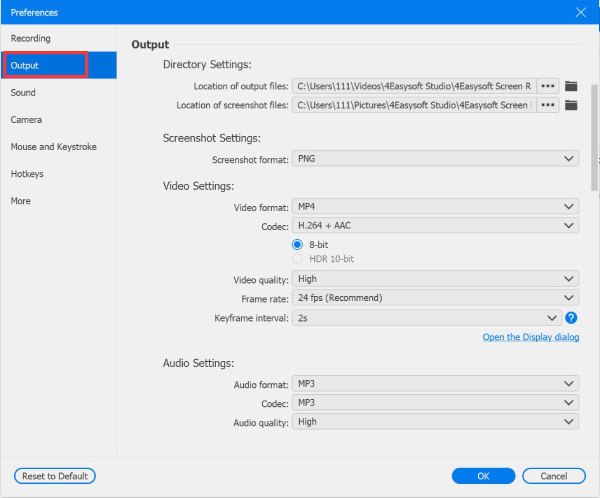
Go to the Output tab, and you can set the location of recordings/screenshots and change the output format and quality of videos, audio files, and screenshots. Here are the settings provided:
Screenshot Format: JPG, PNG, GIF, BMP, TIFF.
Video Format: WMV, MP4, MOV, MKV, F4V, TS, WebM, GIF.
Frame Rate: 120 fps, 60fps, 50 fps, 30 fps, 25fps, 24fps, 20fps, 10fps, 5fps.
Quality: Customize by bitrate, Very High, High, Normal, Low.
Audio Format: WMA, MP3, M4A, AAC, OPUS, FLAC, WAV.
Sound
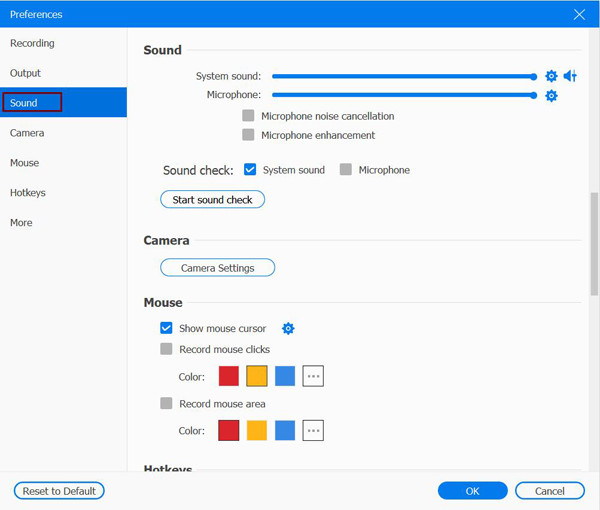
Choose the Sound option to keep the high quality of audio recordings. Here you can adjust the volume for the microphone and system sound separately. To avoid the audio delay, you can set the time as you like. You can also turn on the Noise Cancellation and Microphone Enhancement to access the best audio quality. Moreover, it provides a Recording test to preview your sound effect for 20 seconds.
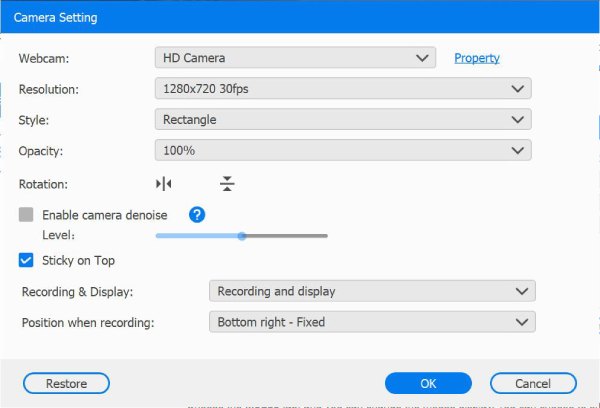
Camera
If you want to record the webcam of yourself, especially when you’re playing gameplay or making tutorial videos, please go to the Camera tab to change the settings. Here you can adjust the resolution, style, and opacity, and move the webcam position, etc. You can also set the desired position of the webcam when recording. Enabling the camera denoise can promise high-quality outputs.
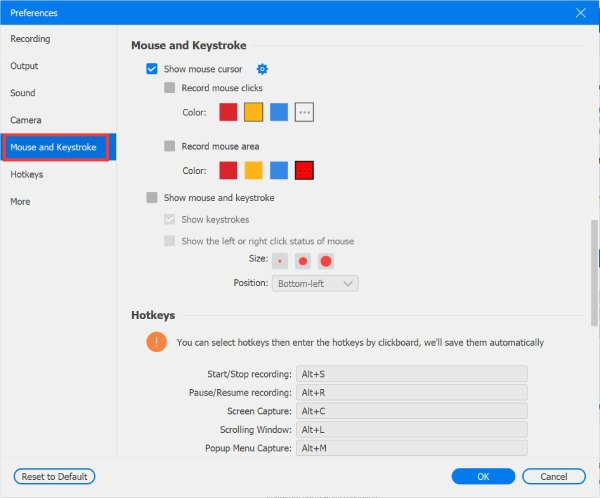
Mouse and Keystroke
Choose the Mouse tab, and you can change the mouse display. You can choose to show or hide the mouse cursor or mouse/keystroke, which will help you highlight the important parts while recording. Here are different colors and mouse sizes provided for you.
Hotkeys
Navigate to the Hotkeys tab, and you can customize the hotkeys to start/stop/pause recording, take screenshots, open/close the webcam, and show/hide the float panel quickly. If you see other programs occupying a hotkey, you can directly click on the hotkey and enter the desired one through the keyboard to replace it. Moreover, you can use the hotkeys to switch the recording mode when capturing.
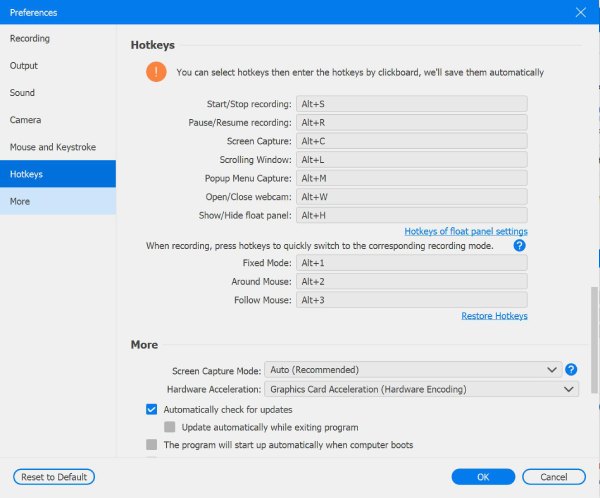
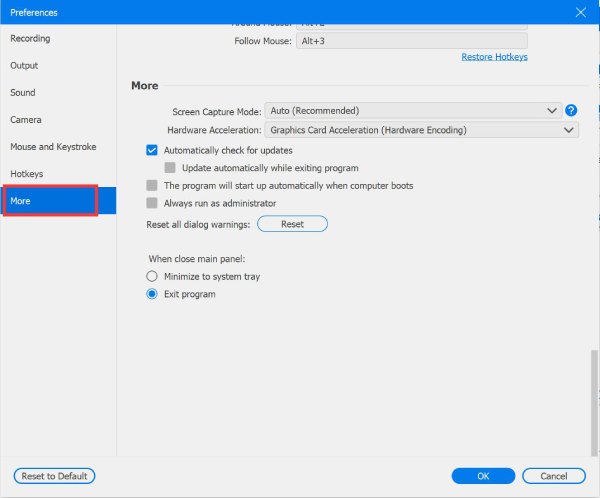
More
At last, in the More tab, you can enable the hardware acceleration, auto-start when your computer boots, change the screen capture mode to keep smooth and high-quality recording, etc.
Main Features
Video Recorder
4Easysoft Screen Recorder enables you to record any video and activity on your computer. Learn more about how to record screen videos in the following.
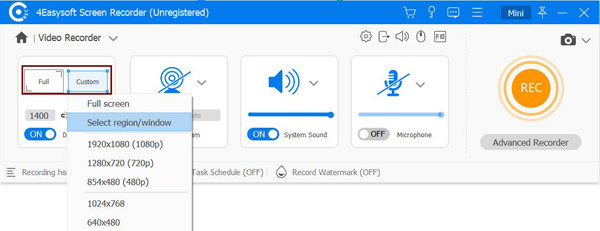
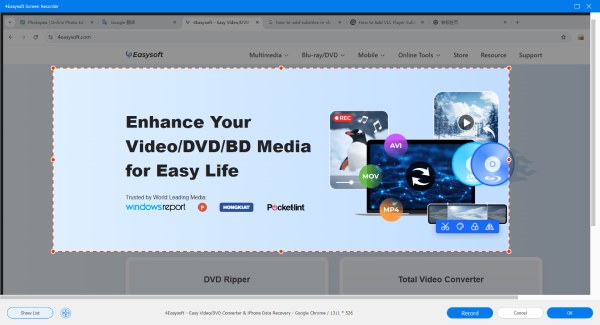
Step 1 Launch and Select the Recording Area
Launch the Screen Recorder, click the Full button to capture the whole screen of your computer or the Custom button to select the desired resolution, including 1080p, 720p, 480p, etc. You can also adjust the borderlines freely.
Step 2 Turn on the Sound
If you want to record conference meetings, online lectures, or any video with audio, you can turn on the System Sound option. You can also open the Microphone capture to record your sound simultaneously. Don’t forget to change the volume by pulling the slider.

Step 3 Start Recording with Editing
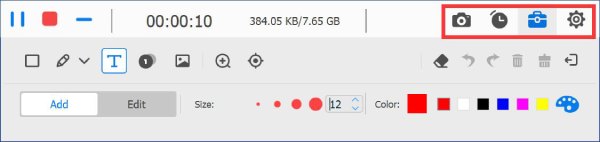
After all settings are done, click the REC button on the right side to start recording your screen. Then a toolbox will pop up, and you can use it to add shapes, lines, callouts, and take screenshots while recording.
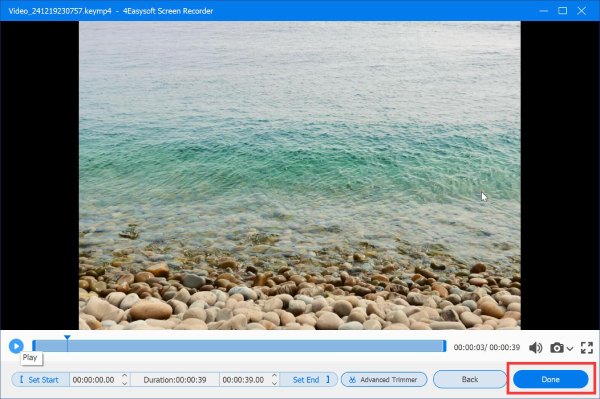
Step 4 Clip and Save the Recordings
Click the Stop button to finish the recording. In the preview window, you can directly trim the video and adjust the speed. There are more sophisticated editing tools in the lower right corner, such as compression and reverse playback. Then click the Save button to export the recording.
Audio Recorder
If you’d like to record online Skype calls, voiceover for presentations, or your favorite music, this designed audio recorder is your best choice. You can record from the system sound and your microphone with high quality.
Step 1Launch Audio Recorder
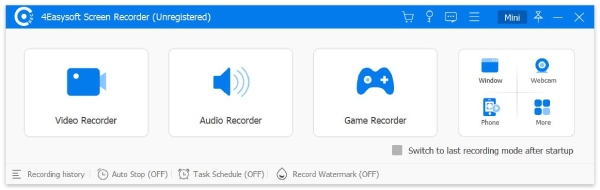
Launch 4Easysoft Screen Recorder, click the Audio Recorder button in the top left corner, and choose Audio Recorder.

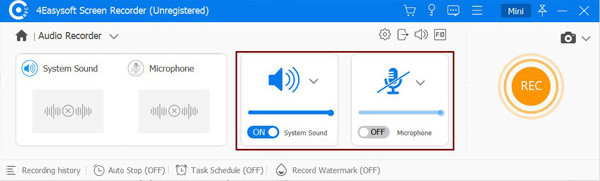
Step 2Choose Sound Sources
The system sound means the internal sound from your computer. And the microphone will record your voice. You can turn on the System Sound and Microphone simultaneously or separately according to your needs. Then pull the sliders to adjust the volume for different sounds.
Step 3Start Recording Audio
Click the REC button to record Skype calls, voiceover, and online music. You can also change the system sound and microphone volume while recording.
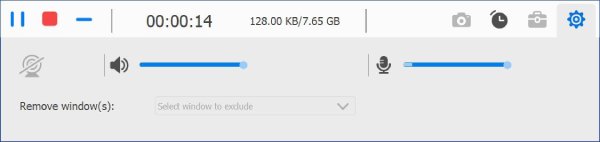
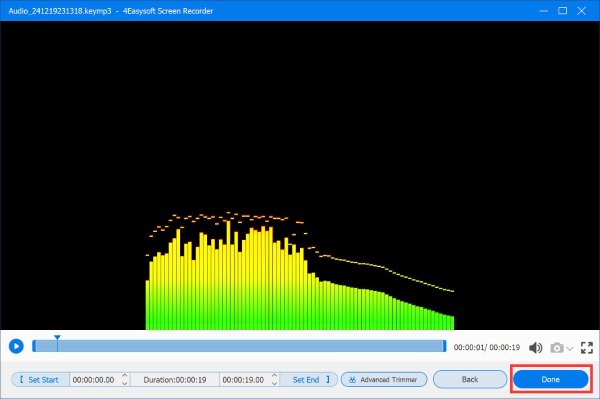
Step 4Save Audio Recordings
Click the Stop button in the toolbox to stop recording audio. In the preview window, you can preview and edit the audio file. After that, click the Save button to export it to the local folder.
Screen Capture
You can also use 4Easysoft Screen Recorder to take snapshots on your computer. And the hotkeys help you take a screenshot easily without opening the main interface.
Step 1Launch Snapshot
Click the Video Recorder button in the main interface and click the Screen Capture button in the top-right corner.
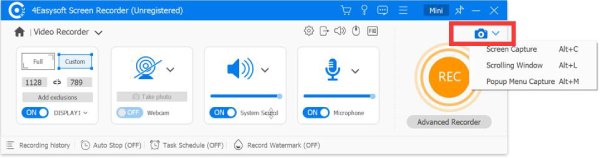
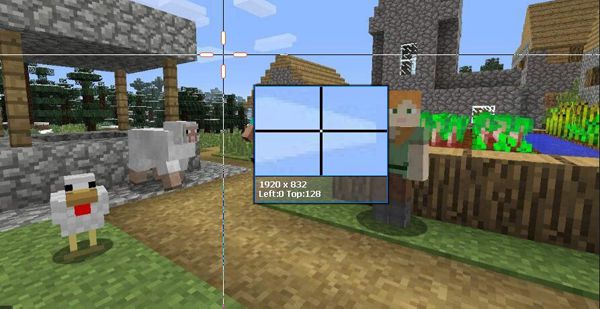
Step 2Choose the Desired Region
You can choose the normal capture or the scrolling screen. Then, your mouse will become a cursor. You can left-click your mouse and drag it to fix the capture area. After that, you can still pull the borderlines to change the size.
Step 3Edit and Save the Screenshots
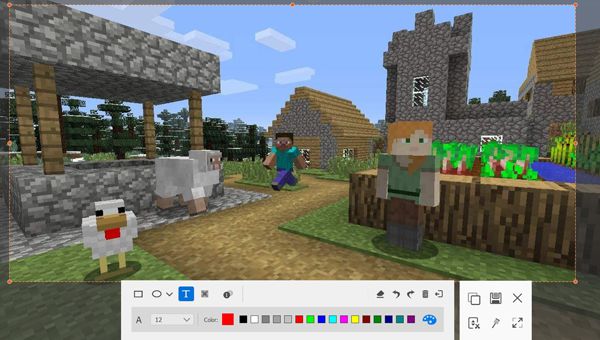
With the toolbox, you can edit your screenshot with many tools, including shapes, lines, texts, callouts, etc. At last, click the Save button on the right side to export it.
Gameplay Recorder
Using this easy-to-use game recorder, you can record games from Steam, PlayStation, Switch, and online game sites with simple clicks.
Step 1Launch Game Recorder
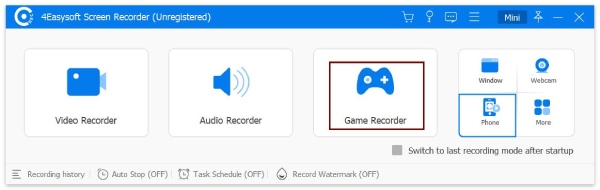
First, you need to launch the gameplay you want to capture. Then, choose Game Recorder by clicking the Screen Recorder button in the top left corner.
Step 2Set the Capture Resource
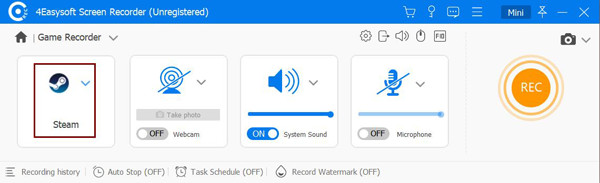
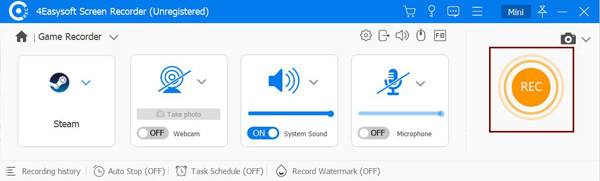
After you open the gameplay, the game recorder will automatically recognize it, and you can directly click the Select the game button and choose the gameplay. You can also do overlay webcam and sound by turning on the Webcam and Microphone recordings.
Step 3Set High-quality Recordings
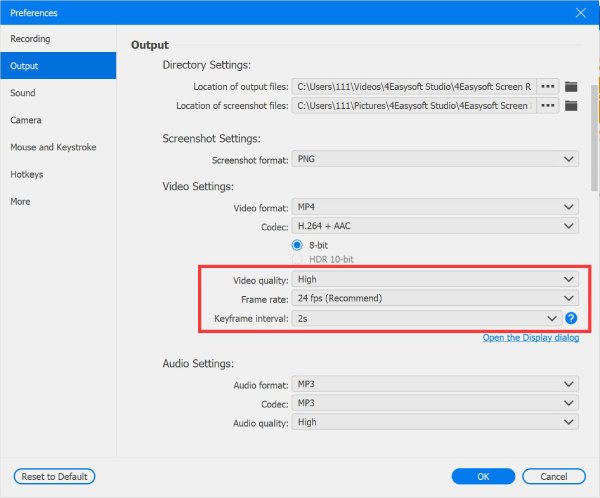
If you want to keep your gameplay recordings smooth and of high quality, you can click the Preferences button to set the frame rate and quality. 60 fps frame rate and Lossless Quality are provided for you. After that, click the OK button to save the settings.
Step 4Start Recording Gameplay
Click the REC button to start recording the gameplay. Before it starts, you have 3 seconds to go back to the gameplay window.
Step 5Export Gameplay Recordings
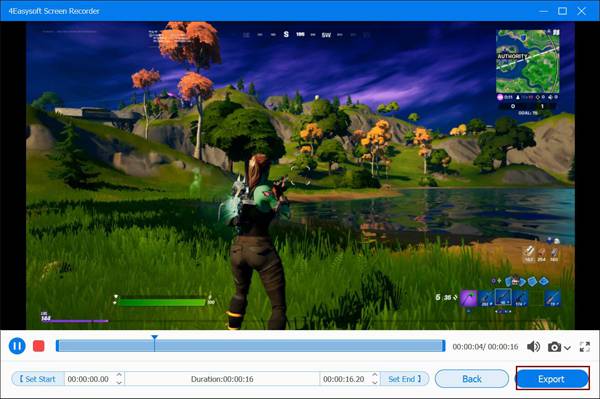
When your gameplay recordings are done, click the Stop button to finish the recording. Before you click the Save button, you can also preview and edit the recording.
Window Recorder
Step 1Launch Window Recorder
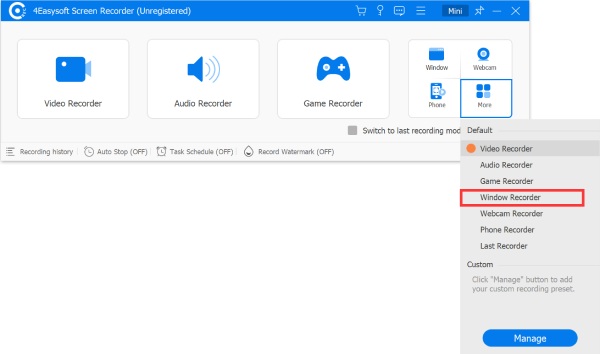
Launch 4Easysoft Screen Recorder, then click the Screen Recorder button in the top left corner and choose Window Recorder.
Step 2Choose a Window to Record
Select a window or process you want to record on the left, or use your mouse to drag and move the Window Catcher to the window you want to record, and release to select the window.
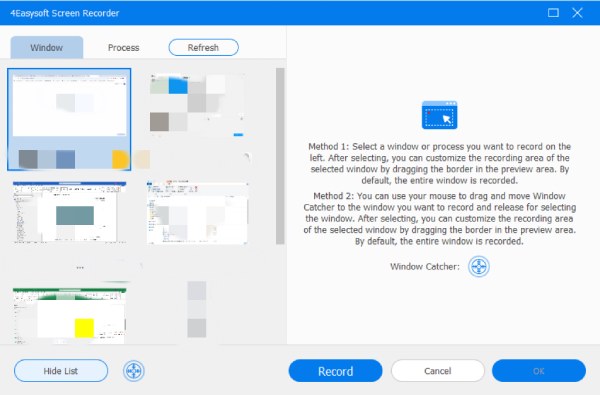
Step 3Customize the Recording Area
After selecting, you can customize the recording area of the chosen window by dragging the border into the preview area. By default, the entire window is recorded.
Webcam Recorder
To record business meetings, reaction videos, and gameplay narrations, the Webcam Recorder is for you. You can use the built-in or the external webcam to capture you and your voice.
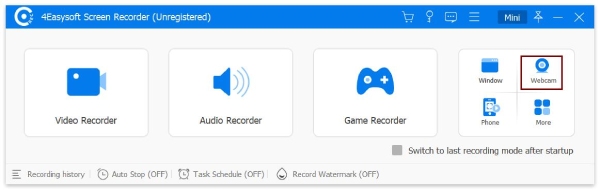
Step 1Enable the Webcam Recorder
You can click the Screen Recorder button in the top left corner and choose Webcam Recorder to record yourself. But you should note that you need to permit the camera to capture.
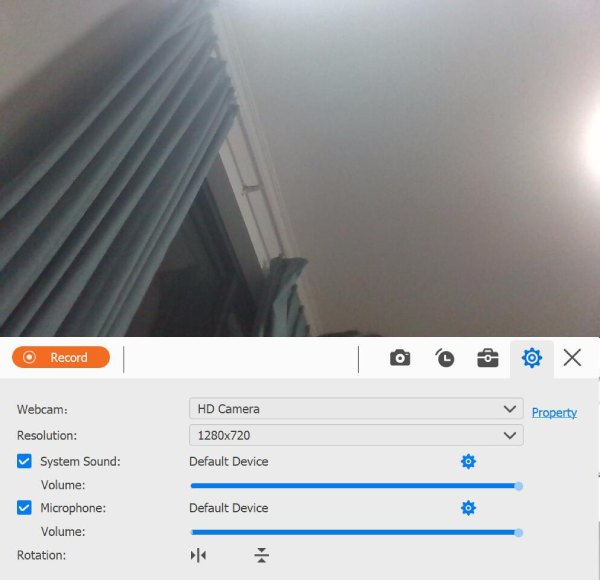
Step 2Adjust the Settings
Here you can change the recording quality, resolution, and volume of sound/microphone. You can also rotate the captured webcam screen without adjusting the real camera.
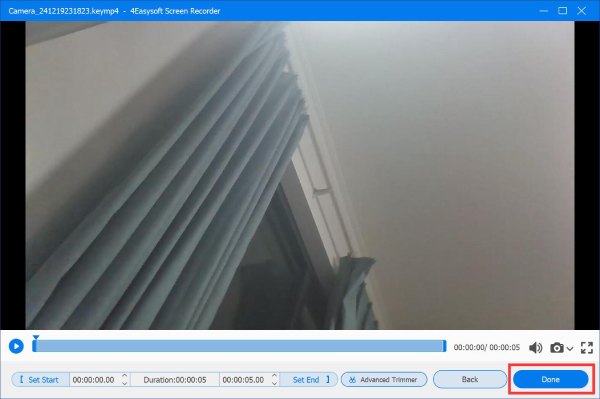
Step 3Record, Edit, and Save
Click the REC button to start recording the webcam. After that, you can clip the tapes in the preview window and edit the recording video, then click the Save button to export them.
Phone Recorder
With this Phone Recorder, you can simply mirror and capture your Android/iOS phone screens on the computer.
Step 1Launch the Phone Recorder
After installing 4Easysoft Screen Recorder, click the Screen Recorder button in the top left corner and choose Phone Recorder.
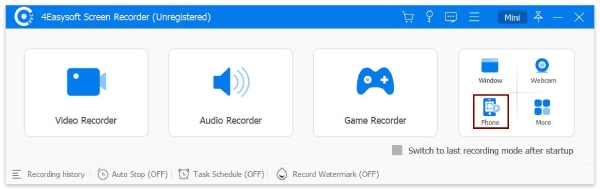
Step 2Choose the Device Type
Here you can choose the iOS device or the Android device. To record the screen activities on your iPhone or iPad, you need to click the iOS Recorder button. And the Android Recorder is for Android phones.

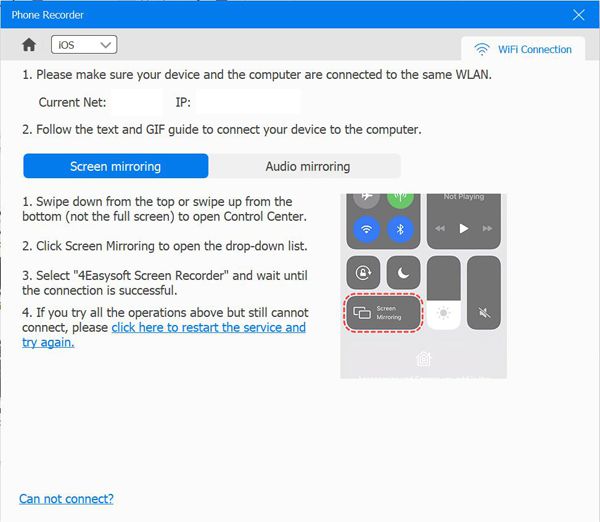
Step 3Connect the Phone to the Computer
For iOS devices:
Follow the two-step instruction to connect your iOS device to the computer. Please keep in mind that the two devices should use the same WLAN. After that, you can choose the Screen mirroring or Audio mirroring option to capture video or audio.
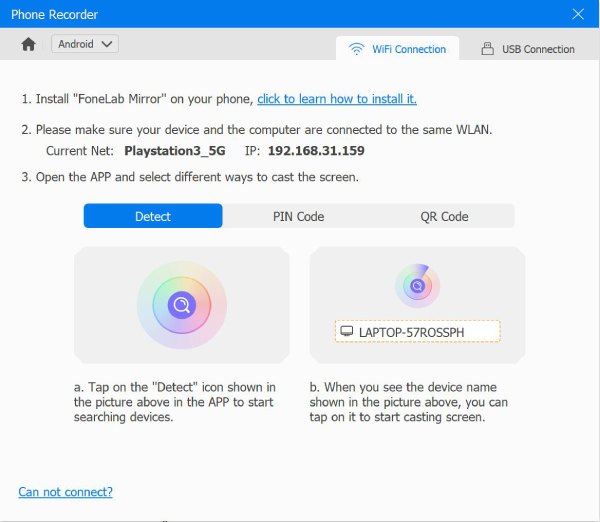
For Android devices:
Since there’s no default mirroring tool on Android, you need to download the FoneLab Mirror app. And then, you can cast your Android screen on the computer through the detection, PIN code, or QR code. Besides, you can directly use the USB cable to connect the two devices.
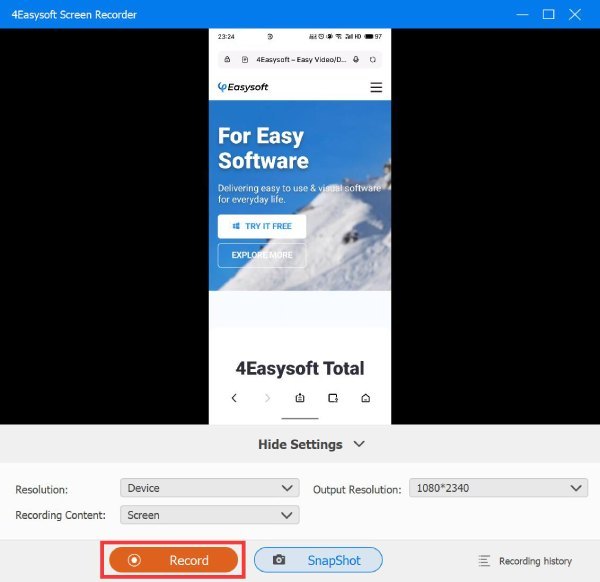
Step 4Record with Desired Settings
You should permit the screen capture on your iOS/Android phone first. Then, you can set the output resolution and click the Record button to star.
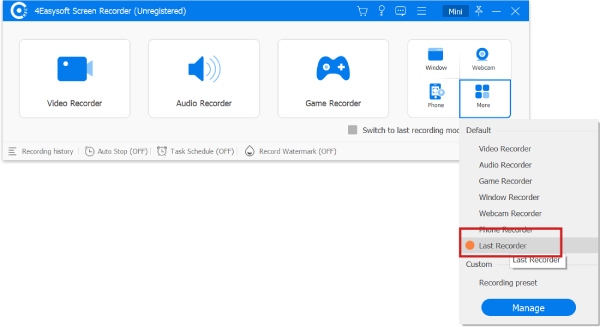
Last Recorder
It also provides a Last Recorder when you want to continue the previous task. Just click the More button on the main interface and choose the Last Recorder option. In this way, you can restore the settings you used last time.
Recording Controls
Edit While Recording
To edit and add annotations in real-time while recording, you can click the Edit button in the toolbox during the recording process. Here you can use the editing tools to add a rectangle, an ellipse, an arrow, a line, and text with different colors. Moreover, you can easily redo, undo, and erase the drawings.
Preset Recording
If you have to record lectures or conferences every week, you can choose to customize a preset recording for these types of activities. In this way, you can directly use the same settings to start recording quickly.
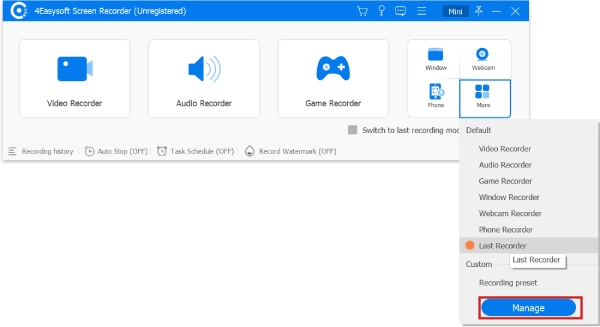
Step 1Add a Preset
After launching the screen recorder, you can click Screen Recorder in the top left corner and click the Manage button to set a preset.
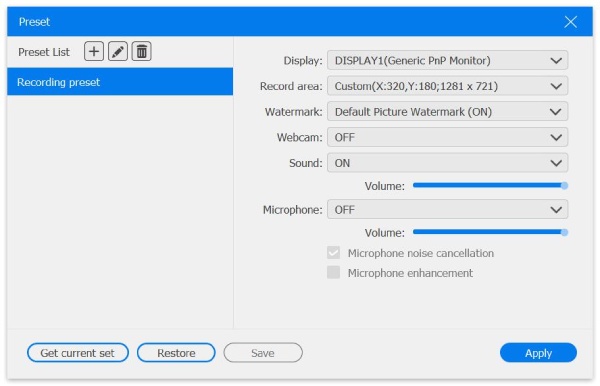
Step 2Change the Preset Settings
In the pop-up window, you can change all the settings for recording, including the capture area, webcam, sound, microphone, video and audio format, video and audio quality, etc. After that, click the Save button to change the name and click the Apply button to save the settings.
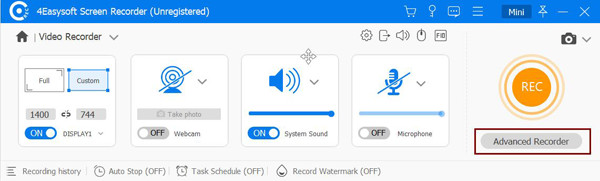
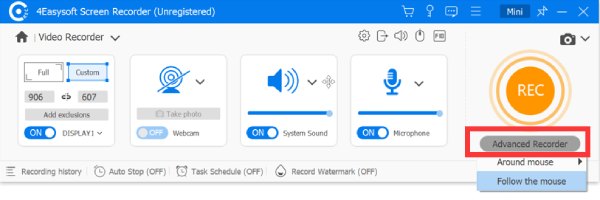
Advanced Recording Mode
When you use the Video Recorder, you will find that there is a Mouse Recorder under the REC button. It provides two recording modes for you.
Around mouse: This recording mode will record the area around your mouse. Thus, it will always change with the mouse movement. Your mouse is always in the center of the capture area, so if you move the mouse to the border of the screen, then the area beyond your screen will be shown in black.
Follow the mouse: This mode is similar to the Around Mouse. The capture area will always move with your mouse. But the area is within the mouse instead of centering the mouse.
Step 1 Find Mouse Recorder
Click the Video Recorder button at the top left corner, and then click the Mouse Recorder button under the REC button before you start recording.
Step 2Select the Desired Options
In the drop-down list, you can choose from Around mouse and Follow the mouse options.
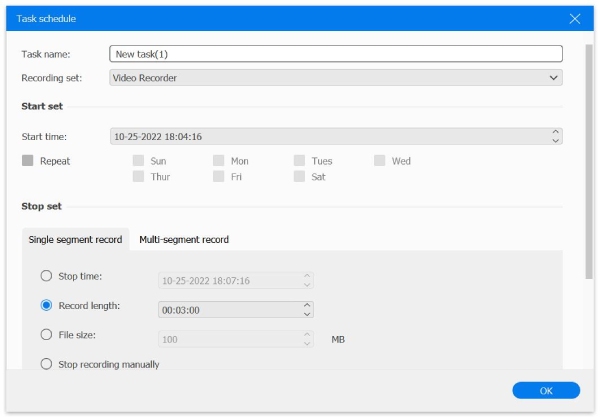
Task Schedule Recording
If you need to automatically record live shows or online lectures when you are absent, you can use the Task Schedule function. Click the Task Schedule button at the bottom of the main interface. Then, you can add a new task with the desired start time, record length, stop time, or even file size according to your needs.
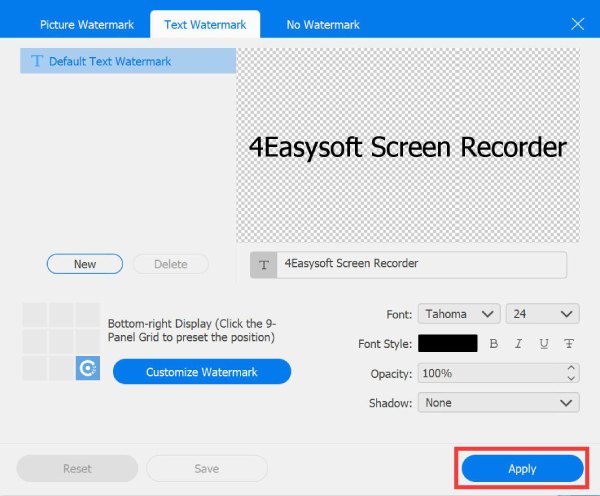
Watermark
From the bottom of the main interface, you can click the Watermark button to add watermarks. Click the Manage button to add your own text or image watermark as you like.
Manage Recording History
After you record video, audio, gameplay, or take screenshots, you can find the recordings in the preset folder. Moreover, you can click the Recording History button on the main interface to access them directly. You can rename, play, share, and delete the recording files.
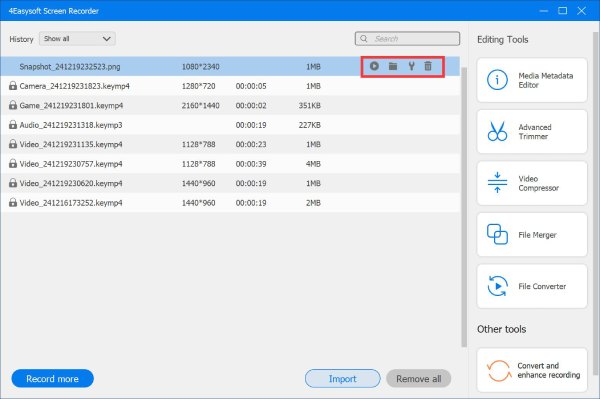
Editing Tools
When you finish recording, the preview window will pop up and include seven editing tools in the bottom right corner. You can use them to edit your recording.
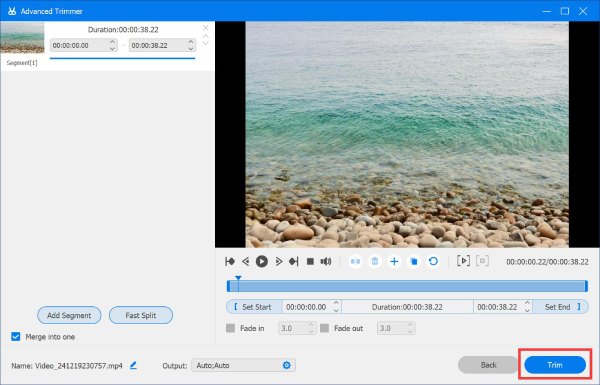
Advanced Trimmer
Unlike the video clipper, this advanced trimmer enables you to cut recordings into several segments before saving, which means you can remove the middle parts of a video.
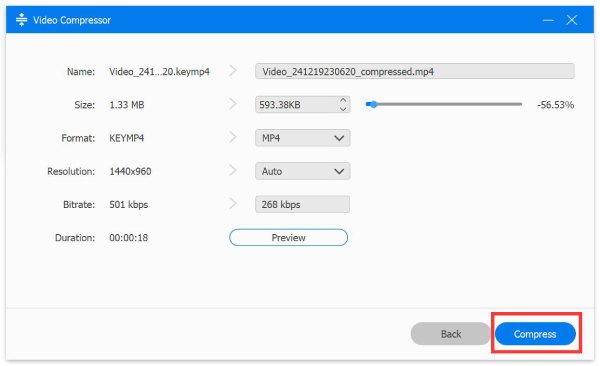
Video Compressor
The video recordings, especially the 4K recordings, always require a large amount of storage. To save computer space, you can use the built-in video compressor to reduce the file size from 1% to 99%. Don’t worry, it will also promise high-quality output with settings.
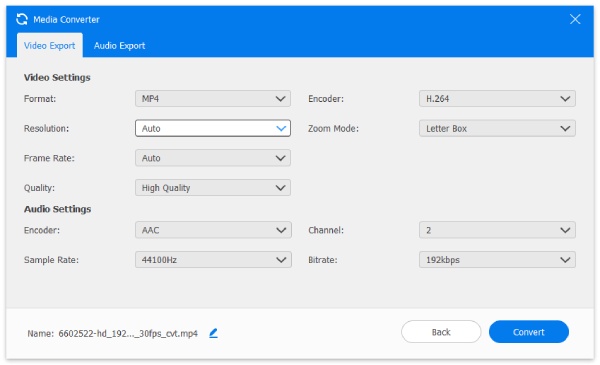
Media Converter
If you forget to change the output settings before recording, you can use this function to convert audio and video files to any other supported formats. You can also adjust the resolution, encoder, frame rate, and quality here.
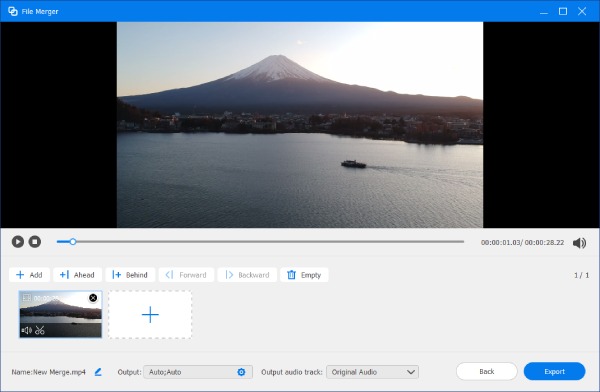
File Merger
This powerful tool can help you merge different recording clips into one. You can also change the output format according to your needs.
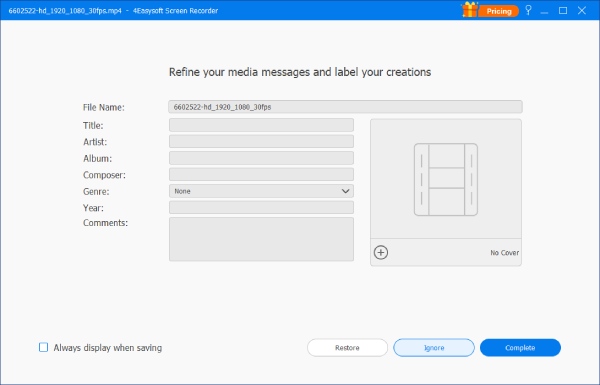
Media Metadata Editor
For modifying and editing file metadata, you can use this tool. It allows you to change metadata such as the artist, year, and video cover of the recorded video at will.
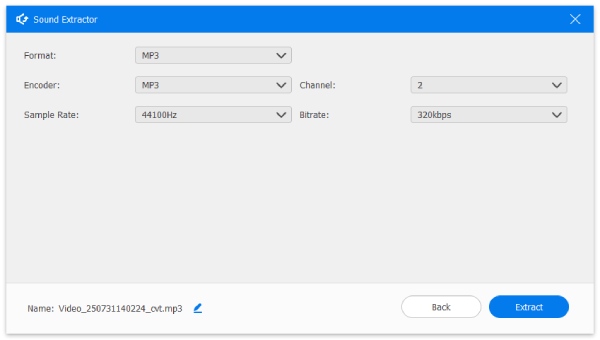
Sound Extractor
If you need to extract the audio file from a screen recording separately, this tool can help you extract it intact. You can set the required audio format, bit rate, etc., in advance.
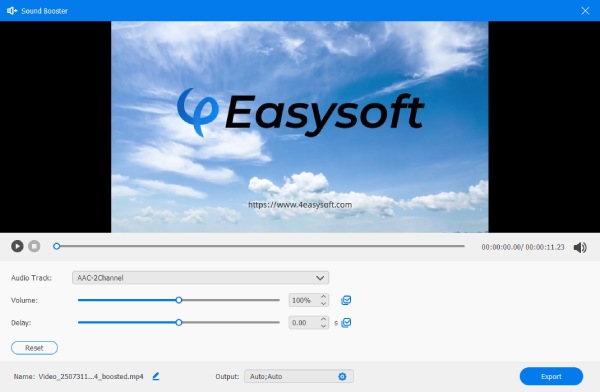
Sound Booster
Suppose the audio is too quiet or delayed when previewing a recorded video. In that case, you can use the Sound Booster, which can increase the volume of the screen recording and synchronize the audio with the video.