For Windows
 For Mac
 Free Online Solutions
Content
Basics
Introduction
4Easysoft iPhone Transfer for Mac is an excellent assistant tool in transferring data across devices on Mac. Whether you are creating a backup for your files on your iPhone or switching to a new device that is not an iOS system, this program can help you out effortlessly within a few clicks on your Mac. You just need a quick guide to learn how to master the 4Easysoft iPhone Transfer for Mac.
Install and Launch
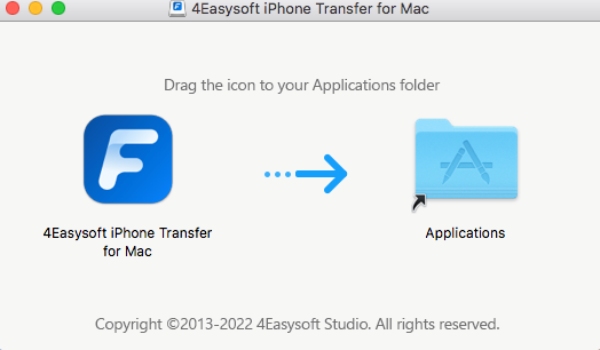
You can click the Free Download button at the top of this page to download the latest version of 4Easysoft iPhone Transfer for Mac. The browser will automatically download the exe file. After it finishes, you can find it in the Finder and double-click on it. Just like installing other regular apps, you drag the iPhone Transfer for Mac button to the Application folder. Then follow the instructions to complete.
Purchase and Registration
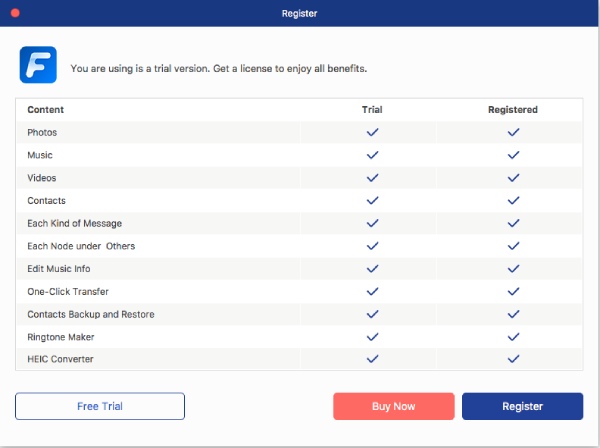
Compared to the complete version with registration, the free trial of 4Easysoft iPhone Transfer for Mac has some limitations on the file numbers. For example, you can only transfer 20 photos in the free trial. Besides, you can only edit music information, transfer data in one click, convert files, make ringtones, and backup contacts in the full version.
How to Purchase 4Easysoft iPhone Transfer
To purchase 4Easysoft iPhone Transfer for Mac, there are two methods for you. One is that if you first launch this program on the computer, a window will pop up, and you can click the Buy Now button to enter the ordering page. The other is to click the Purchase button on the main interface. On the ordering page, remember the email address you fill in. Because you will receive a license key for registration.

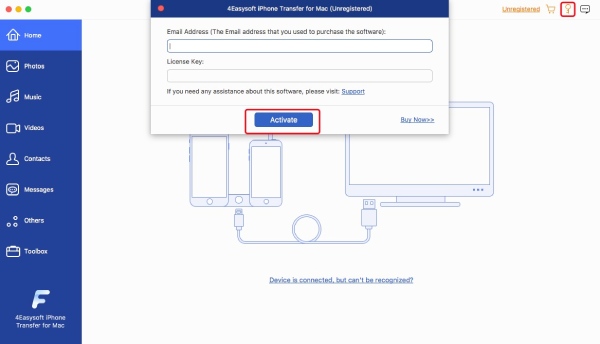
How to Register 4Easysoft iPhone Transfer
After purchase, you can now access the full version and unlock complete functionality in 4Easysoft iPhone Transfer for Mac. Copy the license key you just received from your email. Next, click the Register button and enter your email address and the license key. Finally, click the Activate button to unlock the full version.
Update
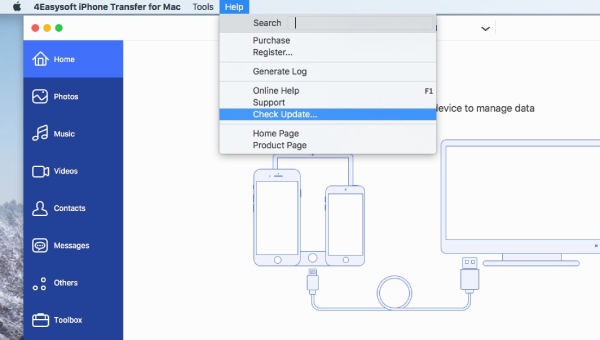
Click the 4Easysoft iPhone Transfer for Mac button on the menu bar and then click the Preferences button to see more settings. Next, under the General section, click the checkbox in front of the Check for Updates Automatically to enable it. Furthermore, you can also see if there is a new version manually. Click the Check Updates button from the Help on the menu bar.
Preference
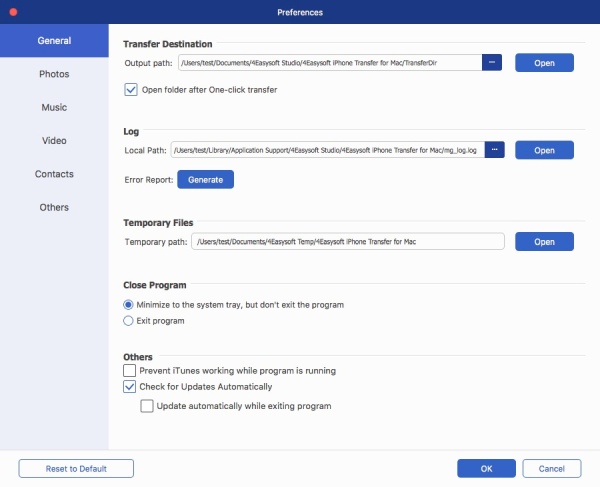
To better understand the 4Easysoft iPhone Transfer for Mac and tweak it to make it more suitable for you. You can simply click the 4Easysoft iPhone Transfer for Mac button on the menu bar. Then you can see Preferences. There you can change the basic settings to meet your demands.
General
After entering the Preferences window, on the first General tab, here you can change the path for output files, data, temporary files, and logs. Meanwhile, you can decide whether the action of clicking the Close button on the main interface stands for minimizing or exiting.
Photos
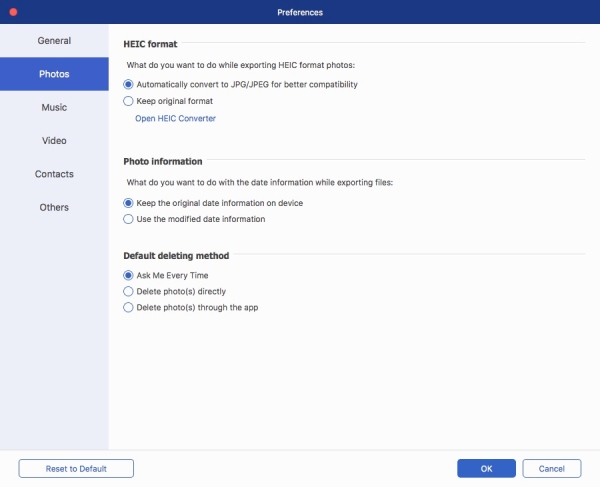
In the Photos section, you see the default setting will automatically convert the photos you transferred to JPEG format for better compatibility. There is also the Keep Original Format option for you. You can tweak other trivial settings like Photo Information and Deleting Method based on your needs.
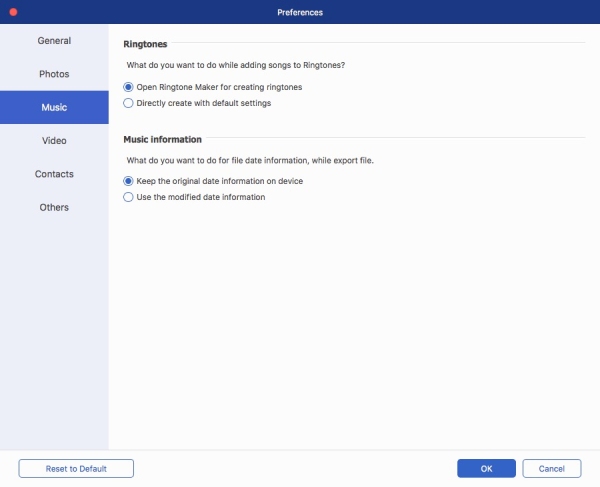
Music
From here, you can change whether to activate Ringtone Maker every time you open music. And change the music information.
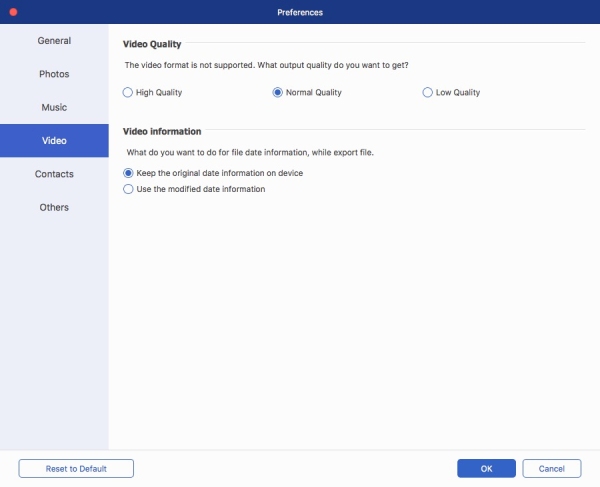
Video
From the Video section, you can adjust the video quality after importing videos from your devices for transferring.
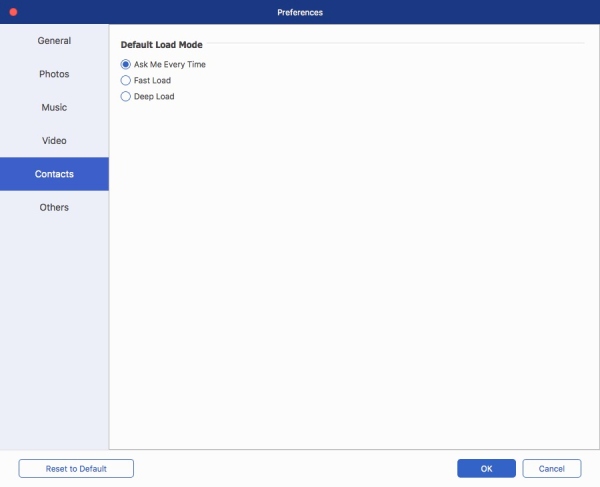
Contacts
When importing your contacts data from any of your iOS devices, here you can change the importing/load mode to fast or deep.
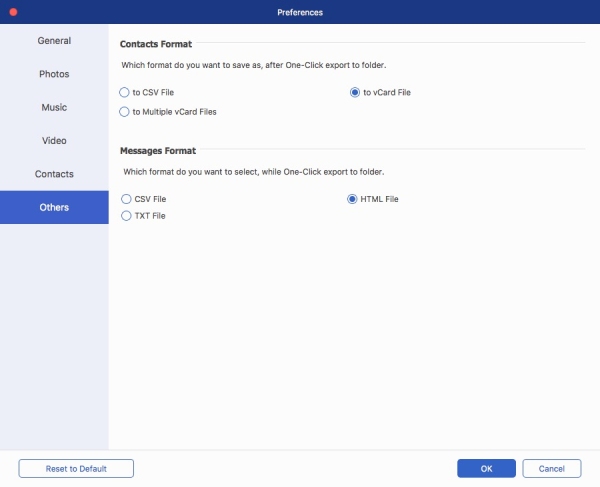
Others
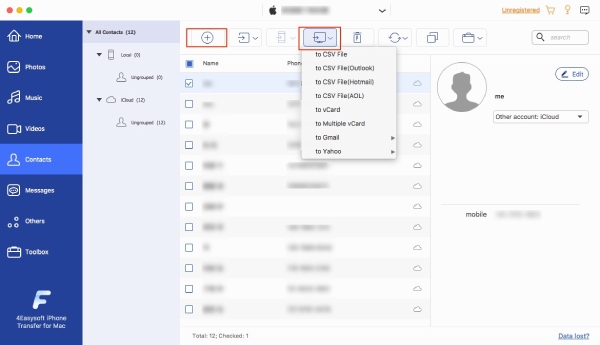
Change your contacts’ data format in a few clicks. The available format includes CSV and vCard. Though the output formats vary, you can do the same things to message format.
Reminder for iOS 13 and Later [Up to iOS 26 and 27 beta]
For iOS 13 and later, the system has enhanced the security protection for iOS devices. Therefore, to fully access the content on your iPhone or iPad and transfer data, you need to take extra steps to let the computer gain access.
Step 1 For the first time connecting the iPhone to the Mac, a window will pop up on this program asking permission to access the data on your iPhone before scanning your device.
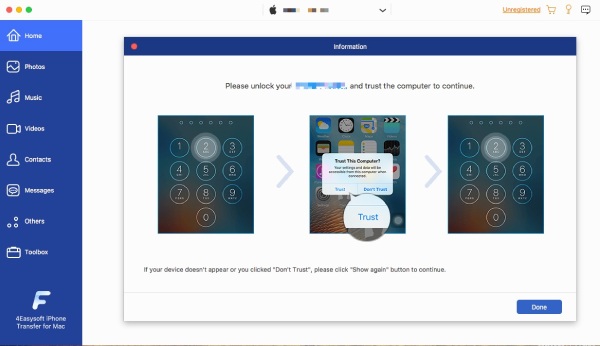
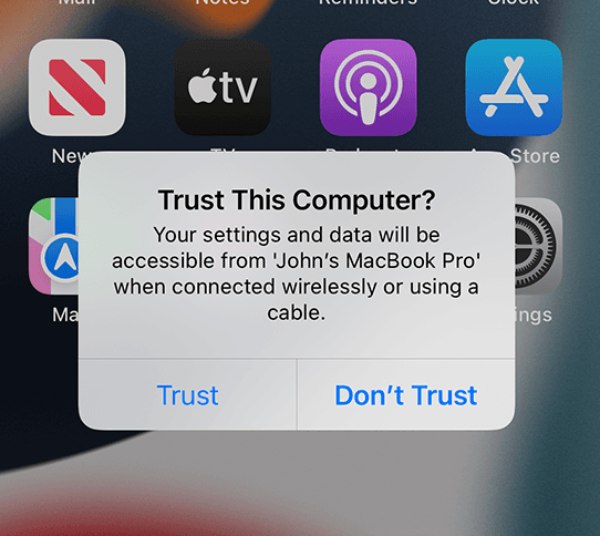
Step 2 To allow access to your iPhone, you need to tap the Trust button on the small pop-up window on your iPhone, and then enter your screen password to unlock it. If you have an iTunes password, you also need to enter it.
Transfer Media Files
Transfer Photos across Devices
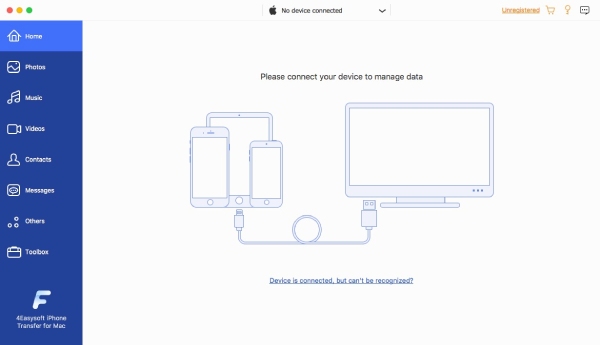
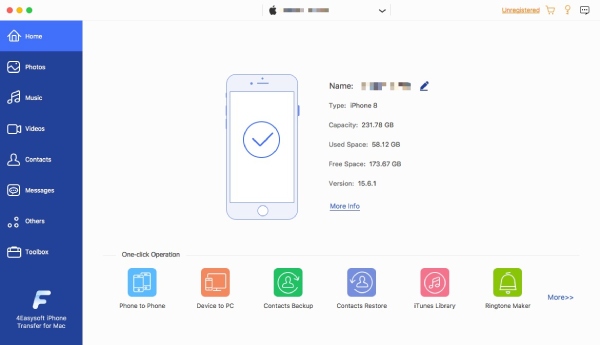
Step 1 Install and Launch the program on your Mac. Then, connect your iPhone to the Mac via a USB cable. After a few seconds, once the connection succeeds, you will see your iPhone name, capacity, type, used space, and other device information on the main interface.
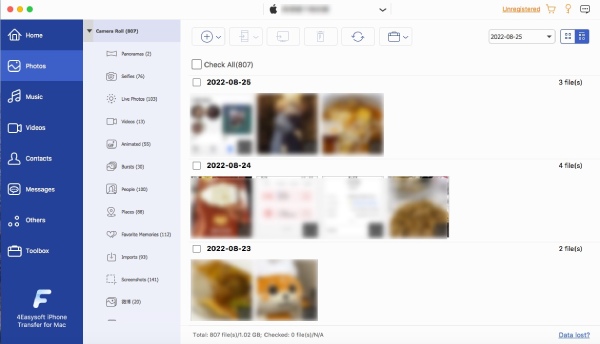
Step 2 On the left side of the window, click the Photos button and all the pictures on your iPhone will appear and are organized based on their types. If you want to transfer some photos to your Mac, click and select them.
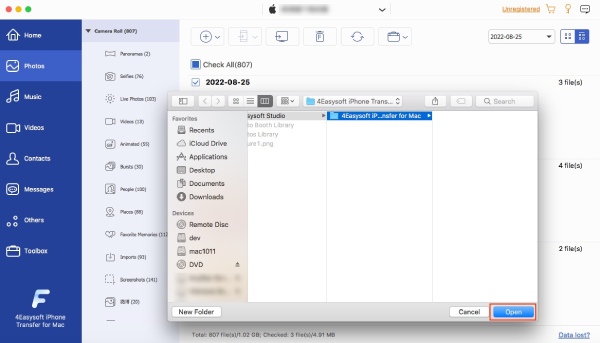
Step 3 Click the Export to PC button above to transfer the pictures to your Mac. Next, select a folder from the pop-up window or create a new one to store these pictures. Once done, click the Open button to confirm and your pictures will be there.
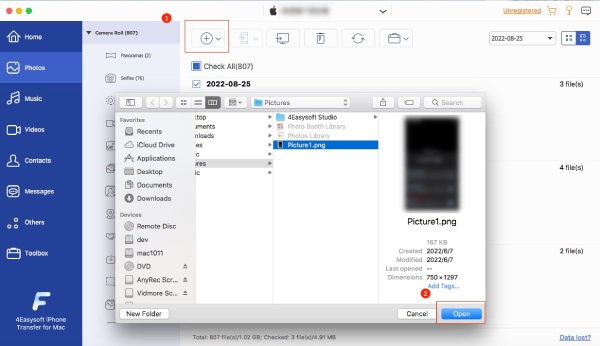
Step 4 To add photos from the Mac to the iPhone, click the Add button. From the pop-up window, select pictures and click the Open button to confirm. The process goes the same for transferring pics from one iPhone to another iPhone or Android. You just need to connect another phone to your Mac as well.
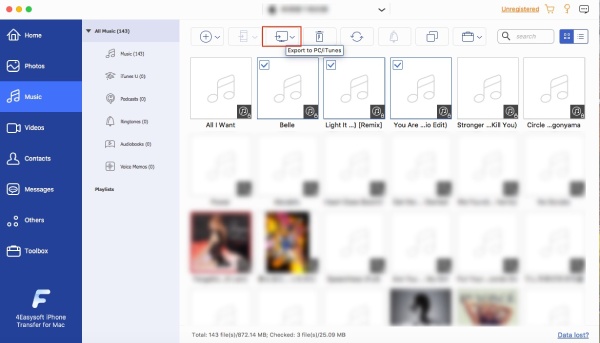
Transfer Music across Devices
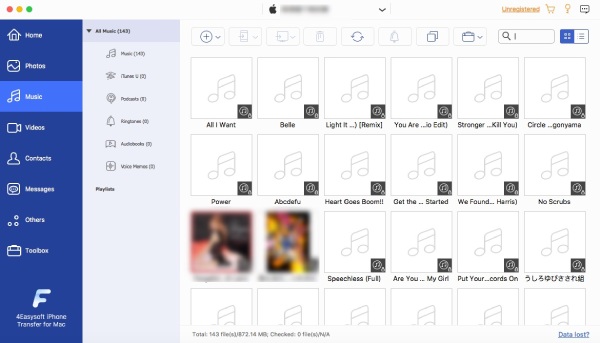
Step 1 After connecting your iPhone to your Mac, click the Music button on the left side. You will see all the music with covers shown immediately. You will see two categories which are All Music and Playlists.
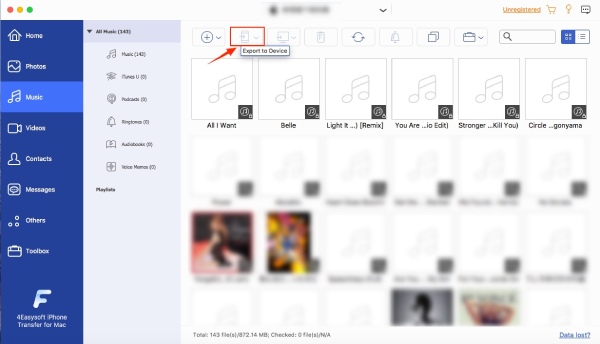
Step 2 If you are to transfer from iOS to iOS, connect another iOS device to your computer as well. And click the music you want to export to it. Then, click the Export to Device button and find a desirable path to store these files. Then, confirm it.
Step 3 Additionally, you can also transfer your music from your iPhone/iTunes to the Mac. Simply select the music shown on the window or select from the iTunes section. Then, click the Export to PC/iTunes button above to select a folder on the Mac to place.
Note: If the music is from your Apple Music app, then you cannot import it to your Mac or other devices. Because they are copy-protected and encrypted.
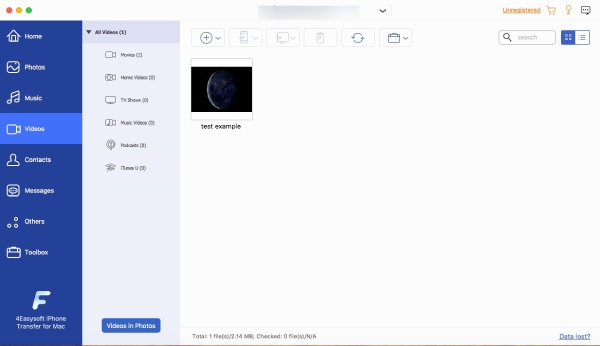
Transfer Videos across Devices
Step 1 To transfer the videos from your iPhone to your Mac, first you need to connect the iPhone to your Mac. Then, click the Videos button on the left side. And the videos will show on the right.
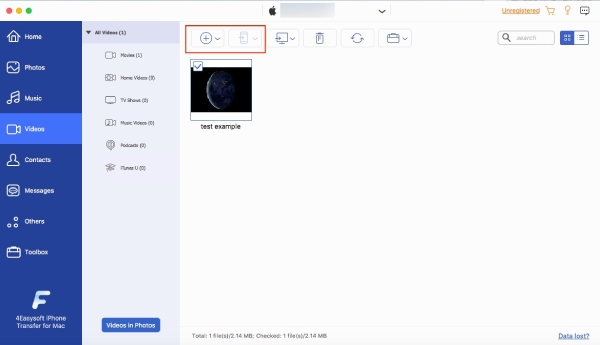
Step 2 You can select videos from TV Shows, Podcasts, iTunes, etc. Next, click the Export to Mac button at the top of the window. A window will pop up for you to select a destination folder to store these videos. Click the Open button to confirm and start transferring.
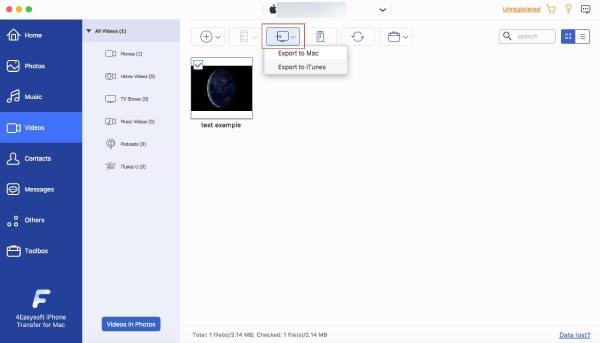
Step 3 There are other buttons: Export to Device and Add. The Export to Device button enables you to transfer the videos from your iPhone to another iPhone, while the Add button allows you to add video files from the Mac to the iPhone you connected.
Manage Contact Information
You can create a backup for your contact information on the iPhone or transfer the information to a new iPhone or other Android devices that are not compatible with the iOS devices. In this way, your contact info and message are well managed. Check the steps below to quickly learn how to do it on 4Easysoft iPhone Transfer for Mac
How to Transfer Contacts across Devices
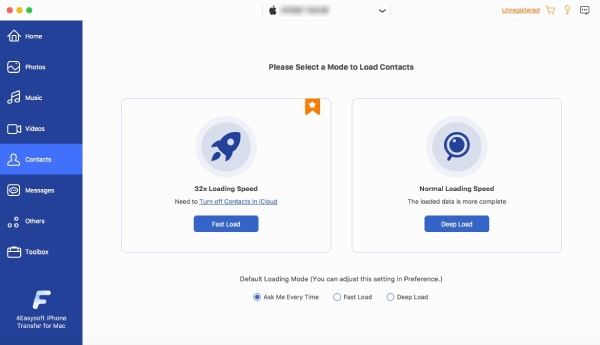
Step 1 There are two modes for loading contacts on your iPhone: Fast Load and Deep Load. Choose one of them to see contacts, the difference is that Fast Load requires you to turn off contacts in iCloud, while the Deep Load is more complete.
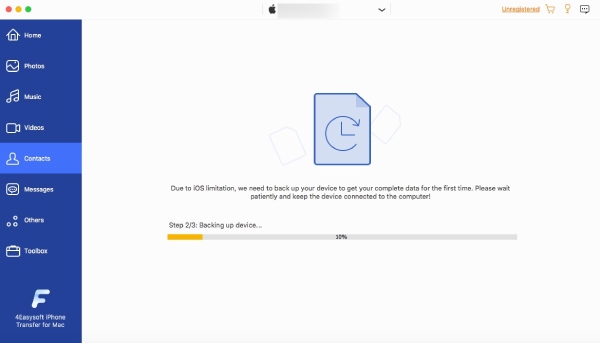
Step 2 Now, click the Deep Load button, which may take a while because it will automatically start back up your contacts before displaying them. After loading finishes, you will see all your contact information on the window. Then you can click on a random one to edit on the right side of the window.
Step 3 Next, to export the contact information, you need to first choose one or all of them, and then click the Export to Mac button above to save the data on your Mac computer. Or you may also click the Create New Contact button next to it to add a new contact method of someone to your iPhone.
Note: When scanning, this iPhone Transfer may ask you to enter the password on your iPhone if you want it to also scan for your call history and other more relevant contact information.
How to Transfer Messages across Devices
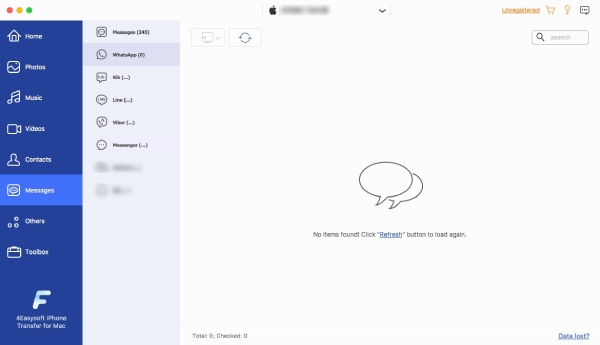
Step 1 For messages on your iPhone, you can also transfer them to your Mac and delete them from your iPhone to save some space. Connect your iPhone to the Mac and directly click the Messages button.
Step 2 Click the checkbox in front of the contact info you want to select, and then click the Export to PC button to transfer your messages to your computer. You can store these data on your computer in many formats: CSV, HTML, and TXT.
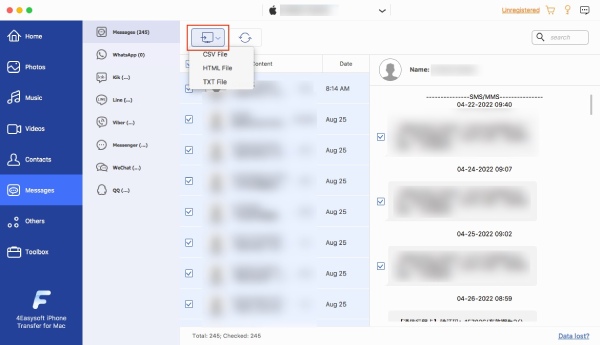
Note: All the media files, contacts, and messages can also be transferred to iTunes to store your data on the d service. Simply click the down arrow button on the Export to PC button and you will see Export to iTunes.
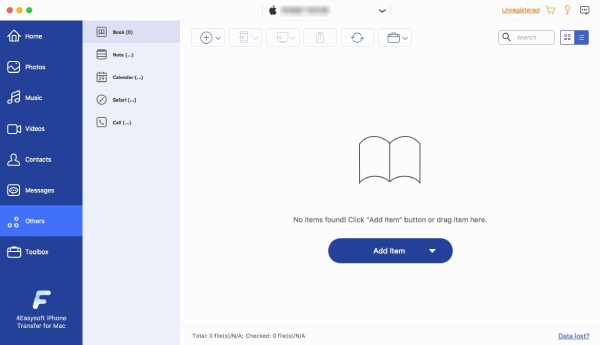
Others
The Others button at the near bottom part of the window represents scanning for other files like books, notes, calendar information, Safari data, and your calls. If there is such data on your iPhone, you can select and click the Export to Mac, or Export to Device button to transfer it across devices. Meanwhile, you can also transfer such data from your Mac to your iPhone. You may delete or refresh the data as well.
Toolbox
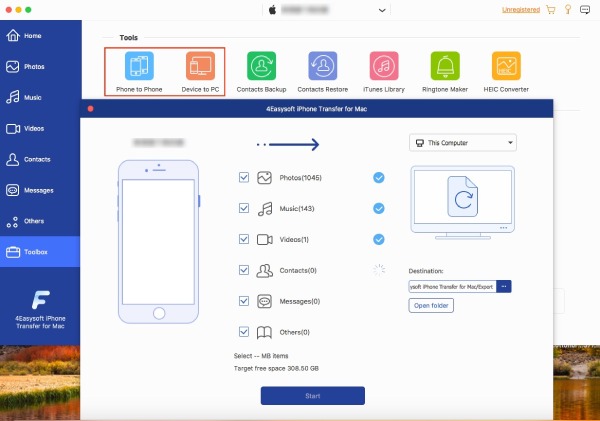
Transfer Data in One Click
Transferring data can be super easy for your iPhone and Mac devices. You just need to first connect them with a USB cable. Then at the bottom of the main interface, click the Toolbox button. Among so many powerful tools, you click the Device to PC button or Phone to Phone button, which depends on which device you are about to transfer to. Whatever you click, a pop-up window will display all your data but not in detail, and with one more click, you can transfer them all.
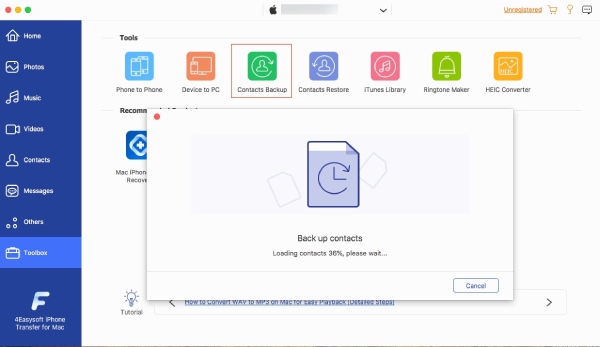
Contacts Backup
Back up all your contacts, phone numbers, and other relevant details in just one click. You can click the Contacts Backup button in the Toolbox after connecting your device to the Mac. Click the Back up Now button and choose a folder for the data, and you are all set.
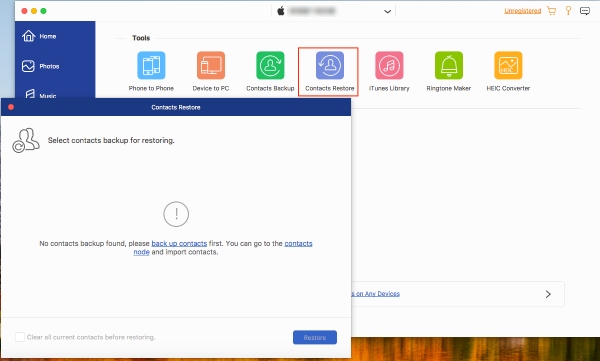
Contacts Restore
If you have created a backup with 4Easysoft iPhone Transfer for Mac, you can now easily recover these backups and store them on your new device. This enables you to get access again to the accidentally deleted information of your contacts.
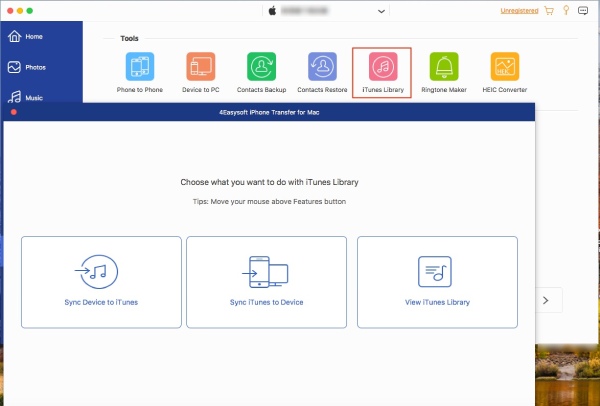
iTunes Library
With just one click, you can sync and manage your iTunes library effortlessly. This works perfectly when your iCloud synchronization is a bit slow or your storage space in iCloud is not enough. By clicking the iTunes Library button, you will see three modes of synchronization: Sync Device to iTunes, Sync iTunes to Device, and View iTunes Library. You can click the corresponding buttons based on your demands.
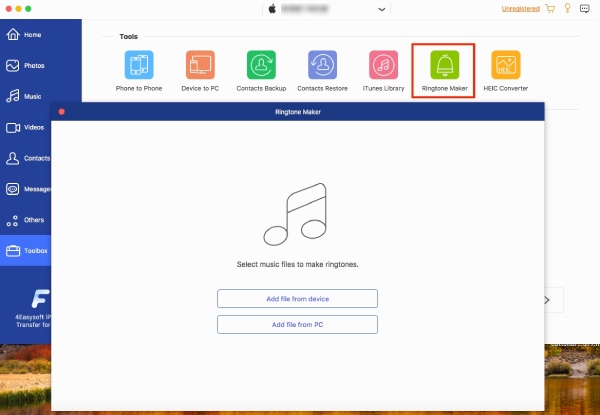
Ringtone Maker
You can add a piece of music from your iPhone or the Mac to create a ringtone for your iPhone. Meanwhile, this Maker also allows you to apply some simple effects like fade in or fade out. Adjusting the time duration of your ringtone here is also feasible.
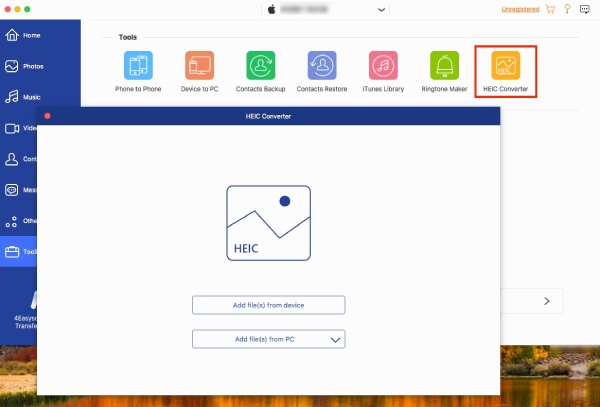
HEIC Converter
HEIC is an image format developed by Apple to store images on your iPhones and Macs. Although the images in HEIC format are of high quality, it is not convenient for you to transfer images from iPhone to Android devices. Using this tool can help you convert any HEIC images on your iPhone or Mac to a more compatible format like JPEG.