For Windows
 For Mac
 Free Online Solutions
Content
Basics
Introduction
4Easysoft Data Recovery is an easy-to-use tool to help you manage and save your lost data from computer, flash drive, and recycle bin to rescue your crashed computers. With simple clicks, it will scan all the data and classify them in different types, then you can choose the desired music, photos, documents, videos, emails, and more data to recover.
Purchase and Register
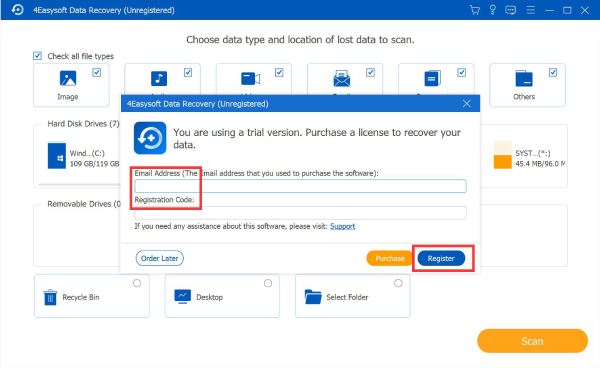
More fancy features in 4Easysoft Data Recovery are waiting for you to explore and you just need to simply purchase the program to unlock all the available features in it. Click the Purchase button (cart buttom) at the top-right corner and choose a desired license according to your need. You will receive the registration code in your email.
After that, you can click the Register button (key buttom) besides the purchase button. Here you can enter the email address you used to buy the license and the registration code you just receive. Finally, click the Register button to activate.
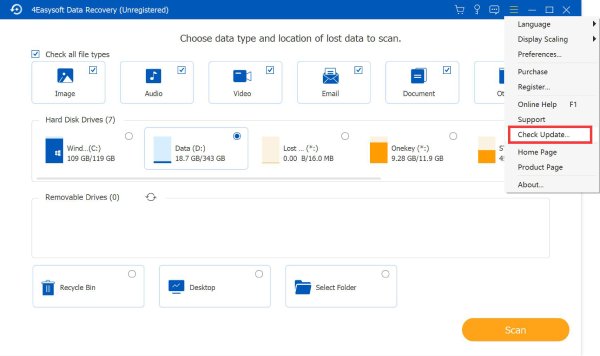
Update
Manual Update: Click the Menu button from top-right corner and click the Check Update button. The update check will start now, and it will provide the latest version for you to download.
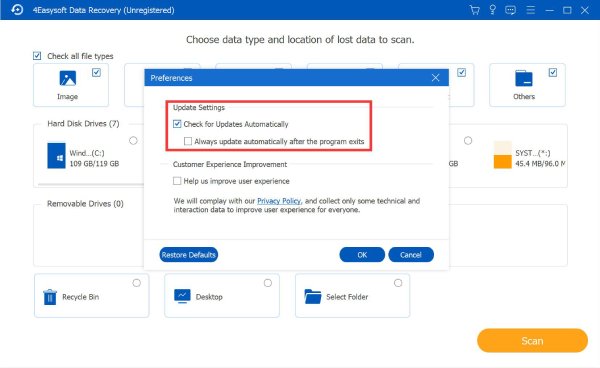
Automatic Update: Click the Menu button and then the Preferences button. In the popping-up window, you can tick the Check for Updates Automatically button for regular check every time you start the program. Moreover, you can enable the automatic update when you exit the program without further confirmation.
Preferences
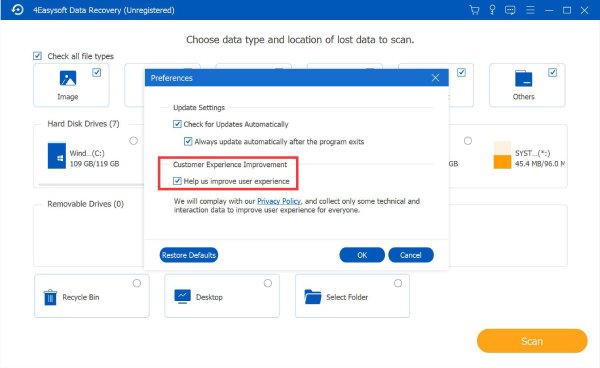
Under the Preferences button, you can also adjust the Customer Experience Improvement settings. It’s guaranteed that your privacy will not be leaked during the process. Of course, you can turn on/off this function anytime as you like.
Recover All Data
4Easysoft Data Recovery enables you to recover data from computer hard drives, external flash drives, recycle bin, and any selected folders. You can even choose to scan the desired file types to help you quickly find the lost data without wasting time. Read the detailed steps below to recover your data now:
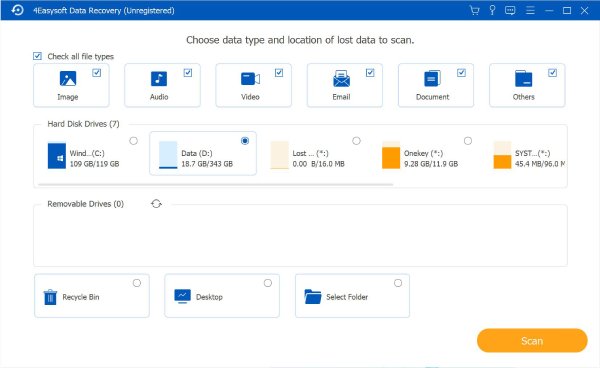
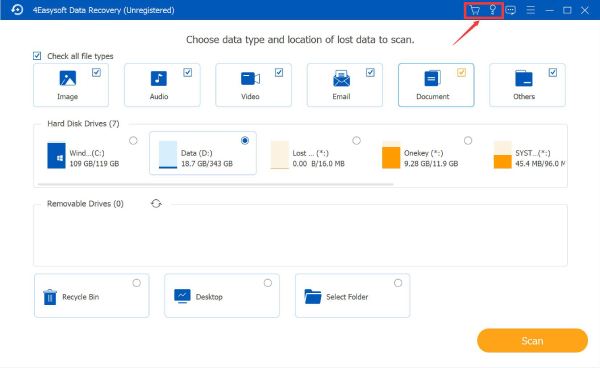
Step 1: Choose the Desired Location
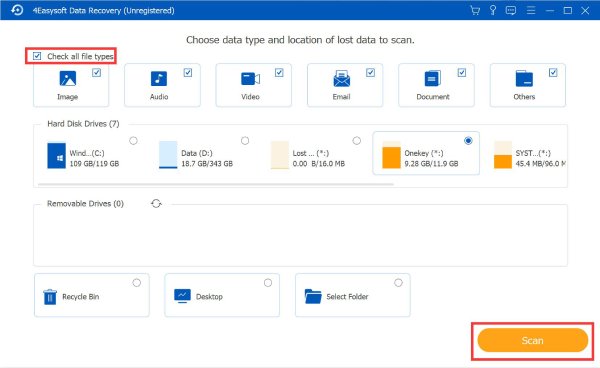
After launching 4Easysoft Data Recovery, you should select the desired location to recover the lost data, including Windows C/D hard disk drive, external drive your inserted, recycle bin, etc. You can even select the Desktop location to scan the whole computer.
If you also know the file type of the lost data, you can tick the Image, Audio, Video, Email, or Document button to save your time. Then, click the Scan button to start.
Step 2: Quick or Deep Scan
After the quick scan finished in few seconds, you will see the popping-up window of the notification. You can directly start recovering all data now by clicking the You can recover them now button.
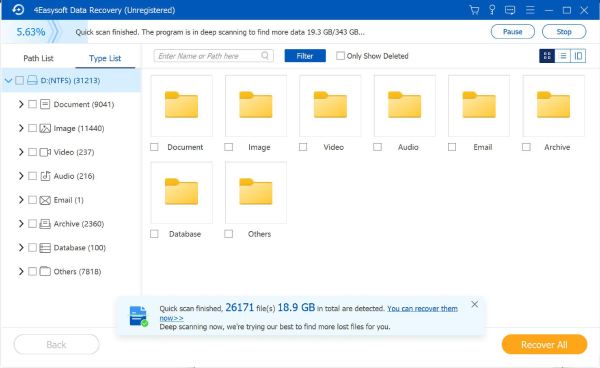
The scanning is still processing, so you should do nothing if you want to have a deep scan. It will take you’re a few minutes.
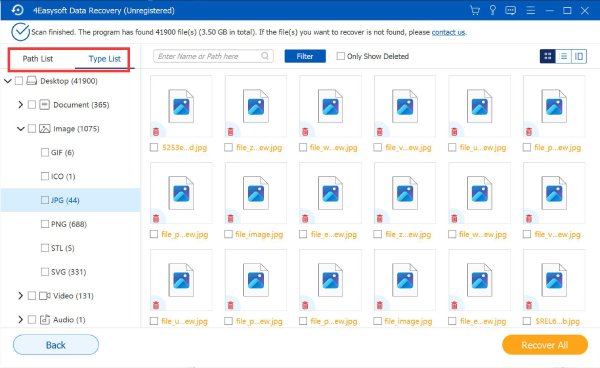
Step 3: Select the Desired Data
From the left pane, you can find the desired data from Path List or Type List. Choose one of the file types and select the desired format to help you find them quickly.
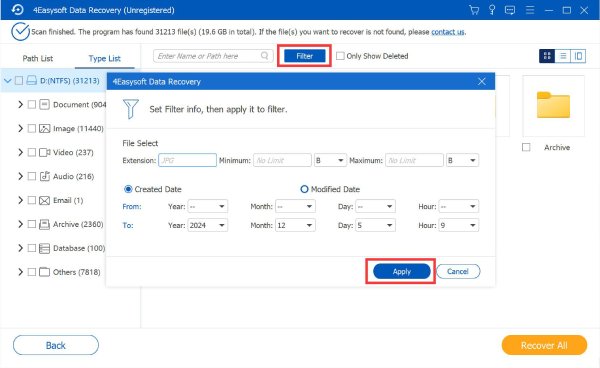
Moreover, you can use the Filter tool to find the desired data accurately. You can enter the information about the extension, created or modified date, etc. Click the Apply button to continue.
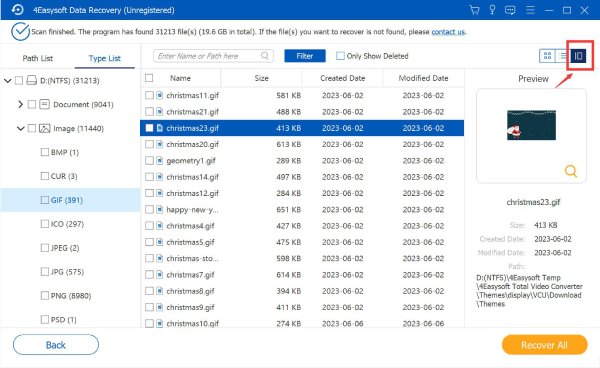
Step 4: Preview the Selected Data
From the top-right corner, you can change the way to preview the data. The default way is Thumbnail, which will only show one image of the video. Thus, you can click the Content button to preview the data in large screen and check the metadata information.
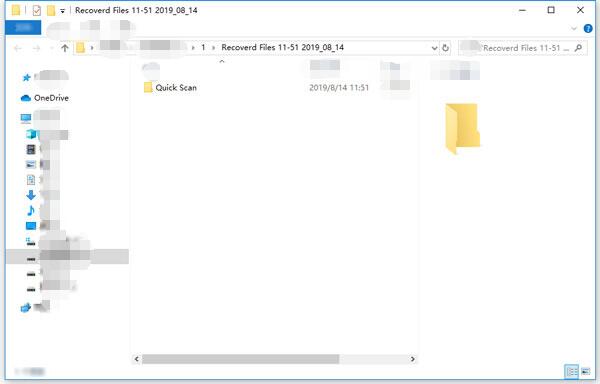
Step 5: Recover Data to the Desired Folder
Click the Recover button and choose the desired folder to save the data. After a few minutes of the process, the recovered data will automatically pop up with the file folder.