Delete duplicates and free up storage on iPhone flexibly.

Newest Guide to Add, Delete, and Edit Shared Photos on iOS 16/17/18

Posted by Aira Lesly Escoto to iOS Cleaner Sep 20, 2022
After the iOS 16/17/18 release, there are many new features attracting people’s eyes. And Shared Photos has updated too. So, many people have questions about this update like how to add, delete, and edit Shared Photos on iOS 16 after updating. Do not be freaking out about this update, this post will teach you and give you the best way to add, delete and edit Shared Photos on iOS 16 to make you play the new iOS version like a veteran.
Guide List
Part 1: How to Add Shared Photos on iOS 16/17/18 Part 2: Can You Delete Shared Photos on iOS 16/17/18 Part 3: Detailed Steps to Edit Shared Photos on iOS 16/17/18 Part 4: FAQs about Add Delete Edit Shared Photos on iOS 16/17/18Part 1: How to Add Shared Photos on iOS 16/17/18
If you have created the Shared Photos Library, there are two ways to add Shared Photos on iOS 16/17/18. And there are two methods for you to import photos to Shared Library. You can add Shared Photos from the Personal Library or the Camera app directly.
Method 1: Add Shared Photos from the Personal Library Manually
This method is for the people who want to manually add photos they like into the Shared Library. And here are the steps to add Shared Photos on the iOS 16/17/18 version:
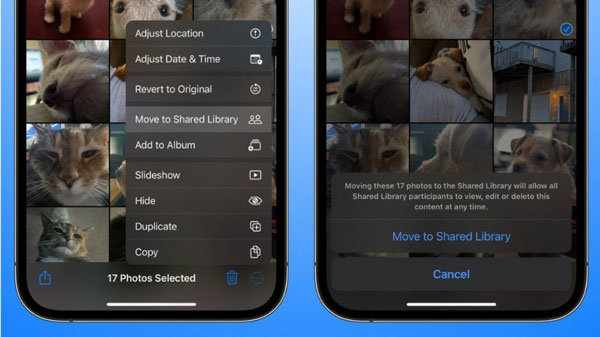
Step 1When in the Photos app, long press on a photo there is a Share option to support you in moving your photos from the Personal Library to the Shared Library. Every photo shown is the sole copy, so moving it from Personal to Shared will remove it from Personal, so keep that in mind.
Step 2The Personal Library will work as it did before. Any photo saved from an app, Safari, or anywhere on the device is sent to the Personal Library. Photos taken in third-party apps or imported from an SD card will also go to the Personal Library. There is no affection for the Personal Library.
Method 2: Add Shared Photos from the Camera Directly
If you think it is too troublesome to choose photos to add them to Shared Library. You can also change the settings to let your Camera app adds Shared Photos automatically on the basis of the iOS 16/17/18 version.
And here are the steps to add shared photos on iOS 16/17/18 from the Camera automatically:
Step 1Open the Settings app menu and tap Shared Library.
Step 2Then you can see the option Sharing from Camera, tap it to decide what automatic actions should be performed.
Step 3When you take photos with the Camera again, you will see there is a reminder that says Shared Library, which means the photo taken by the Camera will be added to Shared Library automatically.

Part 2: Can You Delete Shared Photos on iOS 16/17/18
Every participant in a Shared Library can delete photos. However, deleted photos will be sent to the Recently Deleted album. Only the person who initially added the photo can delete it permanently.
Even if a user gets kicked out from the Shared Library, their posted photos will remain. The photos can be sent to Recently Deleted, and they will take 30 days to disappear completely.
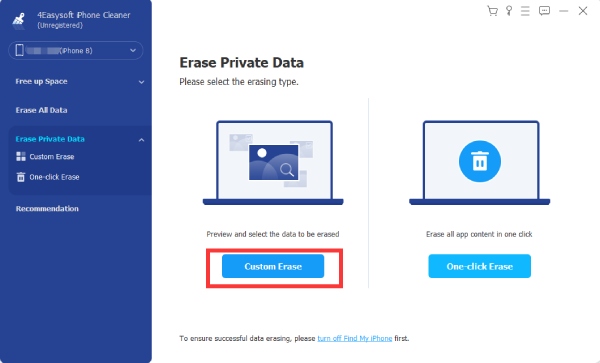
But there is an easy way to delete the shared photos instantly and permanently. You can use third-party software like 4Easysoft iPhone Cleaner to delete photos on your iPhone. This software could help you delete any files and data on your iPhone deeply without residual.
Scan deeply and delete all data from your iOS devices.
Provide 3 different erasing modes: Low, Medium, and High Levels to ensure delete the Shared photos on Library.
Erase your data on all Apple devices if you want to delete all photos including iCloud.
Give you a clear clean interface to avoid deleting other files accidentally.
100% Secure
100% Secure
Here are the steps to use 4Easysoft iPhone Cleaner to delete Shared Photos on iOS 16/17/18:
Step 1As first, please turn off Find My iPhone and click the Erase Private Data button. On the main interface, you can see two buttons. Click the Custom Erase button and just like other functions, it will start scanning your iPhone.
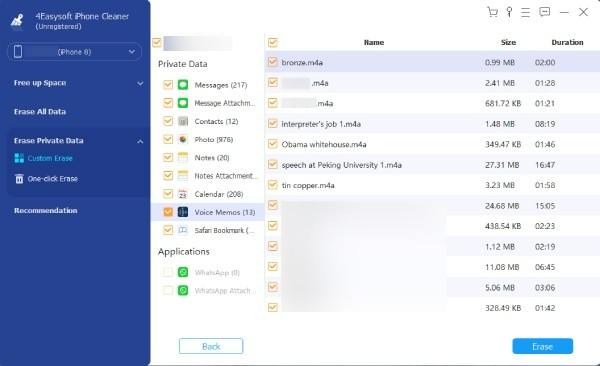
Step 2Once the scanning finishes, you will see all the private data on your iPhone along with the applications’ private data. Click the Photos button to see the photos on your iPhone, then decide which one you want to remove and click the checkbox beside the photo. Finally, click the Erase button to remove all.
In this way, you can delete the Shared Photos on iOS 16/17/18 thoroughly. And you can see the steps are very simple and easy.
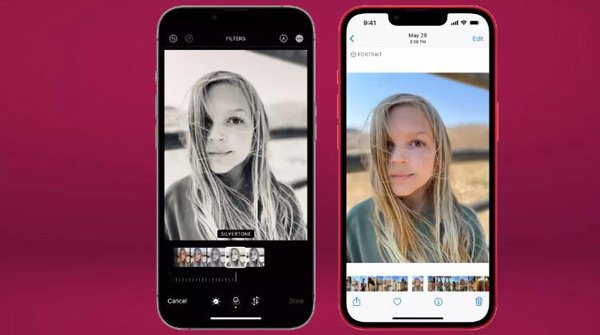
Part 3: Detailed Steps to Edit Shared Photos on iOS 16/17/18
If you want to edit Shared Photos on iOS 16/17/18 and don’t want to edit photos then add them to your Shared Library again, actually, you can edit them directly on the Shared Library.
That's not the case with iCloud Shared Photo Libraries, where everyone gets the right to edit a photo. And that's not just doing touch-up work - shared folder participants can edit captions, keywords and other metadata, too.
Further Reading
 How Long Will Take to Backup an iPhone: Here is Answer and Way to Speed it Up
Part 4: FAQs about Add Delete Edit Shared Photos on iOS 16/17/18
-
Why can't I see my shared Photos on my iPhone?
Please make sure you've turned on iCloud Shared Albums on your iPhone. Go to the Settings app and tap Photos from iCloud, then tap Shared Albums. You also need to make sure that iCloud Photos is enabled. Before getting photos and videos from shared albums on iPhone, you'll need to accept the Shared Album invite.
-
Do Shared albums take up storage?
Although shared albums are stored in iCloud, they don't count toward your iCloud storage. So, you don’t have to upgrade your iCloud storage if you are worried that Shared Photos will take up many spaces
-
How long do photos stay in the Shared album?
iCloud stores the photos that you upload to My Photo Stream for 30 days to give your devices plenty of time to connect to iCloud and download them.
Conclusion
After reading this guide, you must know how to add, delete, and edit Shared Photos on iOS 16/17/18. And if you want to delete the Shared Photo thoroughly and completely, the 4Easysoft iPhone Cleaner will be recommended to you to solve your trouble. You don’t have to worry about the photo residual ever again.
100% Secure
100% Secure