Record, edit, and share video from all sources.

How to Use Snipping Tool on Mac? 3 Methods and 5 More Apps

Posted by Ethan Brooke to Screenshot Jun 03, 2025
You might think you know your Mac, but beneath its sleek interface, do you know how to take screenshot quickly and annotate after? Forget hunting for third-party tools, as you can learn how to use the Snipping Tool on Mac to capture your screen instead. And on Mac, it is more than just the Print Screen key. Thus, today’s guide will show you the three powerful commands on how to use the Snipping Tool on Mac, and after that, more will be revealed!
Guide List
3 Different Commands to Use Snipping Tool on Mac Best 5 Snipping Tool-Like on Mac to Take Screenshots3 Different Commands to Use Snipping Tool on Mac
When it comes to capturing screenshots on Mac, your device offers Snipping Tools to easily snip parts of your screen. Learning how to use Snipping Tool on Mac comes with different commands that will let you take full-screen captures, specific regions, or even capture an active individual window. With these commands, you can quickly capture what you need without installing any third-party software.
Below, you will find three different commands to use Snipping Tool on Mac with ease:
1. How to Use Snipping Tool on Mac to Capture the Entire Screen: Command + Shift + 3
When you need to take a screenshot of everything that can be seen on your Mac screen, use these key combinations.
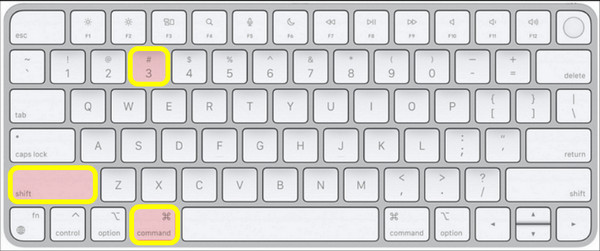
• On your keyboard, press the “Command + Shift + 3” keys, and then your Mac screen will flash quickly, making the screenshot happen. Locate the captured image saved as a file on your desktop.
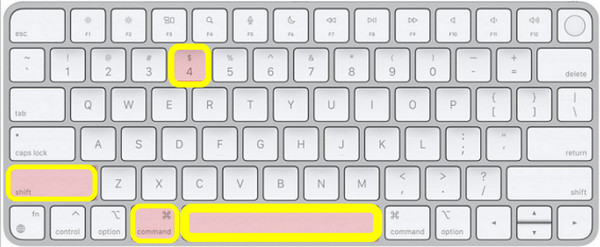
2. How to Use Snipping Tool on Mac to Capture a Selected Portion of Your Screen: Command + Shift + 4
If you ever need to select an area in a presentation, webpage, or any other content, following this command, you determine the region of your screen to capture.

• Once you press the “Command + Shift + 4” keys on your keyboard, your mouse cursor will turn into a “Crosshair” icon. Use this to drag and choose an area you wish to capture. Release the mouse button to take screenshots on Mac. The image is saved as a file on your Mac desktop automatically.
3. How to Use Snipping Tool on Mac to Capture a Specific Window: Command + Shift + 4 + Space
Suppose you wish to capture an entire window. With this combination, you can take capture of your selected window as a screenshot.
• Press the “Command + Shift + 4” keys once the window is opened already on your Mac screen. Then, press the “Spacebar” to transform your cursor into a “Camera” icon. Please hover it over the selected window, click on it, and the screenshot will be done. The captured image is saved on your Mac desktop.
Best 5 Snipping Tool-Like on Mac to Take Screenshots
Aside from learning the three commands to use Snipping Tool on Mac, there are also several third-party tools that offer more features other than screenshotting. With these tools, you can take the screenshot-taking process on Mac to the next level. Here are five of the best Snipping Tool-like apps for Mac:
1. 4Easysoft Mac Screen Recorder
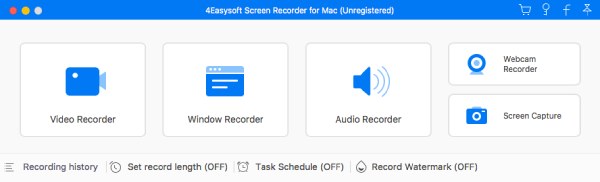
An all-in-one Snipping Tool alternative on Mac called 4Easysoft Mac Screen Recorder is designed not only for taking screenshots but also for screen recording. With its power, you can enjoy a seamless experience for both video and image captures, as well as audio and webcam, making it excellent for any recording tasks! It offers an option for capturing specific areas of your screen with just a few clicks, e.g., entire, window, region, and scrolling. Additionally, you can have complete control over the screenshot settings, altering the quality, format, and more to your liking.
Capture the screen fully, select the area, window, and scroll.
Allow you to annotate and edit captured images before saving.
Customizable hotkeys for taking screenshots and recording.
During recording, you can take screenshots without losing quality.
100% Secure
100% Secure
- Pros
- Can save captured images in JPEG, PNG, etc.
- Offer annotations for both image and video.
- Recording and screenshotting in one tool.
- Cons
- Advanced features are only available in the paid version.
2. CleanShot X
Up next: CleanShotX is a powerful Snipping Tool alternative for Mac, featuring a sleek and minimalistic main screen. Using this tool, you can ensure a high-quality screenshot as well as recording with ease. It also comes with an in-app editor for annotations and even a scroll capture for long web pages. Moreover, it has support for hiding desktop icons and recording GIFs, making it one of the excellent options for professionals.
- Pros
- It is user-friendly with its organized interface.
- Provide cloud storage options for quick sharing.
- Highly customizable screenshot options.
- Cons
- No advanced image management features are offered.
- Offer no free version to try the features first before purchasing.
3. Monosnap
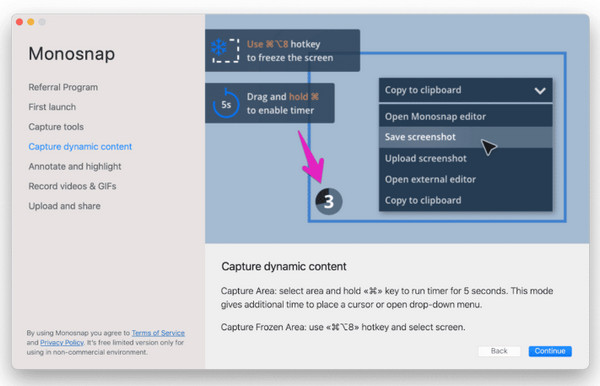
Monosnap is another popular screenshot tool for Mac that features a collection of capabilities. It lets you capture screenshots of a selected area, an active window, or the entire screen without compromising on quality. You can easily annotate images, add arrows or text, and even blur sensitive content. In addition to that, this Snipping Tool alternative integrates well with cloud services such as Dropbox and Google Drive, allowing for quick upload and share, aside from its advanced screenshot functionality.
- Pros
- Beyond screenshotting, it can record your screen.
- Can capture webcam footage.
- Include editing functionalities.
- Cons
- Its interface seems cluttered to some users.
- Its editing tools are basic compared to other applications.
4. Textsniper
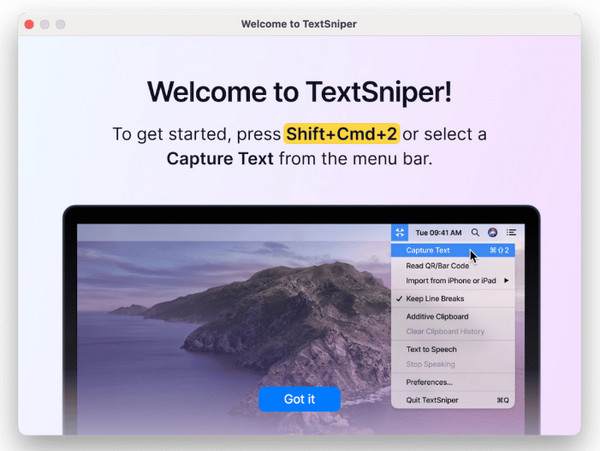
On the other hand, Textsniper is a unique Snipping Tool alternative that is ideal if you need to capture text from documents that cannot be edited. This application has Optical Character Recognition that recognizes text from any image and copies it straight to your clipboard. If you ever need a simple and quick grabbing of text from the image, alongside basic screenshot functions, go with Textsniper.
- Pros
- It can be quickly accessed via a hotkey.
- Have excellent OCR technology for text extraction.
- Great for capturing text from non-editable docs.
- Cons
- Focus only on text extraction.
- Do not have complete screenshot capabilities.
5. Xnapper
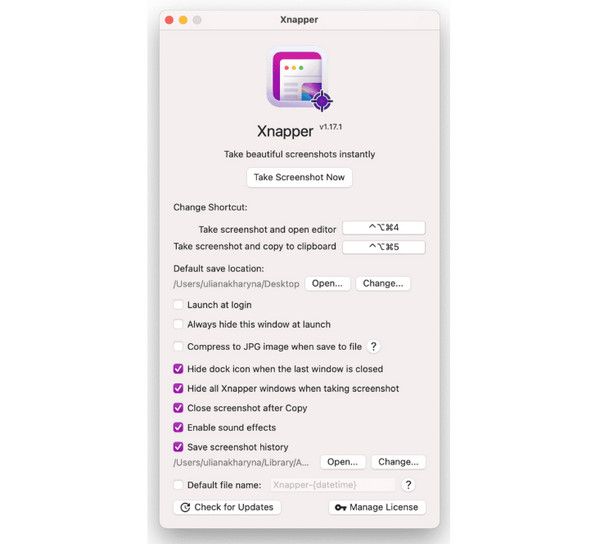
Last but not least, Xnapper is a powerful tool that you can install instead of using Snipping Tool on Mac, made with speed and efficiency. It is specifically perfect for those who want to always capture content for presentations, social media, and other projects. Furthermore, Xnapper has the ability to capture in full-screen or specified regions, and it works with a built-in editor that boasts essential tools such as cropping, drawing, and adding text. It also supports cloud sharing, making it easy for you to share your captured images across multiple platforms instantly.
- Pros
- Lightweight and fast screenshotting tool for Mac.
- Include a built-in editor with drawing and text options.
- Customizable hotkeys for a quicker workflow.
- Cons
- No advanced features compared to other rivals.
- Often receive reports of app crashing when taking large screenshots.
Conclusion
With Mac's provided built-in commands, you can quickly understand how to use Snipping Tool on Mac, capturing screenshots whether full-screen, a specific part, or a selected window. Aside from the Mac screenshot keyboard shortcuts, you can also consider using Snipping Tool-like on Mac for more features such as editing, customizable options, etc. Out of them, a robust solution that goes beyond screenshotting, 4Easysoft Mac Screen Recorder is the best alternative. This versatile tool not only lets you capture your screen but also record it with high-quality video and audio. Whether you want a quick image, a picture of the entire webpage, or more, the program offers everything you need.
100% Secure
100% Secure