Record, edit, and share video from all sources.

How to Use VLC to Take Screenshot of Your Favorite Movies: 4 Ways

Posted by Paula Pailaga to Screenshot Jun 05, 2023
Watching movies in VLC Media Player and thinking of capturing a scene with your favorite lines? Besides being a famous media player, VLC offers more than you think, and one of those is the snapshot feature. While playing videos, you can do VLC take screenshot, and save those captured images on your computer directly. The problem is that some might not know how it works, so this post came to save you. Here, there are four ways given to take VLC screenshot on Windows and macOS.
Guide List
Part 1: How to Use VLC to Take Screenshots of Videos on Windows/Mac Part 2: The Best Alternative Way to Take VLC Screenshots Easily Part 3: FAQs about How to Use VLC to Take ScreenshotsPart 1: How to Use VLC to Take Screenshots of Videos on Windows/Mac
The VLC Media Player is by far one of the most used media players performing so many functions you won’t see in others. Did you know there are three built-in ways to take VLC screenshot on Windows and Mac? You will learn them all here! But first, you have to download the VLC Media Player on your computer. If ready, here’s how to take a VLC screenshot.
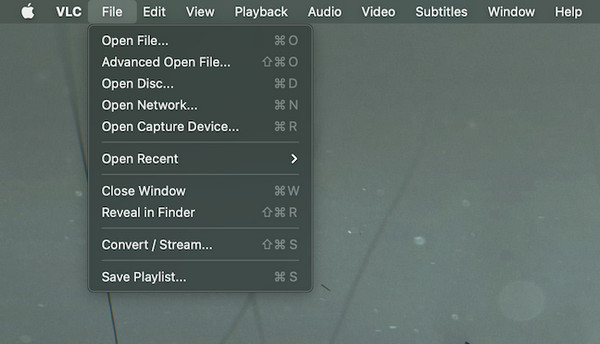
Step 1Open you VLC Media Player on Windows or Mac. Afterward, open the file you wish to capture. For Windows, hit the Media button to see options like Open File. Meanwhile, for Mac, you will see it as a File from the above menu.
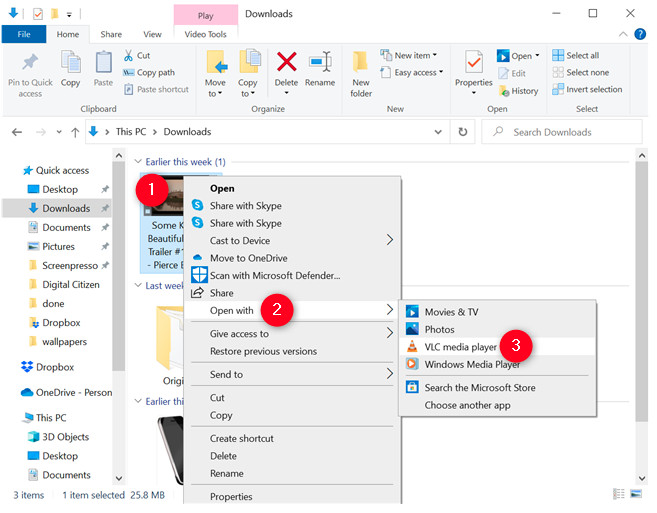
Step 2After selecting the video file, click the Open button. Or, you can go directly to the video and right-click it to locate the Open With to reveal media players, like VLC.
Step 3As said, there are three ways to take VLC screenshot on Windows and Mac. All of them will be discussed; select the appropriate one for you.
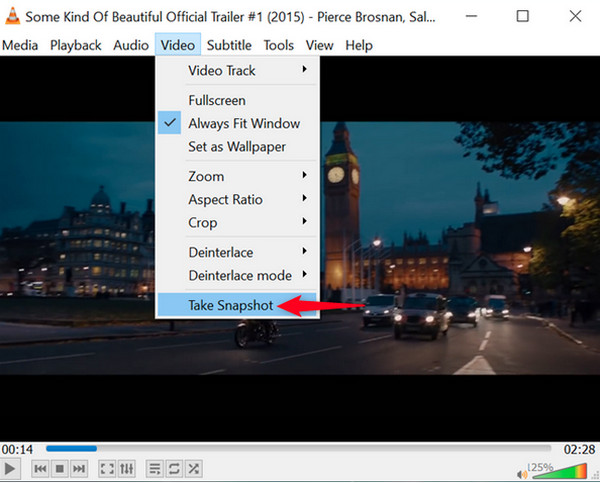
From the Video menu
On your Windows PC, click the Video from the above menu, then locate the Take Snapshot option in the drop-down list. Or, right-click to open the menu easily.
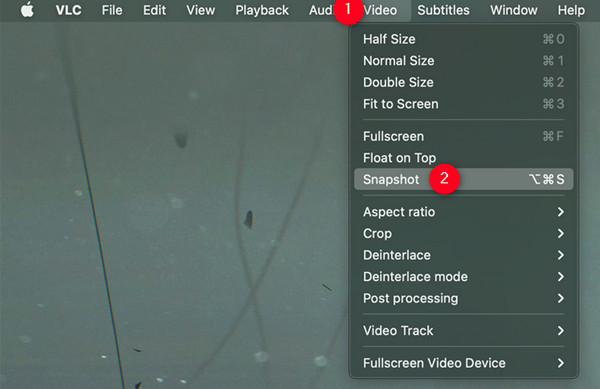
For Mac, on the Video menu, you will see a Snapshot option to take VLC screenshot. You can also right-click to see the screenshot feature.
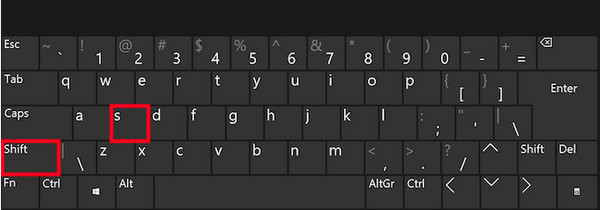
Through the shortcuts
For Windows users, press the Shift + S keys to take VLC screenshot.
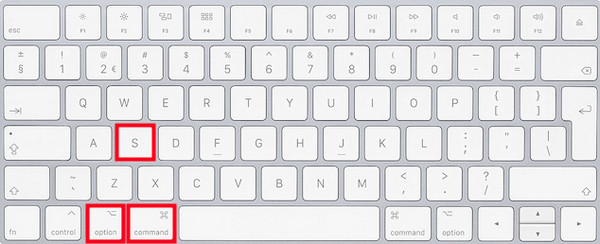
On Mac, press the Option + Command + S keys.
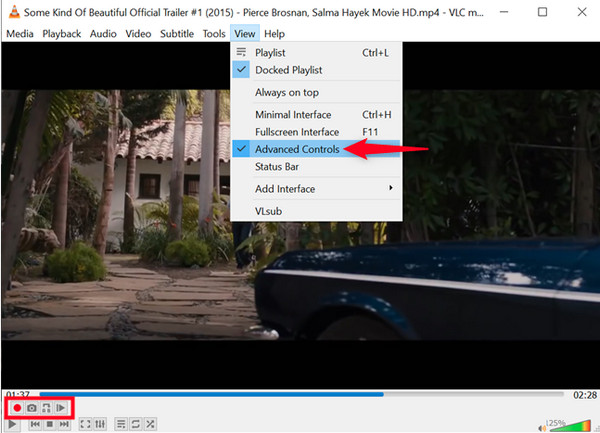
From the bottom button (Windows only)
For Windows 10 users, you can easily take VLC screenshot using the additional buttons below. To do this, go to the View menu, then enable the Advanced Controls option for the below buttons to appear, and this includes the Snapshot feature. By simply clicking it, you will be able to take VLC screenshot while watching movies.
Every time you’re done taking screenshots, a preview of each will appear in the top-left corner. And those are saved to their default location, the Pictures folder, for both Windows and Mac.
Part 2: The Best Alternative Way to Take VLC Screenshots Easily
Without a doubt, those said three built-in ways to take VLC screenshot on Windows and Mac is effective and convenient. However, if you want more than what VLC Media Player offers to take a screenshot while watching movies, a powerful program like 4Easysoft Screen Recorder is definitely for you! Besides recording any screen activities, with its Snapshot tool, you can quickly take a screenshot at any time. You can access it as a separate tool or open it in the custom hotkeys below that you will see when recording the screen. More than that, you can crop and make additional edits using the drawing tools. Providing high quality when exported, you will surely enjoy taking VLC screenshots using 4Easysoft.

Snapshot tool will assist you in taking scrolling screenshots quickly of any selected part of your computer screen.
Equipped with custom hotkeys, including the Snapshot tool, letting you capture while recording the screen without opening it.
A wide range of formats is provided, allowing you to have more options to export captured screenshots, including the GIF format.
Through the drawing tools, you can add text, arrows, shapes, etc., and make edits to your screenshots.
100% Secure
100% Secure
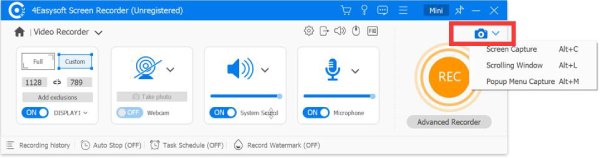
Step 1Get the 4Easysoft Screen Recorder and launch it. On the main interface, among other options, hit the Snapshot button in the right side corner.
Of course, after you launch it, you can use the hotkeys to take screenshot of your VLC videos at any time when watching.
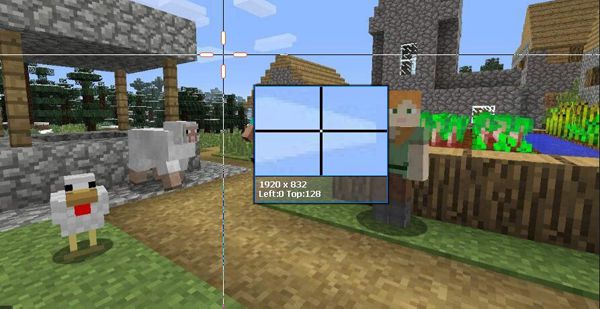
Step 2Your mouse will then change into a cursor move. Left-click, then drag it to select the capture area. Note that you can still pull the borderlines to change the size.
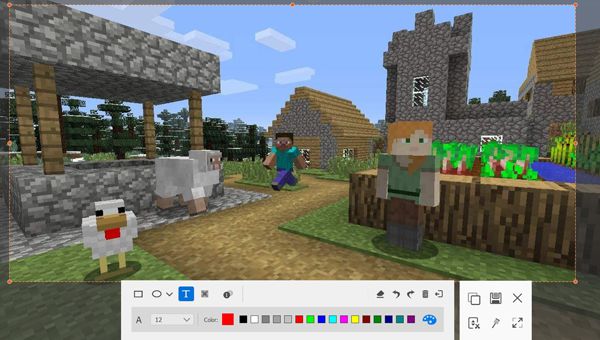
Step 3Before saving, you can edit your captured VLC screenshot with the toolbox below. You can add shapes, lines, texts, and other annotations. If satisfied with how your screenshot turns out, hit the Save button with a floppy disk icon.
Part 3: FAQs about How to Use VLC to Take Screenshots
-
How to change the default location of captured VLC screenshot?
For Windows users, open the Preferences menu or press Ctrl + P keys. While on Mac, you can press the Command + Comma (,) keys. Go to the Video tab, then navigate to Video Snapshots. Hit the Browse button to select a new location where you want to save VLC screenshots.
-
Can I change the set shortcuts hotkeys to take VLC screenshot?
You can click the Tools or the VLC option from the above menu, depending if you’re using Windows or macOS. Click Preferences to find the Hotkeys tab. Double-click the Take Videos snapshot to choose a new combination of keys to take screenshots in VLC Media Player.
-
What format does VLC use to capture screenshots?
If saving screenshots in VLC has a default folder, it goes the same with the format. The default format for the VLC screenshot is PNG on both Windows and Mac. Luckily, the default format can also be changed to JPEG, along with the file location and name in the Preferences menu in the Tools tab.
Conclusion
That’s all about taking a VLC screenshot. You learned the easy ways to accomplish the task here without taking much of your time and doing complicated ones. To ensure you’ve done the screenshot task successfully, you could wait for the preview of the photo on the window. But, there’s an easy way to do this that is much more convenient, wherein you can do edits when done capturing with the help of 4Easysoft Screen Recorder. The program will help you take VLC screenshot with its Snapshot tool and do more with its superb features.
100% Secure
100% Secure