Record, edit, and share video from all sources.

Unlocking How to Print Screen on Mac (Hotkeys and More)

Posted by Ethan Brooke to Screenshot Jun 03, 2025
Switching from Windows to Mac can feel like learning a different language, such as how to print screen on Mac. Have you been looking for the Print Screen key on your Mac keyboard? If so, you will discover soon that there’s a more refined way to capture your entire screen, window, or region on your Mac. This post will show you how to do print screen on Mac, giving you crucial hotkeys and tools available. Take a perfect screenshot any time on your Mac now!
Guide List
Use Corresponding Hotkeys to Print Screen on Mac How to Print Screen on Mac through Screenshot App Grab Utility to Print Screen on Older Mac Computers Best Way to Capture on Mac with Customized Print Screen Key Bonus Tips to Print Screen Windows System on Mac ComputerUse Corresponding Hotkeys to Print Screen on Mac
When it comes to print screen on Mac, the process is just as straightforward as on Windows system, but instead of the Print Screen key, it relies on a combination of hotkeys. Mac has a bunch of hotkeys that can capture screenshots on screen in different ways. Below are the top three methods used:
1.How to Print Screen on Mac to Capture the Entire Screen
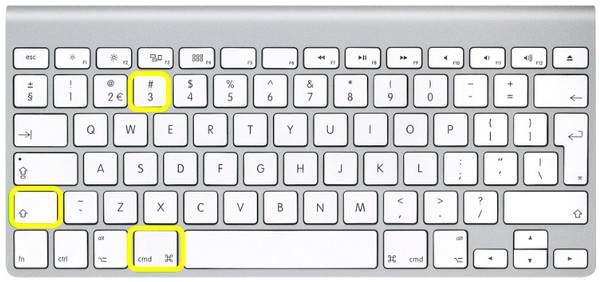
• Press the “Command + Shift + 3” keys, capturing the entire screen, and the image is preserved on your desktop as a PNG file.
• If you wish to easily paste it on any image editor or messaging platform, use the “Command + Control + Shift + 3” key combination.
2.How to Print Screen on Mac to Capture the Selected Area
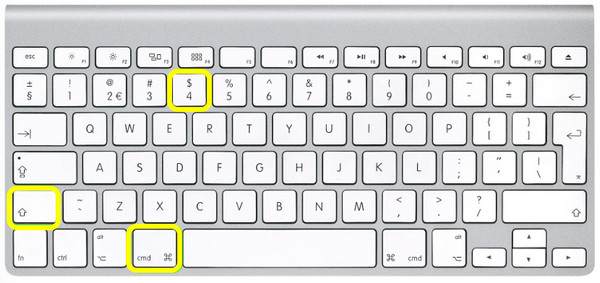
• Once you press the “Command + Shift + 4” keys, the cursor will transform into a “Crosshair”; click on it and drag to choose the portion you want to capture. Upon releasing the mouse button, the image is stored to your Mac desktop as a PNG file.
• To easily copy and paste it, press the “Command + Control + Shift + 4” keys, then select the area you want to capture. The image is copied to a clipboard and can easily be pasted to another app.
3.How to Print Screen on Mac to Capture the Particular Window
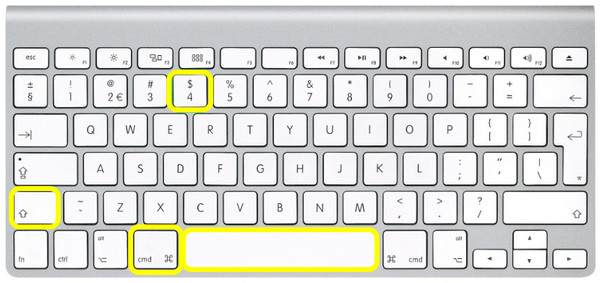
• Use the “Command + Shift + 4” keys, changing the cursor to a “Crosshair” icon. Next, press the “Space bar” after, and then it will change to a “Camera” tool. Hover your mouse cursor over the window you want to take a screenshot of, then click. The image is saved to your desktop as a PNG file.
• To copy it, press the “Command + Control “Shift + 4” keys, then press the “Space bar”. Move the cursor over the window you wish to capture. Upon clicking the mouse button, paste the image into an image editor or other app.
How to Print Screen on Mac through Screenshot App
Those said hotkeys are indeed a quick and efficient way to print screen on Mac. But if you opt for more options like settings timers or more saving preferences, you can use the built-in Screenshot app on Mac. It features a user-friendly interface for screenshots and recordings, and here’s how you can use it:
Step 1Start by pressing the “Command + Shift + 5” keys to activate the Screenshot app. A toolbar below will appear with multiple options for taking screenshots.
Optionally, you can click “Options” to choose the location of the captured image before getting started.
Step 2The first icon is for taking screenshot of the entire screen, the following icon is for capturing the selected window, and the third icon is for capturing a specific area. Select the needed capturing method.
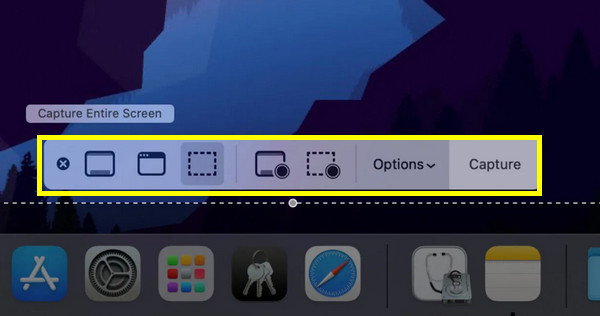
Step 3Once you have chosen the screenshot method, click the “Capture” button or press” Enter” to successfully take the screenshot.
Grab Utility to Print Screen on Older Mac Computers
How about for older Mac computers? Luckily, macOS used to include a built-in Grab application for taking screenshots. The Grab utility lets you understand how to print screen on Mac in older macOS versions before macOS Mojave 10.14. Here’s how it works to capture your Mac screen in various modes:
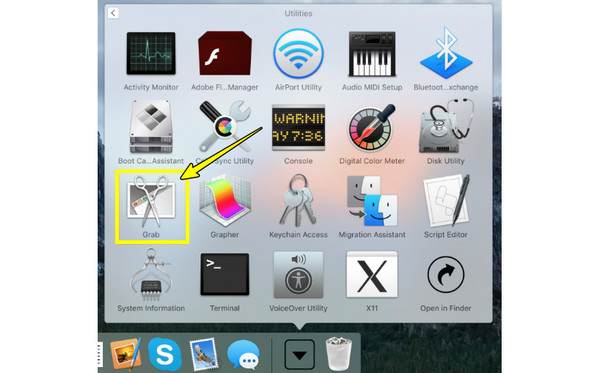
Step 1Launch the Grab app by going to “Applications” then “Utilities”. After that, head to the “Capture” menu to see four options you can choose from: Selection, Window, Screen, and Timed Screen.
Step 2Upon choosing the type of capture you want, follow the on-screen instructions to successfully take a screenshot on Mac. Next, grab will open the image in a new window for viewing. Go to the “File” menu and click “Save”.
Best Way to Capture on Mac with Customized Print Screen Key
Though built-in Mac screenshot shortcuts and tools like Screenshot and Grab are easy to use, the 4Easysoft Mac Screen Recorder offers a more robust and customizable solution to learn how to print screen on Mac. With this program, you can quickly assign customized hotkeys for screenshots as well as recordings, making the entire operation faster without closing any window. You can capture entire screens, specific regions, active windows, or even scrollable areas, making it perfect for saving detailed content like presentations, web pages, favorite show moments, or gameplay. In addition to taking screenshots on Mac, the tools permit you to capture while recording, too, with just one click of a button.

Set your own hotkeys for screenshots and recordings.
Multiple capture modes are available, and all can be done with ease.
Capture high-quality screenshots and save them in PNG or JPG.
Built-in editing tools for enhancing your screenshots before saving.
100% Secure
100% Secure
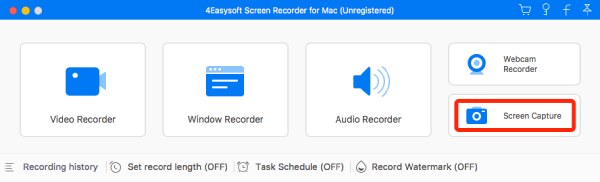
Step 1Launch the 4Easysoft Mac Screen Recorder on your Mac screen. Then, from the main screen with various recording modes, select the “Screen Capture” button on the right side.
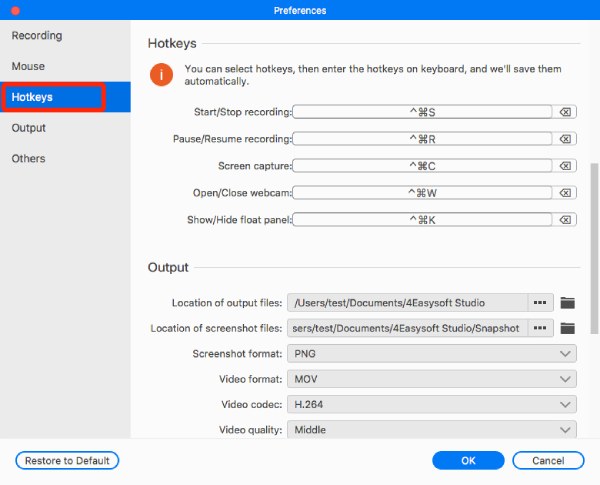
Note: Before getting started, you can go to the software icon from the menu and select “Preferences”. Here, head to the “Hotkeys” tab to change the set hotkeys for Screen capture, Start/Stop recording, and more.
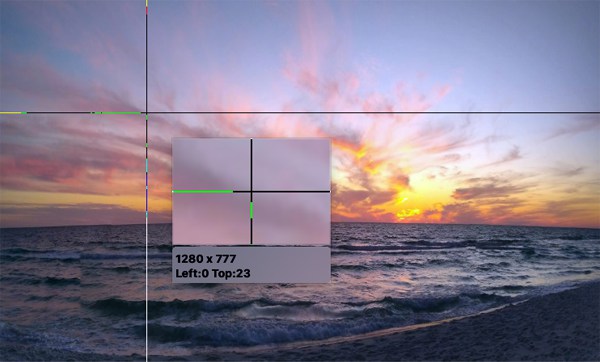
Step 2Upon clicking the “Screen Capture”, your mouse will change into a cursor move, left-click, then drag it to determine the capture area. Once done, you can pull the borderlines to change the capture size and print screen on Mac.
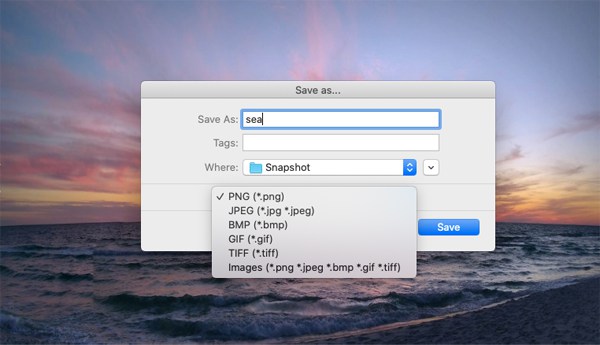
Step 3After all that, you can edit your screenshots with shapes, texts, lines, callouts, and more you can see in the toolbox. Later, click the “Save” button, and then in the export pop-up menu, you can choose the format and where to save the image. Finally, click the “Save” button.
Bonus Tips to Print Screen Windows System on Mac Computer
Are you using a Mac and need to print screen Windows system running through Boot Camp? If so, there’s a great tip available on how to achieve the screenshot efficiently. Here’s the tip you can consider following to help you print screen Windows from your Mac:
• For Boot Camp, the “Fn + Shift + F11” keys can be used instead of the Print Screen key, and this key combination can capture the entire screen. Meanwhile, to capture a window, you can use the “Fn + Option + Shift + F11” keys.
Conclusion
How to print screen key on Mac? As you’ve learned, taking screenshots on Mac is simple with the built-in macOS hotkeys and tools. By masterminding these shortcuts and the Screenshot app, you can efficiently capture your screen. But, if you opt for a more tailored screenshot experience, particularly if you prefer a customized Print Screen key, use the 4Easysoft Mac Screen Recorder. With its recording and screen capture solution, together with customizable options and editing tools, you can take your screenshot to the next level beyond the standard macOS options.
100% Secure
100% Secure