Reliable video converter, editor, and compressor for daily tasks.

3 Practical Ways to Remove Audio from Video (When to Do It)

Posted by Paula Pailaga to Edit Video/Audio Dec 25, 2025
Knowing how to remove audio from video is just as important as editing the visuals. Whether you're dealing with copyrighted music, background noise, or preparing a clip, muting audio helps make your video more professional. Therefore, this post shows you three practical ways to save a video without sound, from simple online to desktop tools. Also, explain when it's appropriate to remove audio, so you'll know the right choice for your project.
Guide List
When Is It Appropriate to Remove Music from a Video? How to Cleanly Remove Music from Videos Using Powerful Tools Kapwing Online Converter: Mute or Export Silent Videos Remove Music from Videos on iPhone using iMovieWhen Is It Appropriate to Remove Music from a Video?
Knowing when the right time is to mute audio help you avoid copyright issues, enhance clarity, and make sure your video is suitable for its intended audience.
Here are some everyday situations when it is appropriate to remove music from video:
• Copyright concerns. The video may have copyrighted music, and you don't have permission to use it, especially when uploading it online.
• Poor audio quality. The music is distorted and of low quality, which makes the content poor.
• Distracting background music. The music may be too loud, which takes the audience's attention away from the visuals.
• Professional or business use. Music may be unnecessary for formal content.
• Adding new audio. You're planning to replace the music with a voice-over or a different soundtrack. (Get free background music here.)
• Silent playback formats. The video is made for platforms where sound is usually muted.
How to Cleanly Remove Music from Videos Using Powerful Tools
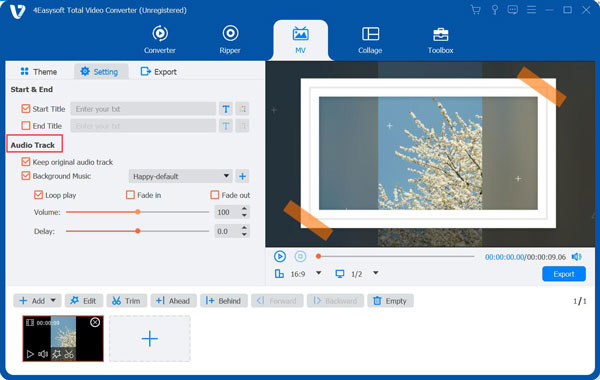
The best place to start to remove background music from video is a dedicated desktop tool named 4Easysoft Total Video Converter. This excellent video converter and editor allows you to completely mute or remove audio tracks without affecting video quality. Moreover, you can add external audio tracks or background music into this muted video. Later, you can export it with 600+ formats and pre-made profiles. So, you can save, play, edit, and share this video without limits.

Extract, remove, or change audio from video with just one click.
Fast conversion speed with hardware acceleration, no longer waiting time.
Preserve original video quality up to 4K resolution, giving you excellent results.
Built-in video editor for trimming, applying effects, filters, and more.
100% Secure
100% Secure
Step 1Open 4Easysoft Total Video Converter. From its main screen, click the "Add Files" button at the top-left corner to add the video you wish to remove audio from.
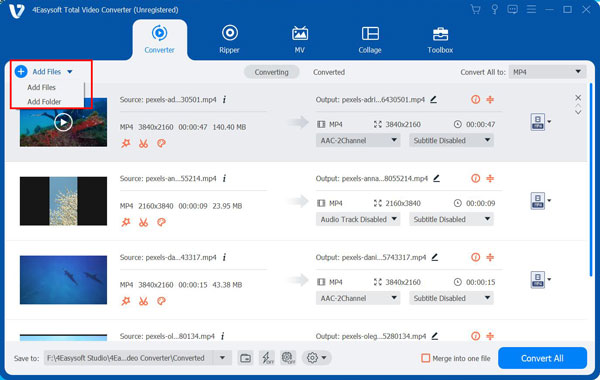
Step 2After that, navigate to the "Audio Track" menu and pick "Disable Audio" to completely remove the music track. Otherwise, you can click the "Edit" button, head to the "Audio" tab, and adjust the volume to "zero". You can play the video to confirm the music has been removed.
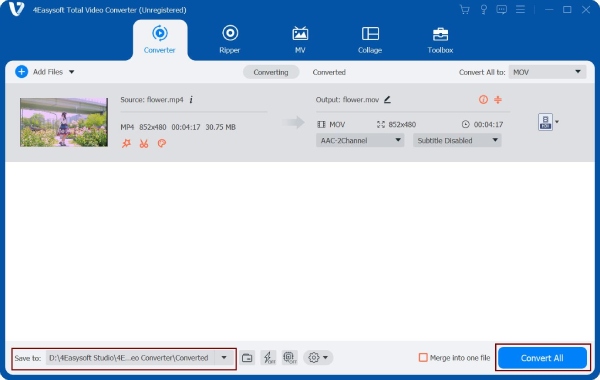
Step 3Click the "Format" dropdown menu to choose your desired video format, and adjust output settings there. Later, set a destination folder, then click the "Convert All" button.
100% Secure
100% Secure
Kapwing Online Converter: Mute or Export Silent Videos
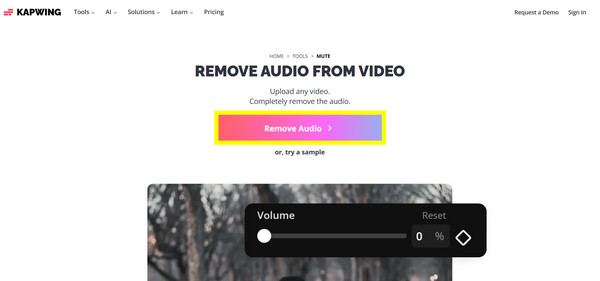
For anyone who wants a browser-based solution to remove sound from video, an online audio remover is a quick and accessible alternative. Kapwing is a famous online editor that lets you remove background noise from video or export videos without any sound. This solution is useful when you don't want to install any software and need a quick edit for a social media post.
Step 1Open Kapwing in your chosen web browser, and upload your video file by clicking the "Remove Audio" button or paste the video URL into the page.
Step 2Select the video on the timeline, then click "Audio" (Volume), then mute the sound.
Step 3Watch the silent video, and export it to your computer.
Remove Music from Videos on iPhone using iMovie
If you wish to edit directly on your iPhone, Apple fortunately has built-in tools to eliminate unwanted audio tracks from your video conveniently, and that is iMovie. The app is free, which lets you remove or mute background music without any cost, as well as let you enjoy basic editing features like trimming and transitions. While it has no advanced audio separation tools, it works more than enough for quick edits on the go.
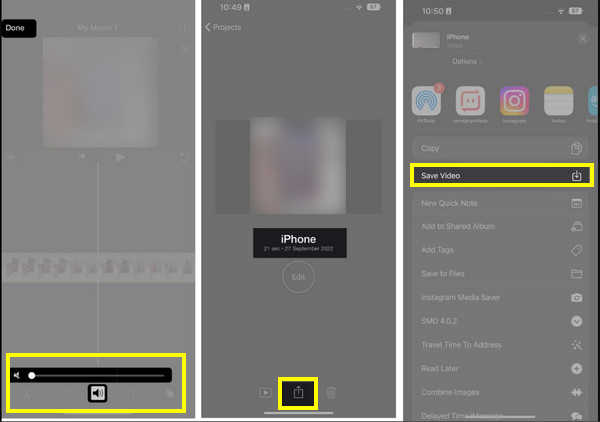
Step 1Launch iMovie on your iPhone and create a new project. Add the video that contains the music you wish to remove.
Step 2Start by tapping the video clip in the timeline; select the "Volume" option and drag the slider to zero.
Step 3Preview the video to confirm the music is removed.
Step 4Export and save the video to your Photos app's Library.
Conclusion
A simple yet powerful way to improve clarity is to mute videos and remove unwanted audio. From online tools to built-in solutions, each way mentioned here serves a different purpose depending on your workflow and device. Also, understanding when to remove audio helps ensure your videos remain professional and perfect for their audience. For a most reliable and flexible option to do the task, 4Easysoft Total Video Converter is an excellent choice. This tool allows you to cleanly remove audio while preserving original video quality. To get consistent results always, this all-in-one solution is your friend.
100% Secure
100% Secure