Record, edit, and share video from all sources.

Detailed Guide for Educators and Students to Record Lectures

Posted by Ethan Brooke to Record Video Jun 09, 2025
The record of lectures can change the game for teachers and students, providing the best of both worlds: a customized, engaging alternative to pre-authorized recorded online content. Classroom lectures, tutorials, and preparation of study materials depend mainly on properly using hardware and software tools. This article will provide you with the basic knowledge to get started to record lectures easily, including the most necessary hardware and software requirements, and guidance on using popular tools like 4Easysoft, QuickTime, and OBS. There are more helpful hints to make your recordings sound precise, professional, and impactful so you can deliver content that resonates with the audience.
Guide List
Hardware and Software Requirements for Recording Lectures Step-by-Step Guide to Recording Lectures Using Popular Software Tips for Recording High-Quality LecturesHardware and Software Requirements for Recording Lectures
The correct hardware and software combination is required to produce polished and superior lecture recordings. Below is a summary of the necessary tools:
Hardware Requirements:
1. Microphone:
• A good microphone is essential for record lectures with crystal-clear sound. Lapel microphones are options for hands-free recording or USB microphones (like the Blue Yeti). Avoid using the microphones that come with your laptop because they frequently pick up background noise.
2. External or webcam:
• Attach an external camera or HD webcam for better visuals with video. Ensure proper lighting and framing for a slick, professional quality.
3. Laptop or computer:
• The device should have sufficient processing and storage capacity to handle lecture recording and editing assignments. Ensure that the computer meets the minimum needs for the recording program you desire to use.
4. Headphones:
• Put on headphones so that echo or feedback won't become an issue, and be able to monitor sound quality during recording.
Software Requirements:
1. Software for Screen Recording:
• Popular tools for recording lectures include OBS Studio, QuickTime Player (for Mac), and 4Easysoft Screen Recorder. With these apps, you may simultaneously record your screen, webcam, and audio.
2. Tools for Audio Editing:
• Audio quality can be improved, background noise can be eliminated, and volume levels can be changed with software such as Audacity.
3. Software for Video Editing:
• You may improve, edit, and trim your recordings using programs like iMovie (for Mac), Camtasia, or Adobe Premiere Pro.
4. Tools for Transcription:
• Consider using apps like Otter.ai or Rev, which offer lecture recording apps with transcription capabilities, if you require transcriptions.
Investing in the proper hardware and software will enable you to produce precise, professional, engaging lecture recordings that meet your needs. Whether you’re recording for educational purposes or professional presentations, these tools will help you achieve the best way to record online lectures.
Step-by-Step Guide to Recording Lectures Using Popular Software
With the right tools, recording lectures doesn’t need to be complex. From a casual user to an advanced tool, the alternatives of 4Easysoft Screen Recorder, QuickTime Player, and OBS Studio will assist in making lecture recording professional. We will guide you on employing these tools to easily record your lectures, covering the best way to record online lectures possible.
1. Using 4Easysoft Screen Recorder
The 4Easysoft Screen Recorder is an intuitive tool suitable for beginners and professionals to capture your lectures. You can also simultaneously record your screen, webcam, and audio, so it’s perfect for lecture recording.

Record lectures using high-quality HD screens, webcams, and audio recordings for professional-quality lectures.
Allow you to record your screen, webcam, or audio to work for various lectures.
Let users change the video resolution, frame rate, and audio sources for high-quality recording.
Allow users to specify when a recording begins and ends, a beneficial feature for scheduled lectures or presentations.
100% Secure
100% Secure
How to Use 4Easysoft to Record Lectures:
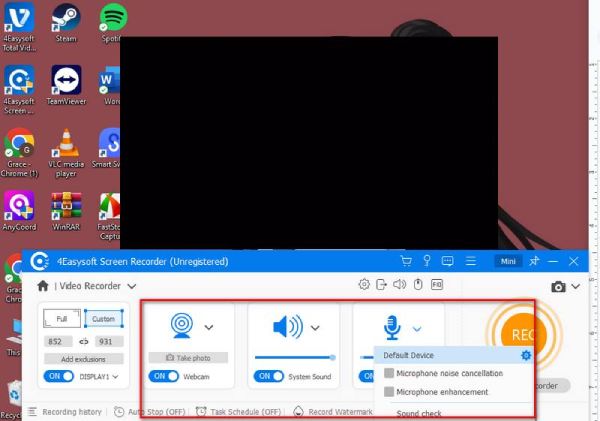
Step 1Install the software by downloading it and following the installation steps. Open the program and select the recording mode (e.g., screen recording, webcam recording, or both).
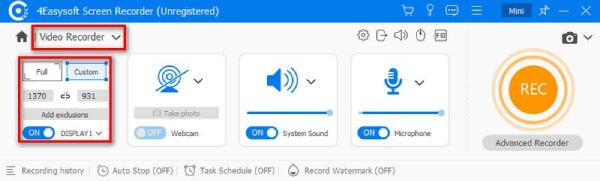
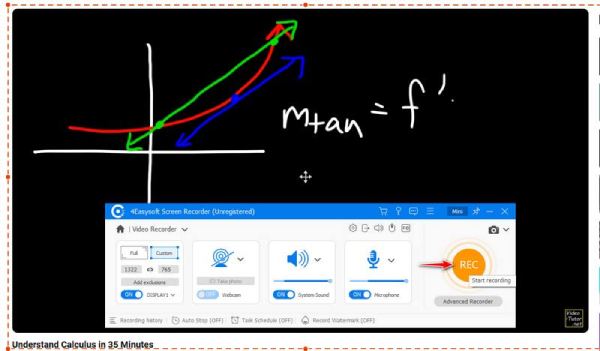
Step 2Configure the audio source (microphone) and video quality (resolution, frame rate) from the "Preferences" settings. Then, click the "Record" button to record lectures.
Step 3Finally, click the same button to stop. After you finish, you can edit the recordings as you like and click the "Save" button to store your recording in the format you want.
2. Using QuickTime Player (for Mac Users)
QuickTime Player is free on Mac, allowing a simple and thoroughly blessed recording of lectures. While it doesn’t have advanced features like a record lectures app with transcription, it’s a reliable option for basic lecture recording.
How to Use QuickTime to Record Lectures:
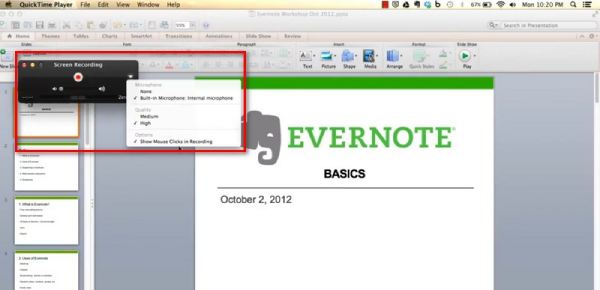
• Choose "File" and then "New Screen Recording" for screen capture or "New Movie Recording" for webcam recording.
• Click the arrow next to the record button to select your microphone and camera inputs. In this way, you can use QuickTime to record screen with internal audio.
• Click the "Record" button and start your lecture. When you've finished, click on the stop button in the Menu Bar.
• QuickTime will then automatically save your lecture recording, which you can edit or share.
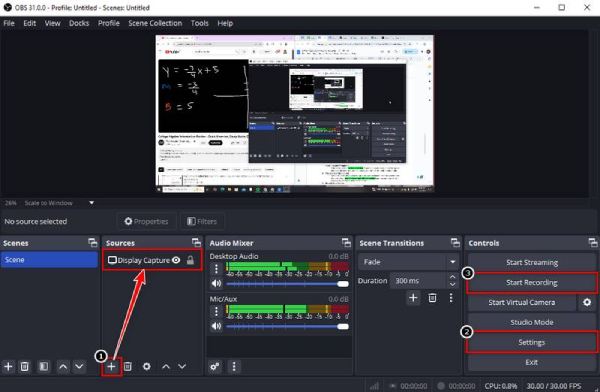
3. Using OBS Studio (Open Broadcaster Software)
OBS Studio is an open-source video recording and streaming software that can produce high-quality video content. Its flexibility and refined functionalities make it the best course-lecture recording tool. It also provides a schedule recording to record any lectures even when you are away.
How to Use OBS to Record Lectures:
• Create a new scene and add sources like screen capture, webcam, and microphone audio.
• Go to "Settings" to adjust video resolution, bitrate, and audio levels.
• Click "Start Recording" to begin. Use the "Stop Recording" button when finished.
• OBS saves recordings in your chosen location, where you can edit or export them.
You can create high-quality lecture recordings tailored to your needs by mastering these tools. Whether using 4Easysoft for simplicity, QuickTime for Mac convenience, or OBS for advanced customization, these step-by-step guides will help you find the best way to record online lectures.
Tips for Recording High-Quality Lectures
Producing professional and engaging lecture recordings requires more than the right tools; it is about setup and delivery. Here are several realistic suggestions to make sure your recordings are clear, polished, and valuable while bringing you closer to nailing the process of recording online lectures:
1. Invest in a Good Microphone:
• Clear audio is key to lecture recordings. A quality microphone minimizes background noise and delivers a crisp sound, ensuring your voice is clear and understandable.
2. Choose a Quiet Environment:
• Record in a quiet, distraction-free space to avoid interruptions and background noise. If you’re using a record lectures app with transcription, quiet surroundings will also improve the exactness of the transcriptions.
3. Use a Script or Outline:
• Composing a script or an outline will help you stay organized. Organizing your lecture will also ensure that you do not have prolonged pauses, voice repetitions, or off-topic rambles, thus keeping their attention while recording. If you are wondering how to record lectures in Google Docs, use it to write up your script or outline for better organization.
4. Record in High Resolution:
• Set your recording software to capture video in at least 1080p resolution for clear and professional visuals. This is especially important if you’re sharing slides or demonstrating software.
5. Edit Your Recording:
• Cut unnecessary parts, remove background noise, and enhance audio levels using editing software.
Conclusion
Recording your lectures is an excellent option for personalized, engaging, high-quality content. You could produce professional-quality recordings with the right equipment, software, and presentation techniques. 4Easysoft Screen Recorder is ideal for the tools discussed due to its user-friendly interface, flexible recording modes, and high-quality output. While programs like QuickTime and OBS do a great job, 4Easysoft provides a smooth experience to beginners and professionals alike, which is all right for those needing advanced features like a record lectures app with transcription. Pairing 4Easysoft with dedicated transcription tools can streamline your workflow, giving you the ultimate solution for recording lectures.
100% Secure
100% Secure