Delete duplicates and free up storage on iPhone flexibly.

iPad Clear Cache in 4 Efficient Methods [Quick and Easy]

Posted by Aira Lesly Escoto to iOS Cleaner Jun 11, 2025
iPad keeps some memory space to store data you have recently used/visited. These data could be images, temp files, and more. Although it seems important, you need to delete the cache on the iPad. Why? That is because getting too much cache from apps/browsers can consume a lot of space in your storage. That can make your iPad sluggish or misbehaving in some ways. Thankfully, this post covers 4 easy ways to delete cache on iPad. Jump right in!
Guide List
Method 1: Quick and Easy Way to Clear All Cache on iPad Method 2: Simple Way to Delete Cache on iPad via Offload Method 3: Uninstall App to Get Rid of Cache on iPad Method 4: Remove Data Cache from Safari Browser on iPadMethod 1: Quick and Easy Way to Clear All Cache on iPad
If you want to delete cache on iPad quickly and easily, regardless of whether from applications or browsers, then use the professional 4Easysoft iPhone Cleaner. This tool allows you to free up space on your iPad by completely clearing all unused apps and cache files and freeing up storage space that they've occupied. You can make your iPad perform better than before by freeing up the storage space that those cache data have occupied. It is also equipped with powerful technology that makes the cache data scanning process quick and efficient, making iPad and iPhone cache deletion swift and easy!
Offer service for deleting caches for all iPad models and versions, including iOS 26.
Support file compressor that enables you to compress larger cache to smaller sizes.
Erase all unwanted data, aside from cache, on your iPad thoroughly.
Scan and categorically divide all data from your iPad for easy viewing and selection.
100% Secure
100% Secure
Step 1Install and run the 4Easysoft iPhone Cleaner on your computer. Right after that, get a charger's cable and use it to link your iPhone and the computer.
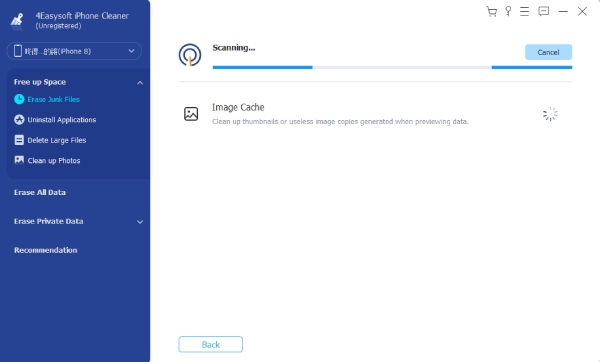
Step 2Click the "Free Up Space" dropdown button on the left pane and select "Erase Junk Files". Right after that, the tool will begin scanning all of the iPad's cache data.
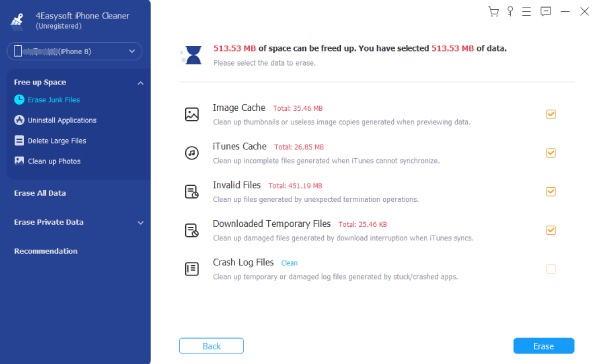
Step 3Click all the cache data's checkbox to select them. You can delete cache based on how much storage space they take. Then, click "Erase" at the lower right corner to delete the cache on the iPad.
Method 2: Simple Way to Delete Cache on iPad via Offload
Besides using a third-party app to do iPad clear cache operation, there are also default ways you can delete them. One is to delete the cache on the iPad by offloading each of your apps that have too many caches. This default method lets you remove the app but keep its associated data. Although it efficiently clears the cache, you must reinstall the app again. Here's how you will do this one.
Step 1After opening the Settings app, tap "General", and select "iPad Storage". Wait until the iPad Storage page loads (this will take time if you have already stored too much data on your iPad).
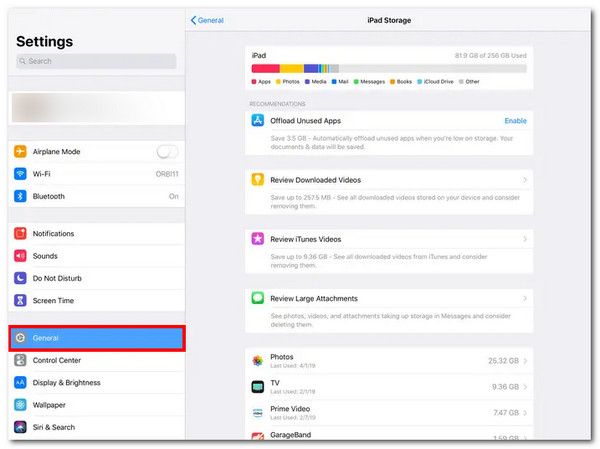
Step 2Once the page is loaded, what you need to do next is to choose an app on the list. You better choose the one that consumes great space in the storage.
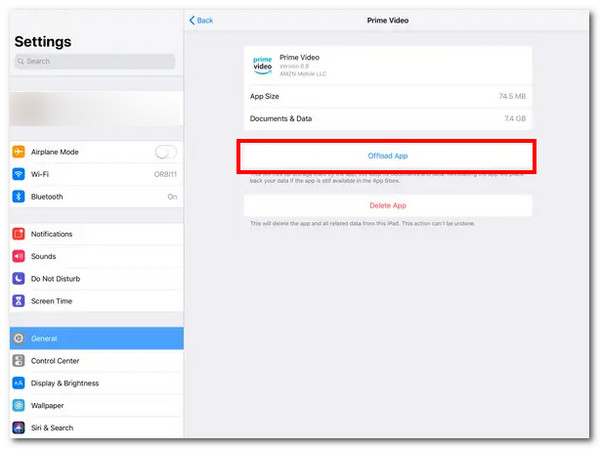
Step 3If you are now on the app's page (which you picked earlier), select the "Offload App" option. Confirm the operation; just tap "Offload App".
Method 3: Uninstall App to Get Rid of Cache on iPad
In case you badly need to save a lot of storage space on your iPad, you can instantly delete the app instead of offloading it. It shares the same process with the 2nd method; the difference is that deleting an app will also delete all of its associated data permanently. Are you asking, "How do I clear the cache on my iPad via the delete app?" See how below.
Step 1First, go after the second Method's Steps 1 and 2 (Settings app, tap "General", and choose "iPad Storage"). Right after doing that, choose an app.
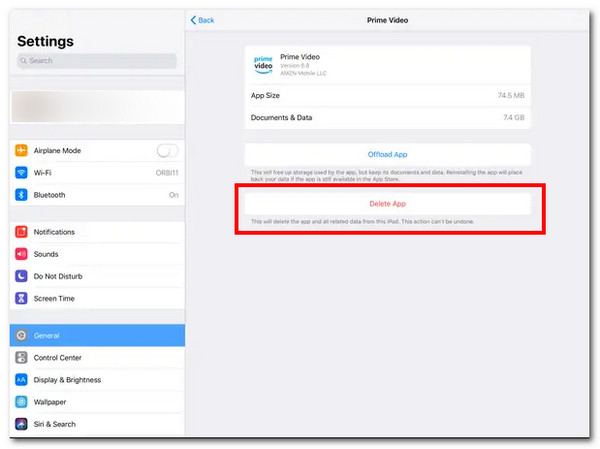
Step 2Once you have landed on the app's page that you've picked, tap "Delete App", and confirm the process by selecting "Delete App".
Method 4: Remove Data Cache from Safari Browser on iPad
The final shot you have to delete the cache on iPad is to get rid of the cache accumulated by your browser. As mentioned earlier, a browser app like Safari can also accumulate too much cache data, which can make it and your iPad sluggish. Clearing its cache can help you make your iPad and Safari run better. Here's how to do it.
Step 1Launch "Settings" and tap "Safari" from the list located on the left pane. You might need to scroll down a little to see Safari.
Step 2From the new page on the right, you will be presented with different choices/options. Select "Clear History and Website Data" and tap "Clear" to confirm. Now, you have cleared Safari history.

Conclusion
To sum up everything, in this post, you learn how to delete cache on an iPad. You are presented with different effective and simple methods. In case your iPad becomes sluggish or misbehaves in some ways, you can clear its installed apps or browsers' accumulated cache data using this post's methods 2, 3, and 4. They are indeed effective but are not quite as using the professional 4Easysoft iPhone Cleaner! With this tool, you can get rid of all of the caches on your iPad, regardless of which app or browser they came from, easily, quickly, and effectively! Try it now!
100% Secure
100% Secure