Delete duplicates and free up storage on iPhone flexibly.

How to Get More Storage on iPad Air/Mini/Pro [2 Perspectives]

Posted by Paula Pailaga to iOS Cleaner Dec 21, 2022
When your iPad is very close to being full, there will be a popup displaying 'Storage Almost Full' on its screen. If you want to avoid being unable to take photos, install new apps, and so on, you must get more storage on your iPad. You can achieve this from 2 perspectives: free up space or adding extra storage. Since people are more used to keeping data on iPad, solving the problem by deleting junk files is more suitable. If you have ever deleted or offloaded the app, you'll know that sometimes you can't remove the unwanted data clearly in these two ways. Don't worry, there is still a better tool to get more storage on iPad in the following article.
Guide List
Part 1: The Best Way to Get More Storage on iPad via Free up Space Part 2: How to Get More Storage on iPad by Adding Extra Storage Part 3: FAQs about How to Get More Storage on iPadPart 1: How to Get More Storage on iPad via Free up Space
As mentioned above, adding extra storage and free up space can get more storage on your iPad. But extra storage means that you keep the data out of the iPad, which is not convenient for accessing data when you need to use them. Thus, here are 3 best ways for you to delete junk files and free up more space on your iPad.
Get More Storage on iPad with Professional Cleaner
You can easily achieve it through 4Easysoft iPhone cleaner, which enables you to delete apps and junk files for getting more storage on iPad Air/Mini/Pro. You don’t need to worry about selecting files or deleting important contents. This powerful tool provides 4 modes - erase junk files, uninstall applications, delete large files and clean up photos. In this way, you can choose the desired mode to get more storage on iPad with a few clicks on the computer. And you have no need to worry deleting the data will make the iPad crash.
Remove junk files safely and consequently speed up your iPad.
Delete unwanted applications and files quickly and completely.
With great flexibility, it give you the ultimate power to define large files by setting the size limitation to clear them.
Save space and keep valuable memory via removing the old pictures and screenshots.
100% Secure
100% Secure
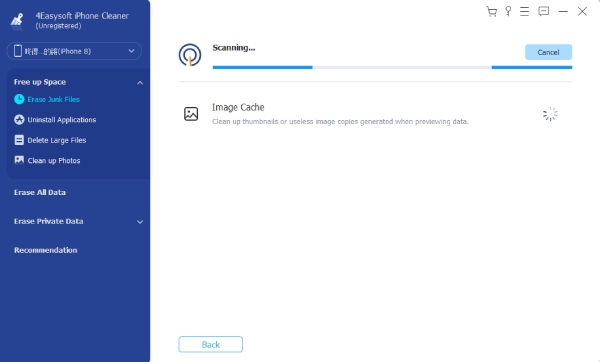
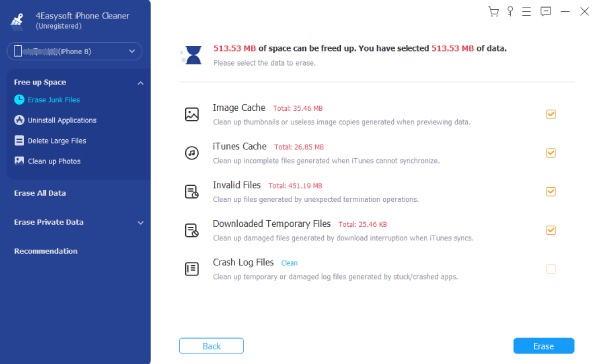
Erase Junk Files:
Step 1Connect your iPad to the computer. After this, Click the Erase Junk Files button on the sidebar to scan redundant files and data on the iPad.
Step 2Click the check box behind each column according to the name to delete. Or you can choose the targets based on their storage space (next to the name). Finally, click the Erase button to remove.
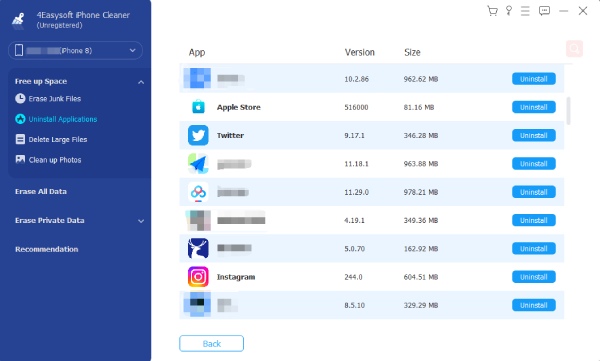
Uninstall Applications:
Step 1After connecting your iPad to the computer, click the Uninstall Applications button on the left and start scanning.
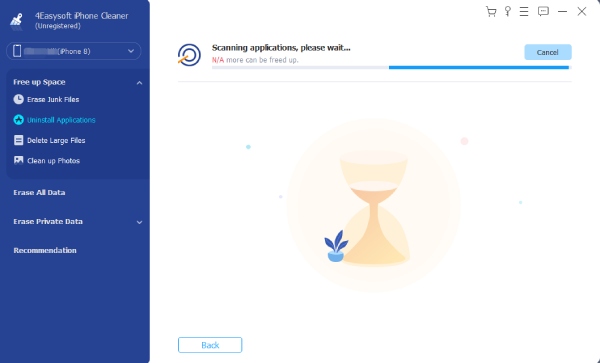
Step 2You will see a list of applications. You can find unwanted ones and click the Uninstall button to remove them. And choose the Confirm button to delete the app finally.
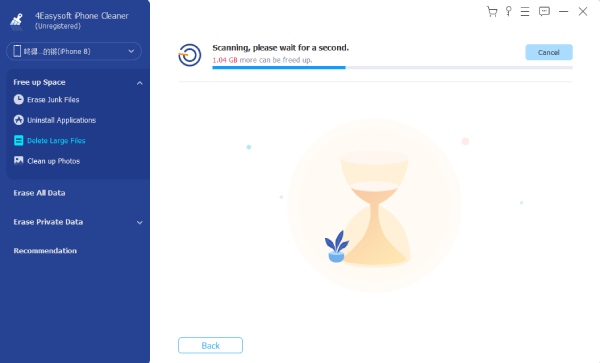
Delete Large Files:
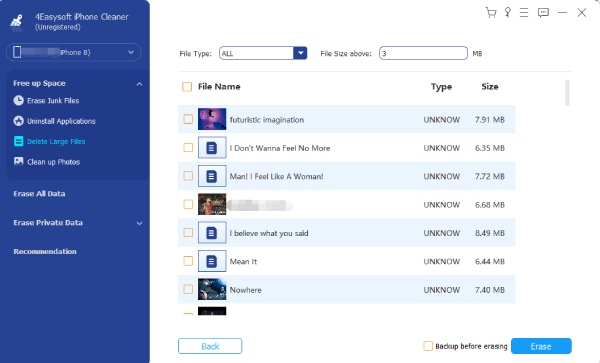
Step 1Click the Delete Large Files button under the Free up Space. After scanning's finishing, adjust the size limitation (such as 20MB) of the large files as your requirements.
Step 2You will see scanning results on the computer screen. Check it and click the check box beside a file or the one called File Name to select all. Moreover, you can choose the Backup before erasing to make a backup. Lastly, click the Erase button.
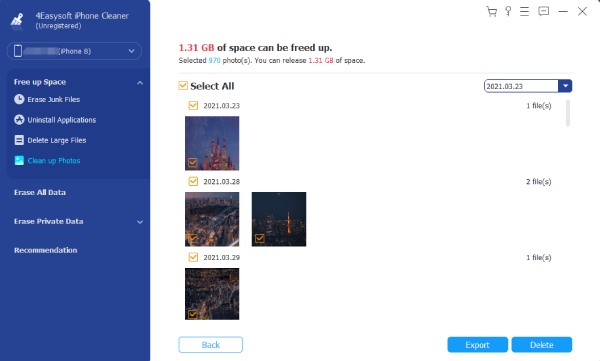
Clean up Photos:
Step 1Connect your iPad to the computer. Then, click the Clean up Photos button to scan all photos. After scanning's finishing, you will see two cleaning modes: Backup & Compress and Export & Delete. You can click the Backup & Compress button and choose photos to compress.
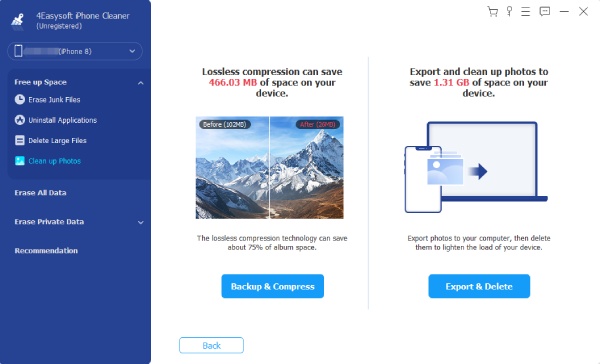
Step 2Click the Export & Delete button to export all the pictures on the iPad to the computer as a backup if you don't want to compress the pictures. Then you can delete photos and get more storage on the iPad.
Get More Storage on iPad by Offloading Apps and Deleting Apps
You can also free up some space to get more storage on the iPad via offloading and deleting apps. These two are iPad’s built-in features and are easy to operate. You can find them in Settings.
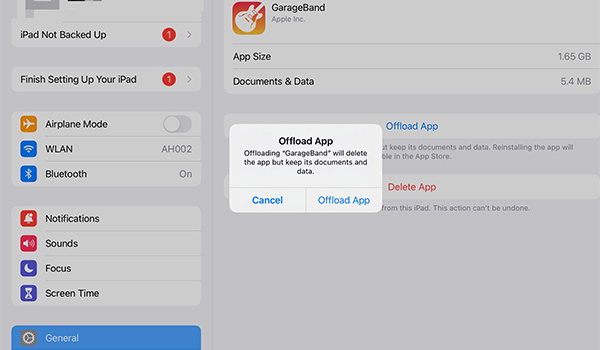
Step 1Go to the Settings, and tap the General button. Find the iPad Storage button and choose it. You will see a list of applications. Select one, such as GarageBand.
Step 2Now you can see the Offload APP button and Delete App button. If you still want to keep the app's documents and data. Please tap the Offload App button. If not, please tap the Delete APP button. After the popup shows, tap again and done.
Part 2: How to Get More Storage on iPad by Adding Extra Storage
As mentioned at the beginning, adding extra space can also get more storage on the iPad. Usually, there are two primary choices, iCloud.com, and an external drive.
Get More Storage on iPad with iCloud Storage
iCloud is better than flash drives and external drives. Why? You don't have to be concerned about leaving it at home. If you remember your Apple ID and password, you can open iCloud.com to take your data without adapters and complicated operations. Moreover, no matter what troubles your iPad gets into, the files kept in the iCloud storage will be safe and sound.
Step 1Go to the Settings, and find your name on the top of the sidebar. Tap it and find iCloud on the interface and enable it.
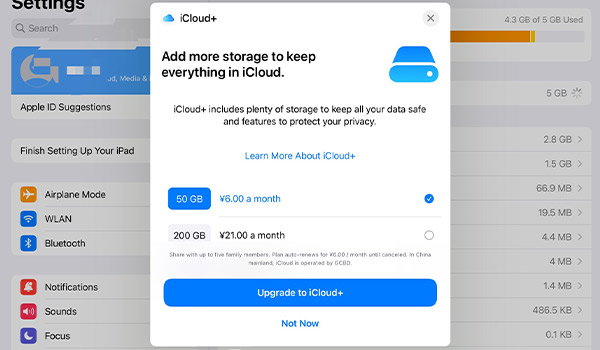
Step 2If you want larger iCloud storage, you can tap the Manage Storage button to upgrade to iCloud+.
Get More Storage via Flash Drive
Indeed, if you upgrade to iCloud+ to get more storage on iPad, iCloud provides considerable space to save data. But 50GB costs you 0.99 US dollars per month, 200GB 2.99 US dollars, and 2TB 9.99 US dollars. And you can buy a 1-TB flash drive at 19.99 US dollars using forever. Thus, using flash drives to get more storage on iPad is more economic-friendly in the long run.
Step 1Download the app that goes with your USB flash drive. Use a USB-A to USB-C to connect the flash drive to your iPad. You can do this with two methods: 1. After its plugin, there will be a hint telling you the download the accompanying app. 2. You can download the app by searching the flash drive's name in the APP Store and following the instructions in the device's package.
Step 2After the app's downloading, plug your flash drive into your iPad. And tap the Allow button on the popup. You will be taught to go to the app going with the flash drive. You will see transfer options on the screen.
Part 3: FAQs about How to Get More Storage on iPad
-
1. How to reduce the memory of app without deleting it?
You can delete the cached memory or data memory generated by the app, and start it again. This won’t delete the app but does free up some space.
-
2. How to delete the cached files from your iPad to get more storage?
Your iPad will automatically delete cached files and temporary files, if it needs more space. You don’t have to delete them.
-
3. What will happen after iPad out of storage?
When your iPhone runs out of space, you won't be able to install new apps, take photos, sync media files, install operating system updates, or do anything that needs space.
Conclusion
You've read five ways to get more storage on iPad. Achieving the goal via flash drive is complicated, and you need to prepare an adapter. iCloud is convenient, but the part out of free 5 GB is expensive. Thus, you can use 4Easysoft iPhone cleaner to save more space by deleting unnecessary files and cache. In this way, you can get more storage on your iPad without losing important data or buying external drive.
100% Secure
100% Secure