Record, edit, and share video from all sources.

How to Screenshot Part of Screen? 4 Must-Try Ways

Posted by Paula Pailaga to Screenshot Jun 06, 2025
Taking a full screenshot captures extra information, which you may need to crop most of the time, wasting your precious time. Why not screenshot part of the screen to capture only what you need? Whether it is a quick snippet of text, a particular image, or a specific window, this post has got you ways how to take a partial screenshot on Windows and Mac. Join here to discover together the techniques that will streamline your workflow and share content with ease.
Guide List
The Best Way to Take Partial Screenshots on Windows/Mac 2 Ways How to Screenshot on Windows [Hotkeys and Snipping Tool] How to Screenshot Part of a Screen on Mac [Default Way]The Best Way to Take Partial Screenshots on Windows/Mac
Many users, like you, are looking for more functionality when it comes to capturing their screen partially, such as editing tools. For this, use the 4Easysoft Screen Recorder— a tool that can screenshot part of screen, and take it to the next level! It features an intuitive interface, meeting all your screenshot needs, whether you want a specific region, window only, or full-screen images, even scrolling ones! Additionally, the program lets you annotate screenshots and make further edits after capturing them, which is perfect for tutorials, adding important notes, and presentations. Beyond this is that its recording functionality allows you to take screenshots, too, saving important details from meetings, online classes, gameplay, video content, and more.

Take partial screenshots, window-only, and full-screen with ease.
Save your screenshots instantly in various formats like JPG, PNG, etc.
Set your own hotkeys for taking screenshots as well as crucial settings.
View your screenshots immediately to check if further edits are needed.
100% Secure
100% Secure
Step 1Open the 4Easysoft Screen Recorder on your computer, then select the “Video Recorder” option from the main screen. There, look for the “Camera” button to take screenshots, and choose “Screen Capture”.
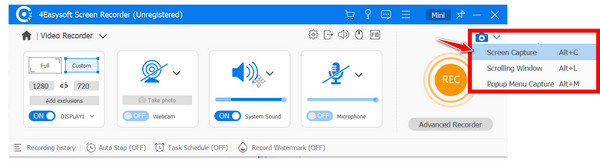
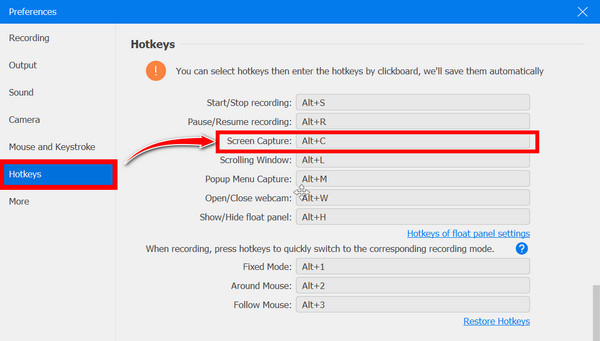
Note: You can immediately take partial screenshots using the custom hotkeys “Alt + C”, which you can change, too, if you want, in the “Settings”, then “Hotkeys” section. For format selection, head to the “Output” section.
Step 2Upon clicking the “Screen Capture” option, your mouse pointer will turn into a “crosshair” icon; drag it to choose the area you want to capture.
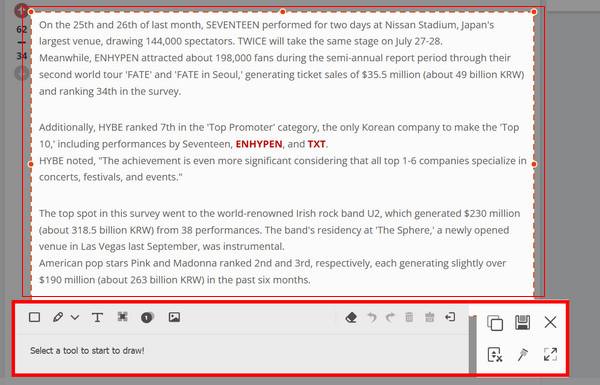
Step 3Once done, the screenshot can be edited with shapes, texts, callouts, and more using the toolbar. Click the “Save” button (Floppy disk icon) to export the captured image to your chosen location.
Aside from the screenshot part of screen, you can capture a full screen or scrolling window as well.
2 Ways How to Screenshot on Windows [Hotkeys and Snipping Tool]
Whether it’s for work, learning, or simply capturing essential details on your screen, fortunately, Windows offers built-in tools to make the ‘screenshot part of screen’ process quick and easy. This section will prove that! So, without anything to say, learn below the two default ways to take partial screenshots on Windows 10/11.
1.Hotkeys
Not just one but two common hotkeys are offered by Windows to screenshot part of screen. Listed below are the hotkeys with their simple steps and where you can locate the captured image.
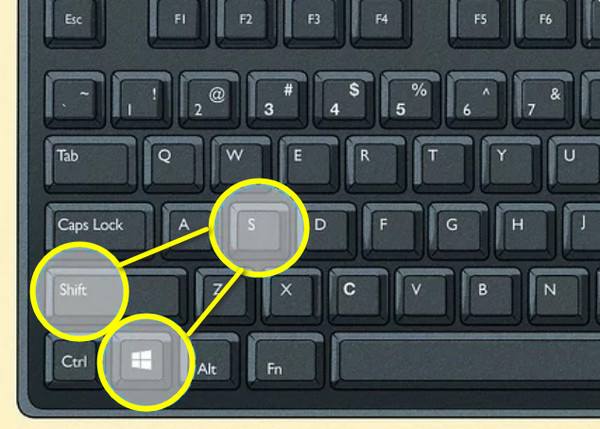
• Windows + Shift + S. With this combination of keys, you can activate the Snip & Sketch or Snipping tool, where you can capture a portion of your screen. Upon pressing the keys, your cursor will transform into “crosshair.” Click and drag it to determine the area you want to capture. Next, the captured image will be copied, and you can paste it into any platform with the “Ctrl + V” keys.
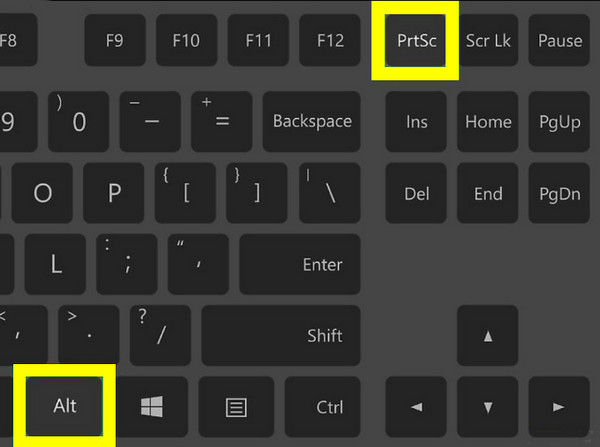
• Alt + PrtSc. If you wish to capture a particular window, use this combination, and then you can copy and paste it into an image editor to save it as JPEG.
2. Snipping Tool
Meanwhile, the Snipping Tool is a versatile and friendly built-in Windows app that permits you to take partial screenshots, giving you more precision in your captures. To learn how it works, follow the complete guide below:
• Use the “Windows” key and search for “Snipping Tool” on the search bar, then select the app from the results. You can also use the Snipping tool shortcuts.
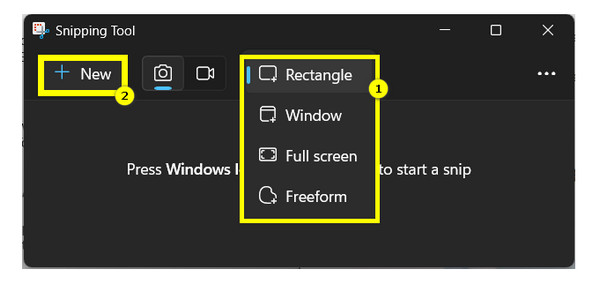
• Begin with selecting the snip type you want from the “Snip” dropdown list. For partial screenshots, go for “Rectangular Snip”, then click the “New” button and drag your mouse to capture the area you wish.
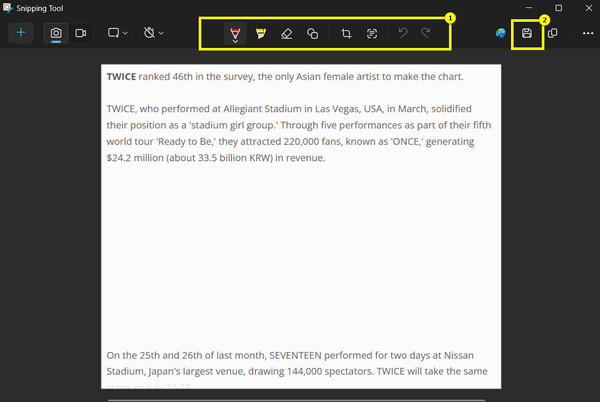
• Once done, the screenshot will appear in the Snipping Tool window. Here, you can draw on the image as well as crop it. Get your screenshot by clicking the “Save” button on the right side (Floppy disk icon).
How to Screenshot Part of a Screen on Mac [Default Way]
fter the Windows way, macOS also provides a built-in, straightforward solution to screenshot part of screen without extra tools. This feature is very efficient and easy to use, relying only on a few keyboard shortcuts. Here’s how to screenshot part of screen on Mac:
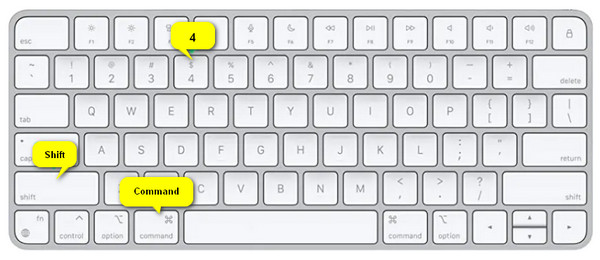
• On your Mac keyboard, press the “Shift + Command + 4” keys to transform your cursor into a crosshair. Click and drag it to choose a portion you wish to capture.
• Once you release it, the screenshot is saved to your desktop by default. Otherwise, if you want to copy the screenshot instead of saving it automatically, hold the “Control” key, too, while dragging the cursor.
Conclusion
When it comes to taking partial screenshots, as you’ve seen here, both platforms offer useful built-in tools, from hotkeys and the Snipping tool on Windows to Mac’s straightforward shortcuts. For basic screenshots, these solutions are indeed great. However, if you want more precision and enhanced functionality, go for 4Easysoft Screen Recorder to take screenshots. With its SnapShot capability, you can screenshot part of screen, the entire screen, the window only, and scrolling window! It even comes with additional features for recording, annotating, and customizable settings to suit your needs. So, elevate your screenshot game with this efficient program today.
100% Secure
100% Secure