Record video, audio, gameplay, and webcam to record precious moments easily.
Mac Screen Recorder Shortcut: How-to, Tips, and Alternative

Posted by Ethan Brooke to Record Video Jun 03, 2025
Frustrated with the menus for screen recording on your Mac screen? You’re not alone. Navigating through menus and options can take up a lot of time, so why not use the Mac screen recorder shortcut instead? Forget the bunch of mouse clicks and explore the keyboard shortcut for Mac screen recording here with some tips and the best alternative to transform your workflow. Make the screen recording on your Mac faster than ever before!
Guide List
Know More about the Default Mac Screen Recorder Shortcuts How to Use the Mac Screen Recorder Shortcuts on QuickTime Bonus Tips to Change the Mac Screen Recorder Shortcuts Best Alternative Shortcuts to Screen Record on Mac Pro/Air/MiniKnow More about the Default Mac Screen Recorder Shortcuts
Luckily, on your Mac, there’s this called the Screenshot app or toolbar that you can use to screen record. Making it even more convenient, there are keyboard shortcuts that let you start and stop the recording quickly.
Here’s a breakdown of the default Mac screen recorder shortcut for the Screenshot toolbar:
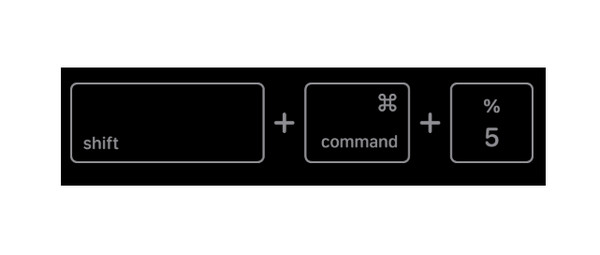
Step 1Ensure that you’re using MacOS Mojave first or later to have the Screenshot toolbar. Next, press the “Command + Shift + 5” keys on your keyboard to open the Screenshot toolbar.
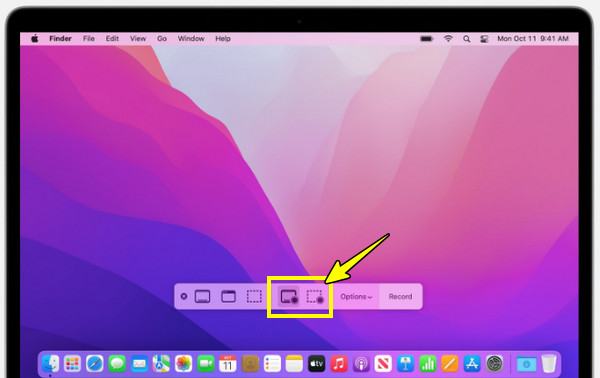
Step 2Here, you can see options to capture screenshots and record your screen. You can select a portion of your screen first before clicking the “Record” button to capture everything on your screen.
Once done, end it by clicking the “Stop” button in the toolbar or using the “Command + Control + Esc” Mac screen recorder shortcuts. In this way, you can stop screen recording on Mac.
How to Use the Mac Screen Recorder Shortcuts on QuickTime
Meanwhile, if you want something more traditional for screen recording on Mac, the built-in QuickTime Player is a reliable tool. While you can easily record screens with the previous toolbar, QuickTime Player is a versatile option that works on various macOS versions. And despite not having a direct Mac screen recorder shortcut for launching, it lets you have detailed control over your recording, such as adding mic audio. Go and see the following steps on how you can use QuickTime Player to screen record on Mac:
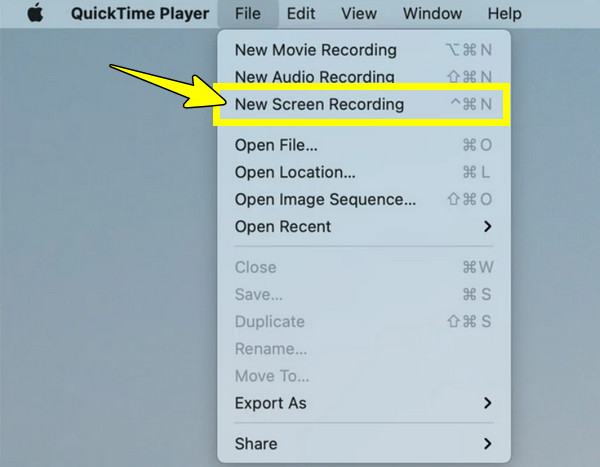
Step 1Open QuickTime Player by going to the “Application”. Next, select the “File” menu and choose “New Screen Recording” or use the “Command + Control + N” keys.
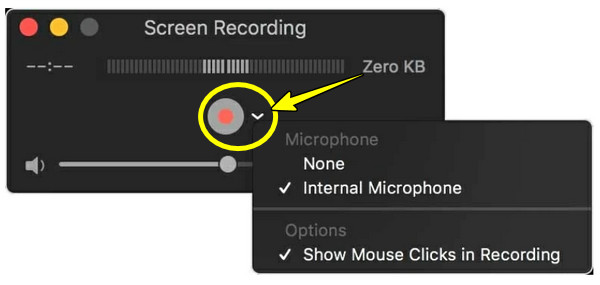
Step 2Before getting started, you can click on the “Arrow” button to record screen with audio on QuickTime. After that, click the “Record” button, where you can select to capture your full screen or a specific area; click the “Start Recording” button to begin.
Step 3Finish it by clicking the “Stop” button. Otherwise, use the Mac screen recorder shortcuts “Command + Control + Esc” keys. Later, you can watch the recording in the player and save it on your Mac.
Bonus Tips to Change the Mac Screen Recorder Shortcuts
While the default Mac screen recorder shortcuts are useful, you may want to customize them for more convenience or to better suit your workflow. For this, macOS permits you to change the shortcuts for certain functions, including screen recording in the System Preferences settings.
Here are the steps you can try to customize and optimize your Mac screen recorder shortcuts:
Step 1Go to the “Apple logo” and choose “System Preferences”. In this window, click on “Keyboard” then pick the “Shortcuts” tab, and click on “Screenshots”.
Step 2Here, you will see the default shortcuts for recording and screenshots. Change the shortcut by clicking on the current shortcut and pressing a new key combination you would love to use.
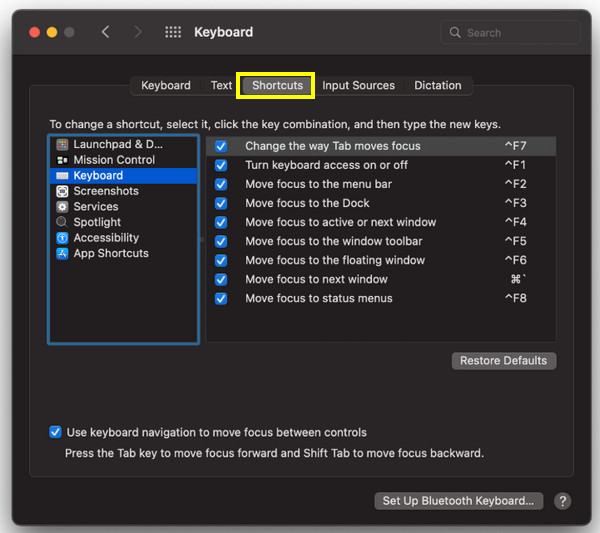
Step 3Once you have changed the recording shortcuts, close the “System Preferences” window, and your custom Mac screen recorder shortcuts can be used immediately, including the Mac screenshot shortcuts.
Best Alternative Shortcuts to Screen Record on Mac Pro/Air/Mini
After knowing the Mac screen recorder shortcut together with the Screenshot toolbar and QuickTime Player, you may consider other apps that offer more enhanced functionalities such as customizable shortcuts. Among these apps, 4Easysoft Mac Screen Recorder stands out as the perfect option for you, giving you greater flexibility and ease of use. Whether you're capturing tutorials, gameplay, or any other activity on your Mac Pro/Air/Mini, this tool provides full customization of hotkeys. Plus, you can record either full-screen or select specific regions, all while adjusting the audio settings to capture system sound, mic, or both. Not only that, but you can even adjust the resolution, frame rate, format, and more to match your preferences.

Set the preferred Mac screen recorder shortcut for easy recording.
Built-in editor for trimming and enhancing your recordings before saving.
Record in high resolution, up to 4K, with smooth and no lag performance.
Allow you to add webcam footage to your screen recordings without losing quality.
100% Secure
100% Secure
Step 1Once you have started the 4Easysoft Mac Screen Recorder, aim for the “Video Recorder” button to capture the Mac screen with audio.

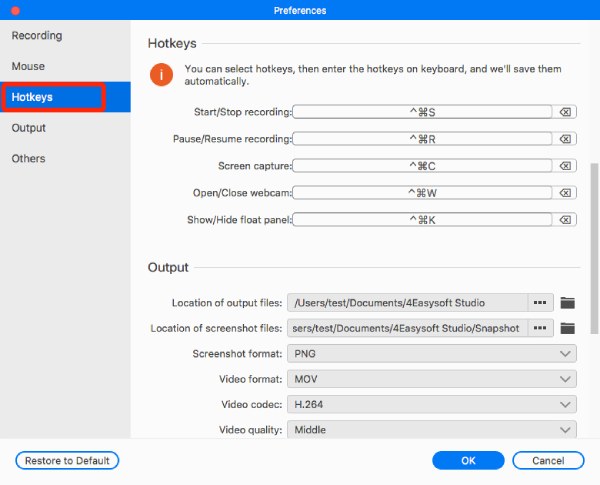
Here, you can go to “Settings” first and then look for the “Hotkeys” tab, where you can customize the shortcuts for start/stop/pause/resume and other actions for recording and screenshots. You can head to “Output”, too, to set recording settings to your liking.
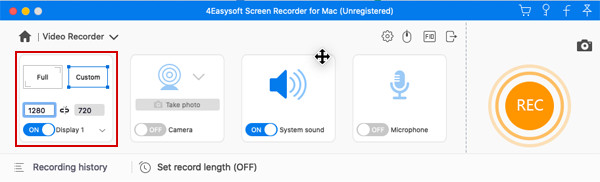
Step 2Saving all the changes, choose the recording area between “Full” (entire screen) and “Custom” (select region) with your desired resolution. You can adjust the capture area freely by pulling the borderlines.
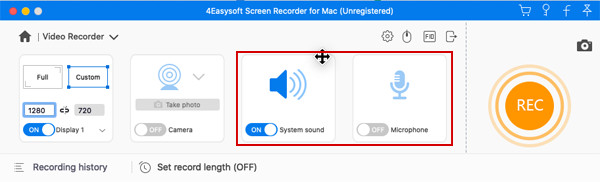
To capture system sound, switch the button of “System Sound”; for your voice, turn on the “Microphone” switch button. Pull each slider to adjust the audio volume.
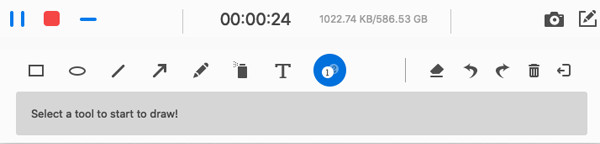
Step 3Once all settings are settled, start recording by clicking the “REC” button or use your set shortcuts, for instance, “Shift + Command + S” keys. Using the toolbox, annotate and take screenshots during recording.
Step 4After a while, click the “Stop” button or use the same Mac stop screen recording shortcut keys to complete the recording. In the preview, trim any unwanted sections before saving your recording on your Mac.
Conclusion
Mastering Mac screen recorder shortcuts can hugely enhance your workflow, whether it is for your tutorials, gameplay, presentations, or other tasks. While there are built-in tools like Screenshot toolbar and QuickTime Player for Mac screen recording, you saw here that you can customize the shortcuts to make the recording experience more efficient for you. For a more advanced and flexible solution, 4Easysoft Mac Screen Recorder is the best tool available! It allows you to set hotkeys for screenshots and screen recording, together with powerful features like editing tools, various capturing modes, and so on, catering to all your tasks with maximum confidence and convenience.
100% Secure
100% Secure