Transfer anything from/to iPhone, iPad, and iPod.

How to Transfer All/Selective Photos from iPhone to PC

Posted by Paula Pailaga to iOS Transfer Mar 12, 2024
Your iPhone stores a lot of necessary information and memories, such as photos. Managing these images can be challenging, especially when you are close to the storage space limit. Thus, you think of transferring photos from iPhone to PC. Unlike Mac, you can’t use AirDrop to do direct file share. Thus, this article provides 7 quick and efficient ways to transfer photos from iPhone to PC. Whatever level of technical knowledge you have, you can easily apply the ways to get photos from iPhone to PC and free up more storage. Start reading now!
Guide List
Way 1. 4Easysoft iPhone Transfer - Batch or selective transfer with high quality Way 2. Windows File Explorer - Use a USB cable for Windows 11/10/8/7 Way 3. Photos App - Use a USB cable for Windows 11/10 Way 4. iCloud Backup - Free 5GB of file size Way 5. Google Drive - Gives 15 GB storage for free Way 6. Dropbox - Free 2GB of storage space Way 7. Email - Wireless transfer FAQs about How to Transfer Photos from iPhone to Windows PCWay 1. 4Easysoft iPhone Transfer - Batch or selective transfer with high quality
A robust solution is what 4Easysoft iPhone Transfer delivers to you: transfer photos from iPhone to PC effortlessly. With it, you can do an easy transfer of your photos, videos, music, and other data from your iPhone to your computer. It doesn’t matter how many pictures you have on your iPhone, as, in a quick period, you can transfer all photos from iPhone to PC. Furthermore, it provides a selective or batch transfer of photos without much trouble. Prior to transferring, you can enjoy handling your files within the program by deleting unwanted images, adding photos, creating albums, etc.

Move photos from iPhone to PC selectively or in batches in no time.
Provide a HEIC Converter to convert iPhone photos format to JPG or PNG.
Locate all duplicate photos from your iPhone and remove them at once.
No iTunes or any other transfer program restrictions can be found.
100% Secure
100% Secure
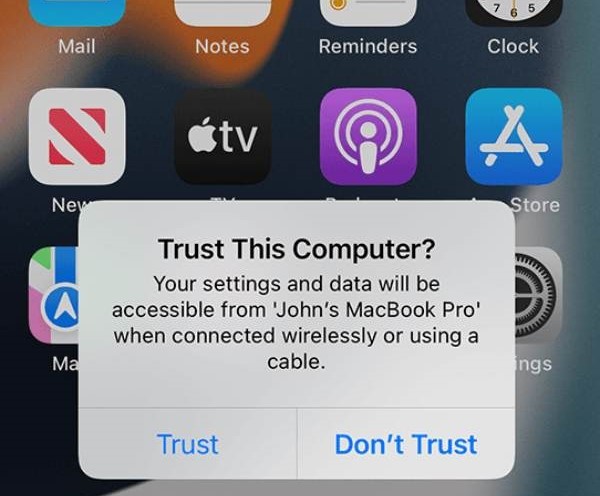
Step 1Utilize a workable USB cable to combine your iPhone with your Windows 11/10/8/7 PC. Then, launch 4Easysoft iPhone Transfer to proceed. Once it connects, tap "Trust" on your iPhone to allow access.
Step 2After that, head to the "Photos" tab to show all your iPhone photos on the screen, organized by albums and dates. Determine the ones you desire to transfer by clicking each box. Or, click the "Check All" to select all items.
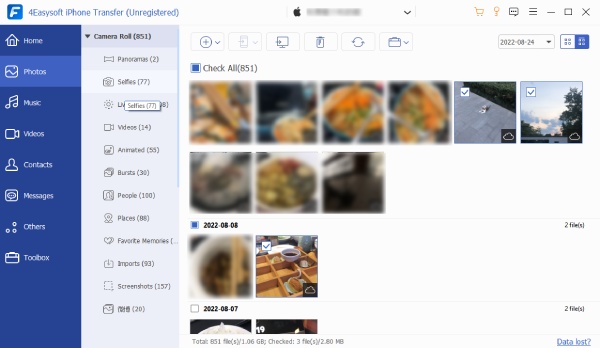
Step 3Next, to download photos from iPhone to PC, click the "Export to PC" button, where you are obliged to select or create a folder to save those iPhone images. Click "Select Folder" to confirm, and the transferring process will commence.
Way 2. Windows File Explorer
Followed by Windows File Explorer, it lets you transfer photos from iPhone to PC just by linking your iPhone to a PC running Windows 11/10/8/7 and then finding your device name. It is one easy escape from understanding how to copy photos from iPhone to PC in an instant. However, some things might spoil your fun in using it, such as the iPhone not being detectable, unable to choose the format, and not having any proper photo orientation.
But, if you like it in any way, see the detailed guide below on how to use File Explorer to get photos from iPhone to PC:
Step 1After getting your iPhone connected to your PC, tap the "Trust" button to allow permission to access. Then, for Windows 10/8, click "File Explorer", see your device under "This PC", and double-click on "Apple iPhone".
For Windows 7, locate "Windows Explorer" and find your device under "Computer" with the same name as the "Apple iPhone".
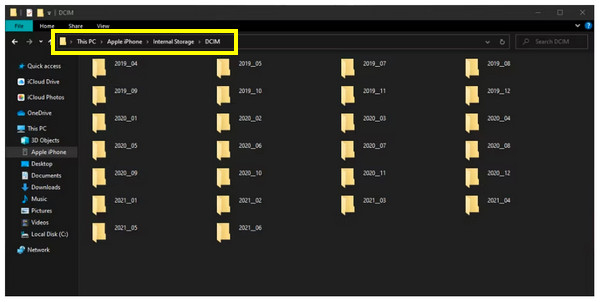
Step 2Once you have clicked the "Apple iPhone", double-click the "Internal Storage" folder, and go to "DCIM". You’ll see your image labeled as 100APPLE, 101CLOUD, etc.
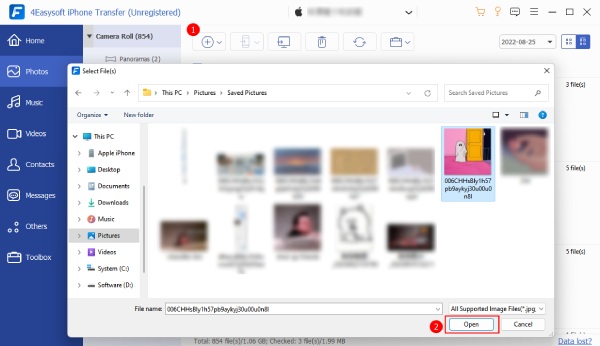
Step 3Select the photo you like to copy from iPhone by right-clicking any folder and then selecting "Copy". Then, find your way to the Pictures folder on your PC, right-click on the blank screen, and click "Paste". You should see your iPhone photos now in one of your computer files.
Way 3. Photos App
If you enjoy File Explorer on Windows 10/11, you can also rely on the Windows Photos app. It’s another convenient way to transfer photos from iPhone to PC, as you only need a workable cable to connect your iPhone and copy your pictures afterward. But most people complain about the Photo app failing to import photos halfway through.
It is still effective in moving pictures, though, so here’s the complete steps on how to import photos from iPhone to PC with the Photos App:
Step 1Once your iPhone is attached to your PC, unlock your iDevice to tap "Trust" to allow your computer to access data. Then, click the "Start" menu to find "Photos".
Step 2From the "Photos" app, click Import, choose "From a connected device,
Step 3Next, click "All items" to select all pictures; otherwise, you can manually choose the pictures you wish to import. After all that, your photos will be moved into the "Pictures" folder. If you wish to specify location, click "Change destination", and then "Import [number] items".

Way 4. iCloud Backup
Probably one of the quickest ways to transfer photos from iPhone to PC is iCloud Backup. Apple provides this solution for quickly sharing and syncing data to other iOS devices that use the same Apple ID account. Once the iCloud Photos is enabled, it can be accessed from any Windows PC. But it doesn't have the select all option to download numerous photos to your PC simultaneously.
See below the following guide to learn how to import photos from iPhone to PC with iCloud Backup:
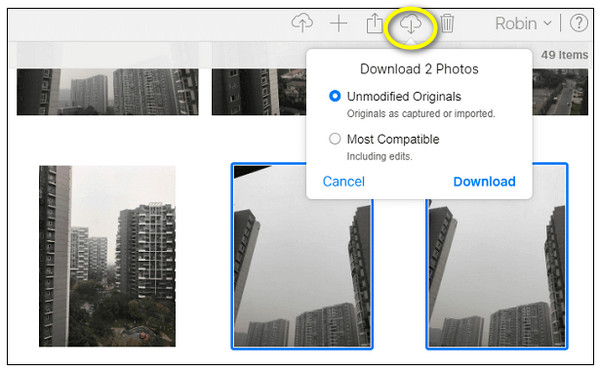
Step 1Ensure the "iCloud Photos" is enabled in "Settings". Once you’ve verified, search for "iCloud.com" on any browser on your PC. Then, sign in with the identical Apple ID account.
Step 2Select "Photos" among other options. Then, proceed to select the desired images and upload them to iCloud. Then, tap the "Cloud" button above to download them on your PC.
Way 5. Google Drive
Google Drive is another wire-free approach to transferring photos from iPhone to PC. When you upload your picture on your iPhone’s Google Drive, your PC can access it automatically. However, it cannot detect the image you uploaded before, so it will create duplications that can instantly fill 50GB of storage space.
Step 1Launch the "Google Drive" app; log in to your Google account. Tap the "Add" button to "Upload", then choose "Photos and Videos". Choose the items you want to transfer.
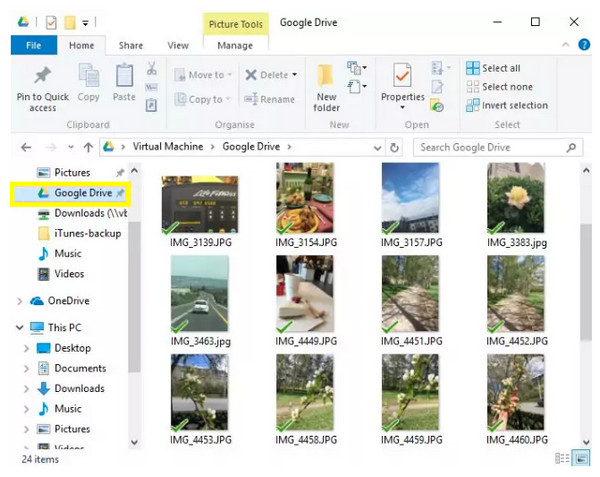
Step 2Get the "Google Drive" installed on your computer. Then, there’ll be a Google Drive folder created on your PC. Open it to locate all your uploaded iPhone pictures.
Way 6. Dropbox
Just like Google Drive, Dropbox is also a good way to access everything in one place. You can share and backup your data from here, then transfer photos from iPhone to PC. However, note that the transferred photos will be sorted by the transfer date, not the creation date, which most people don’t like.
Anyways, here’s how to transfer photos from iPhone to PC with Dropbox:
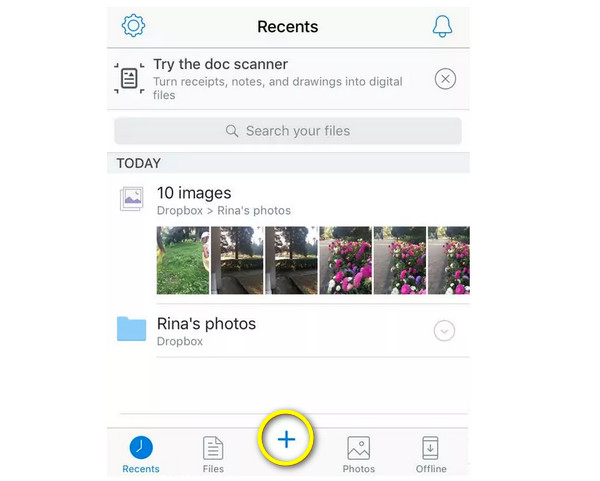
Step 1After running "Dropbox" on your iPhone, tap the "Add" button to "Upload Photos". Select which photos you’d like to move, then add them to the app.
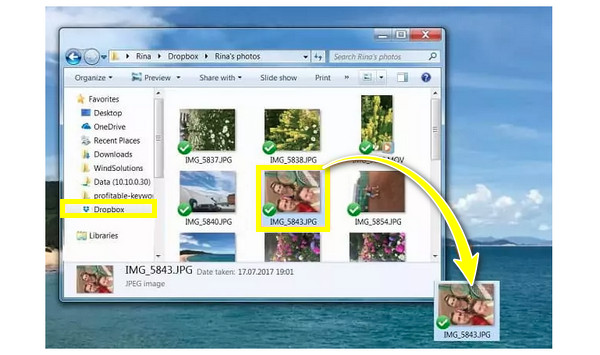
Step 2Establish the Dropbox app on your PC; there will be a created folder for it. Find your way to the "Dropbox folder" and see all your iPhone photos. You can then move desired pictures by dragging and dropping or copying-pasting.
Way 7. Email
There is one more solution for you to transfer photos from your iPhone to your PC wirelessly, and this can be done through email. Although this method is much slower than others, it effectively transfers a few desired images. So, if you choose this method, ready your email.
To begin, here’s how to transfer photos from iPhone to PC through Email:
Step 1Launch the "Photos" app, then go to your main library, and tap "Select". Choose your desired five photos from there.
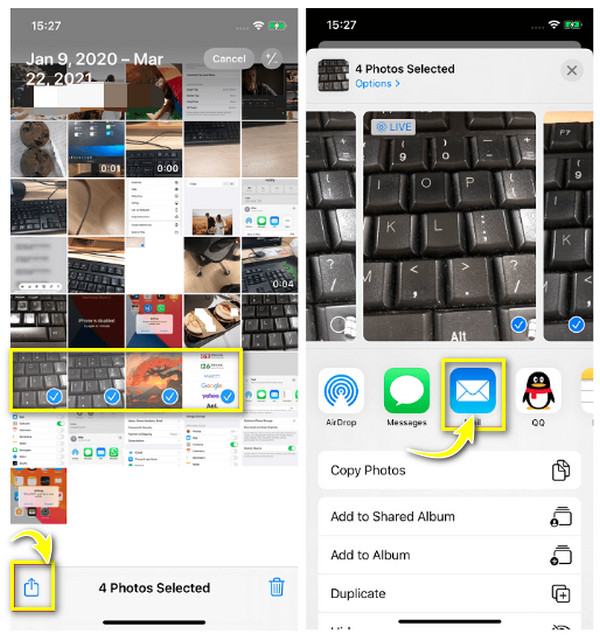
Step 2Afterward, tap the "Share" button and select "Mail" as the transferring method. Input your proper email details in the respective bars. Then, click "Send". Check your email on your PC and see the five transferred pictures.
FAQs about How to Transfer Photos from iPhone to Windows PC
-
How do you wirelessly transfer photos from iPhone to PC?
While USB cables are famous for transferring files, you can also apply the methods used by iCloud, Email, Google Drive, and others discussed above for a wireless transfer. Using those requires a stable Wi-Fi network to get a better connection.
-
How to transfer photos from iPhone to PC without iTunes?
Luckily, all the methods mentioned above are not required to use iTunes to transfer photos from an iPhone. You can use Google Drive, Photos, iCloud, Dropbox, etc., without being troubled by iTunes restrictions.
-
Can I use Bluetooth to transfer photos from iPhone to PC?
Yes. Among the wireless solutions to share files from mobile to PC is Bluetooth. After pairing the two devices, go to your iPhone's Bluetooth file transfer app, click Send Files, and choose your PC name.
-
How to transfer photos from iPhone to PC Windows 10?
There are many ways to transfer photos to a Windows 10 PC, such as through the Photos app, Google Drive, Dropbox, and others mentioned above.
-
Can I choose all photos to transfer using Google Drive?
No. Unfortunately, with Google Drive, you cannot select over 10 items simultaneously. Also, the photo albums you created on your iDevice cannot be imported.
Conclusion
When you come into a situation where you ought to transfer photos from iPhone to PC, it might be a challenging task at first. But this article proves the procedure is as easy as pie if you have suitable assistance tools. Using Photo, iCloud, Email, and more, each option will suit different user requirements. But if you’re talking about the best option, go for 4Easysoft iPhone Transfer. This tool can assist you in transferring data, such as photos, videos, messages, and others, from an iPhone to another device. It also comes with management functionalities; explore it today!
100% Secure
100% Secure