Transfer anything from/to iPhone, iPad, and iPod.

2025 Guide: Transfer Photos from iPhone to Flash Drive

Posted by Alvin Cantero to iOS Transfer Apr 14, 2026
While your iPhone has a way for you to store your captured memories, it's always a good idea to have a backup, like sharing these photos on a flash drive. Doing a transfer of photos from iPhone to flash drive not only frees up valuable storage on your device but also lets you have a tangible backup you can easily access and store. Hence, in today's guide, you'll learn the five ways to transfer photos from an iPhone to a flash drive, each with detailed steps, and some without a computer to use.
Guide List
Method 1: Quick Way to Transfer iPhone Photos to USB Drive Method 2: Transfer Photos from iPhone to Flash Drive via iCloud Photos Method 3: Built-in Way to Transfer Photos with Photos App on Windows Method 4: Use Image Capture to Transfer iPhone Photos to USB on Mac Method 5: Use USB-C to Transfer Photos from iPhone to Flash Drive FAQs About Transferring Photos from iPhone to Flash DriveMethod 1: Quick Way to Transfer iPhone Photos to USB Drive
The safest way to transfer iPhone photos to a flash drive is to use a professional transfer tool. Based on practical testing, 4Easysoft iPhone Transfer is a highly efficient and reliable option. It can quickly transfer photos from your iPhone to a flash drive, thereby reducing the risk of data loss. It also features a photo selection function, allowing you to manually select the photos you want to save to the flash drive before transferring them. Additionally, it includes a built-in HEIC converter, enabling you to convert your HEIC files before transferring them to the USB flash drive.

Let you transfer iOS data between computers and Apple devices.
Cover a range of media types, including photos, videos, music, and more.
Have a preview window to check the selected media to transfer first.
Allow you to manage and edit data, like photos, music, contacts, etc.
100% Secure
100% Secure
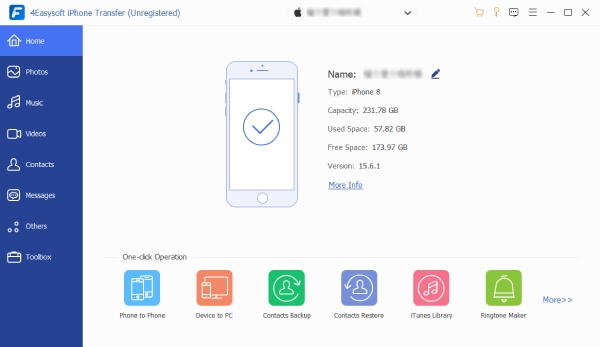
Step 1Run the 4Easysoft iPhone Transfer. Connect your iPhone with your PC via a USB cable. Tap the "Trust" button on the notification that appears on your iPhone, and you'll see your iPhone information.
Step 2Go to "Photos" on the left and select the photos you wish to transfer. Before proceeding with the on-screen steps, insert your USB drive and determine its folder.

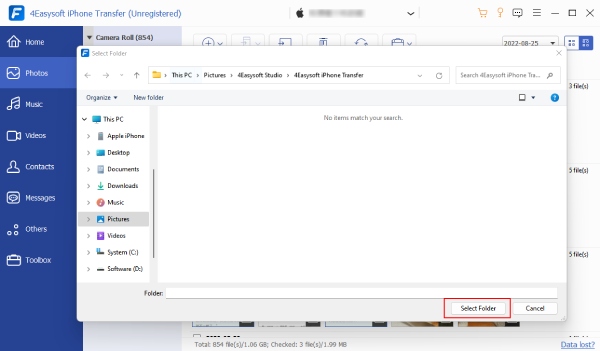
Step 3On the program, click "Export to PC" to transfer the selected pictures. Locate the USB drive folder from the window and select it as the destination. Once done, click "Select Folder". That’s how easy it was to transfer photos from iPhone to flash drive!
Method 2: Transfer Photos from iPhone to Flash Drive via iCloud Photos
For iPhones, Apple has a cloud-based solution designed for all users: iCloud Photos. By applying the iCloud Photos approach, you can quickly access your entire photo library from any device connected to your account offline and ensure your cherished memories are safely backed up. Here’s how to transfer photos from iPhone to flash drive with iCloud Photos.
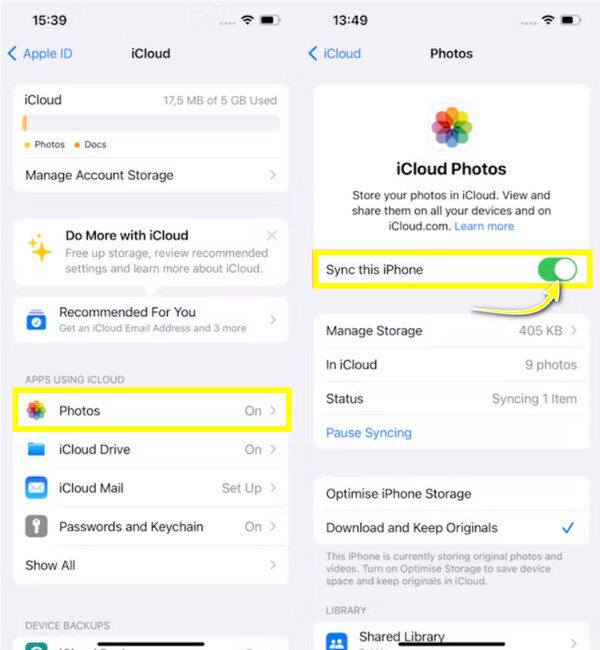
Step 1On your iPhone, open the Settings app, tap your name at the top, then be in "iCloud," and then head to the "Photos" section. Ensure the "iCloud Photos" switch button is turned on.
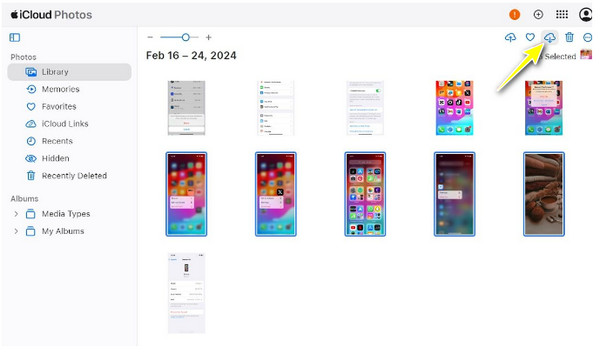
Step 2Acquire any device, then open the iCloud website on a browser with your Apple ID logged in. Next, go immediately to "Photos" to view your iCloud Photo Library.
Step 3From this page, select individual photos you wish to carry to a flash drive. Once you have done so, save them by clicking the "Download" button.
Step 4Ready your flash drive and insert it into the computer's USB port. Locate the downloaded photos from your iPhone; if they are in a ZIP file, extract them first.
Later, if they are ready, drag and release the pictures to the flash drive folder to transfer photos from iPhone to flash drive.
Method 3: Built-in Way to Transfer Photos with Photos App on Windows
As for this method, the Photos app is a powerful tool for editing, managing, and sharing your collections. With features like automatic album creation, editing tools, and easy integration with your PC’s system, the app is among the ideal ways to transfer photos from iPhone to flash drive. So, without further ado, get through the steps below to start!
Step 1First, establish a connection between your iPhone and computer via a USB cable. Then, make sure to select "Trust This Computer" on the notification that appears on your iPhone.
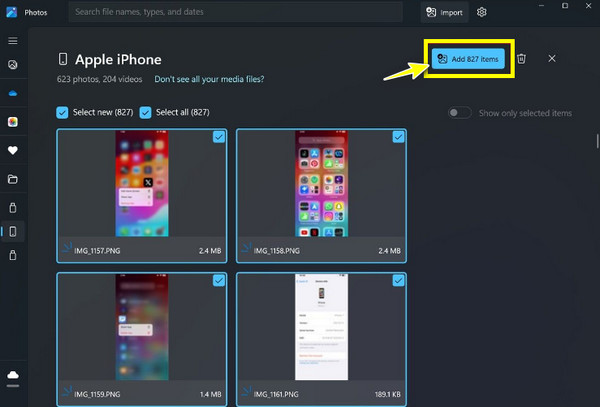
Step 2Launch the Photos app and upload your iPhone photos by clicking “Import” and choosing "Apple iPhone" or other USB-similar options.

Step 3Once all photos are displayed, you can review them and select the ones you wish to transfer. Next, click "Add [number] items" to begin the process.
Create a folder or let them save in the “Pictures” folder automatically; click “Import” to proceed.
Step 4Get your flash drive ready on your PC, then go to its folder immediately. After that, move to the folder where the imported images were saved. There, you can select the pictures, press "Ctrl + C" to copy, go to the flash drive folder, right-click anywhere, and then "Paste".
Method 4: Use Image Capture to Transfer iPhone Photos to USB on Mac
Meanwhile, Image Capture is a versatile and often overlooked utility in macOS systems. It provides a straightforward interface, so transferring media from iPhones, scanners, and digital cameras will be too easy. Unlike other applications, Image Capture has direct control over the import process, which you can specify precisely where you want to save your files, making it the perfect tool for Mac users to transfer photos from iPhone to a flash drive. Here’s how you can achieve it:
Step 1Get your USB cable and use it to link your iPhone to your Mac. If prompted, ensure that you choose "Trust This Computer" on your iPhone.
Step 2In Image Capture, click on your iPhone from the "Devices" list on the left side; it will then display all the photos available for import.
Step 3Insert your USB drive into your Mac now. Then, at the bottom, click "Import To" and choose "Other", here, determine the USB drive folder as the destination for your photos. Click "Choose" to confirm the location.

Step 4Turn back to the main window of Image Capture, browse your photo library, sort out the photos you want to import, or click "Select All" to import everything. Once okay, click "Download" or "Download All" at the bottom right to transfer photos from iPhone to flash drive.
Method 5: Use USB-C to Transfer Photos from iPhone to Flash Drive
USB-C is only compatible with iPhone 15 and later models, and the USB drive must support a USB-C port or be certified as compatible with iPhone. This method transfers iPhone photos to a USB drive via USB-C by leveraging iOS's external storage support to export the original images to an external device through the "Share → Write to File System" process. Compared to transferring via a computer, this method is more direct, faster, and more secure; however, if there are a large number of photos, the transfer may fail or be interrupted.
Step 1Insert your USB-C flash drive into the iPhone and open the "Files" app to confirm the drive appears under Locations.
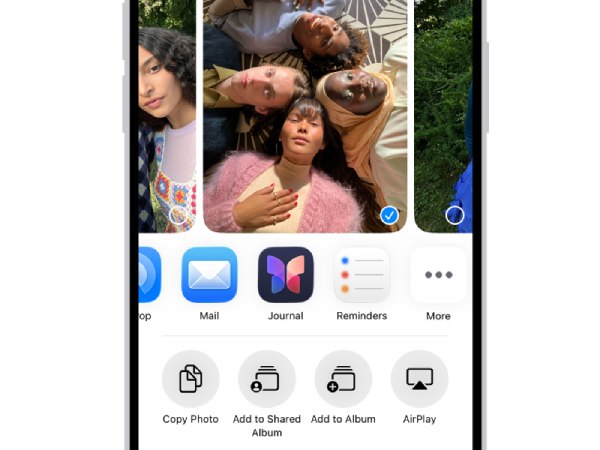
Step 2Go to "Photos" and select the images you want to transfer. Tap the "Share" button and choose "Save to Files," then select your USB drive folder.
Step 3Confirm the transfer and wait until all selected photos are successfully copied to the USB drive.
Summary of Choosing a Specific Transmission Method
| Method | Speed (5.0) | Security (5.0) | No Computer Required | Devices Supported |
| 4Easysoft iPhone Transfer | 4.2 | 4.3 | × | iPhone + Windows |
| iCloud Photo Transfer | 3.5 | 5.0 | √ | iPhone / Mac / Windows |
| Windows Photos App | 3.8 | 4.2 | × | iPhone + Windows |
| Mac Image Capture | 4.0 | 4.4 | × | iPhone + Mac |
| USB-C Direct to Flash Drive | 5.0 | 4.5 | √ | iPhone 15 and later |
For speed: Connect a USB-C flash drive directly
For secure backups: iCloud
For batch organizing/managing photos: 4Easysoft / Mac Image Capture
For easy import by Windows users: Windows "Photos" app
FAQs About Transferring Photos from iPhone to Flash Drive
-
Why is my iPhone not recognizing the flash drive?
This usually happens because the flash drive isn't fully compatible with iOS, requires more power than the iPhone can supply, or uses an unsupported file system format. It can also occur if your iPhone's iOS version is outdated or the USB-C/Lightning connection is loose.
-
Does transferring photos to a flash drive delete them from iCloud?
No. Exporting photos to a flash drive only creates a copy and does not affect your iCloud library. The original photos will remain in iCloud unless you manually delete them from the Photos app, and then also remove them from "Recently Deleted".
-
How to transfer photos from iPhone to a flash drive without losing quality?
To avoid quality loss, you can export the original files instead of compressed versions. Also, make sure "Keep Originals" is enabled in iPhone Settings, and avoid sending via apps that compress files.
Conclusion
Whether you want to use iCloud Photos or Image Capture on Mac, there’s a perfect method to transfer photos from iPhone to flash drive. You see today that doing so is a practical way to back up your cherished memories and free up storage on your iPhone. Among the methods discussed, if you seek a quick and friendly solution, 4Easysoft iPhone Transfer remains on top! Aside from simplifying the process of transferring your photos from iPhone to flash drive, it has high-speed transfer power and wide media management features. With these, you can have an efficient way to safeguard your memories and keep your collection organized.
100% Secure
100% Secure