Reliable video converter, editor, and compressor for daily tasks.

Level Up Your Edits! 5 Top-Tier Sony Video Editing Software

Posted by Aira Lesly Escoto to Edit Video/Audio May 22, 2025
Regarding Sony video editing, to get professional and stunning results, you may require Sony video editing software. Thus, Sony Vegas may come to your mind, and you’re not wrong about it. But besides Sony Vegas, many editing tools today suit different needs and expertise levels. In this post, you’ll dive into five notable Sony video editing software choices, each designed to enhance your Sony videos. See the one that works best for you!
Guide List
Top 1. Sony Vegas Top 2. 4Easysoft Total Video Converter Top 3. VEGAS Movie Studio Top 4. Adobe Premiere Pro Top 5. Final Cut ProTop 1. Sony Vegas
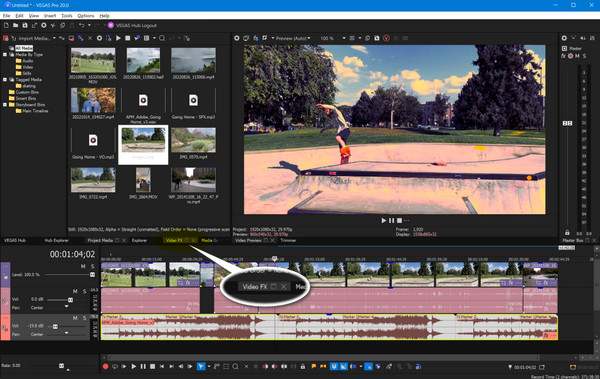
Sony Vegas, famously known as VEGAS Pro, is a powerful and professional-grade Sony video editing software you can get for your Sony videos. It provides various advanced tools, making it excellent for content creators and professionals. Using it, you can effortlessly edit, apply special effects, enhance quality, and do more edits. Another one is its support for 3D editing, where users can create 3D effects, apply 3D adjustments, and work with 3D models. You can expect more from Sony Vegas video editing software and see it for yourself while editing your Sony videos.
Step 1Launch VEGAS Pro, select “File” and go to “Import” to open your Sony videos. Drag them onto the timeline once added and arrange them to their positions as needed.
Step 2You can start editing by clicking the “Trim” tool to cut clips; add effects by going to the “Video FX” tab, then drag your desired effects or transitions onto the clips. Next, use the “Color Correction” tool to adjust your footage's brightness, contrast, etc.
For audio editing, use the “Noise Reduction” to clean up sound; you can change audio levels and add effects, too.
Step 3Once your Sony video is ready, head to “File”, and choose “Render As”. Determine your desired file format and settings, then click “Render” to save the final video.
Top 2. 4Easysoft Total Video Converter
4Easysoft Total Video Converter is an outstanding software solution for Sony video editing software. It has many editing tools to enhance your Sony footage easily. Whether with AVCHD or other Sony formats, this program offers seamless support with an intuitive interface, making it ideal for beginners and professionals. You can cut, trim, rotate, and apply effects, themes, and more to your video. Plus, you can enjoy the freedom of customizing video and audio settings, allowing for precise control over the final Sony video. Thanks to its combination of ease of use and powerful functionality, it makes it the best choice for editing on your Sony videos and enhancing any content.
Have various Sony formats support, such as AVCHD, MP4, XAVC, and more.
Can trim videos, apply filters and effects, adjust audio effects, etc.
Guarantee a high-definition output, up to 1080P and 4K resolution.
Preview all applied edits in real time to see if they meet your preference.
100% Secure
100% Secure
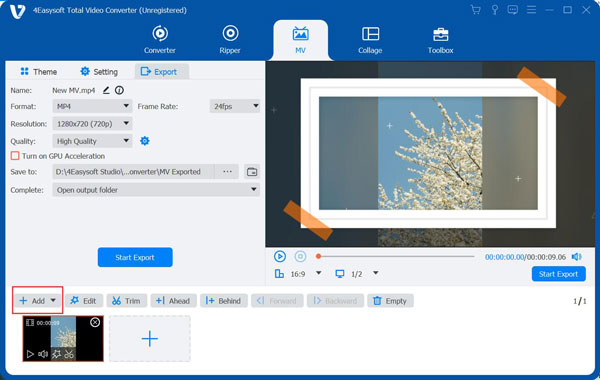
Step 1Once you have launched 4Easysoft Total Video Converter, go inside its “MV Maker” widget above, then click the “Add” button to import your Sony video files. You can use the “Ahead” or “Behind” buttons, too, to add them while arranging their order automatically.
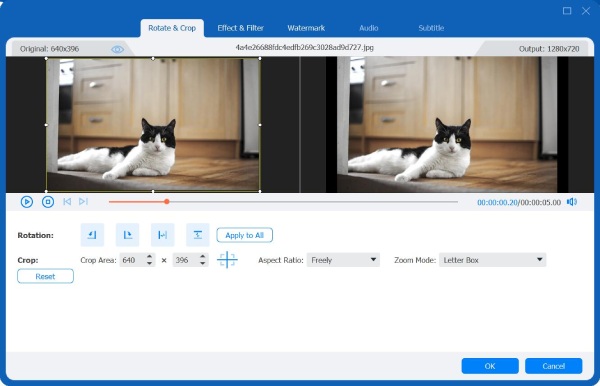
Step 2Begin with the “Edit” button to open the editor and see tools like “Rotate & Crop” where you can change the position of your video; apply effects and filters in the “Effects & Filter” tab, then go to “Watermarks” to add either image or text if you like.
Next, for “Audio”, select and add a background track if needed, and remove the background noise from video as you like. You can also add text subtitles in the “Subtitles” tab.
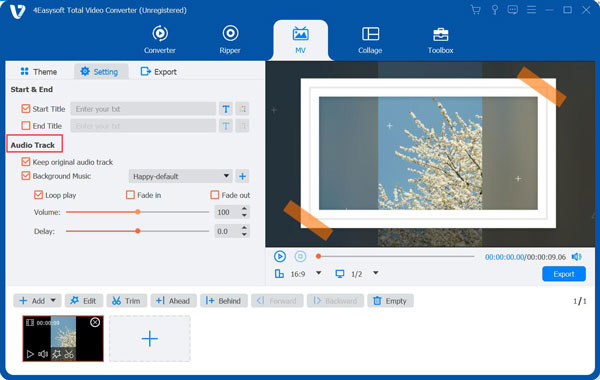
Step 3Returning to the main screen where themes can be seen, select the one you desire to apply to your Sony video. You’ll see the preview of it on the right window pane of this Sony video editing software.

Proceed to “Settings”, and add a title at the end or start if you like. Go down to the “Audio Track” category, where you can also add background music, apply loop play effects, and more.
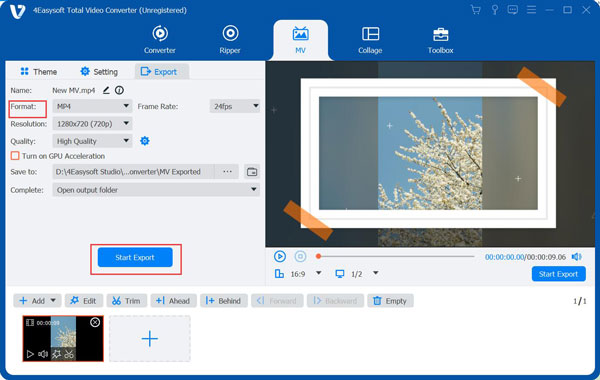
Step 4Once satisfied with all the edits, go to the “Export” tab. Here, you can set the format, resolution, quality, and frame rate that you would like for your final Sony video. Click the “Start Export” button to get your video.
Top 3. VEGAS Movie Studio
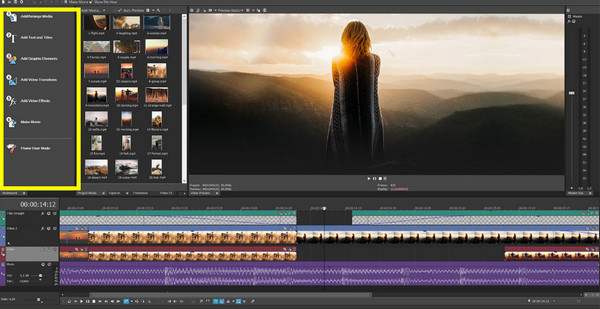
Moving on, VEGAS Movie Studio has a more accessible solution for beginners or casual editors who are still hoping for powerful features. This Sony video editing software gives a straightforward drag-and-drop interface, letting everyone quickly upload and organize their media files. It supports timeline-based editing, so you can arrange your Sony videos, add effects and transitions, add text, or do more.
Step 1Open VEGAS Movie Studio on your computer, then start with “File” and “Import” to upload your Sony video files to the program. Drag them once added in your desired order.
Step 2After that, you can use the “Split” tool to cut and trim video by dragging their edges in the timeline. Access the “Video FX” tab to choose effects for your clips. Next, add titles or subtitles using the “Text” tool.
Regarding audio tracks, you can adjust their volume levels and even fade-ins or fade-out effects.
Step 3 If you’re satisfied with how your final Sony video looks, go to “File” and then “Render As” and click on “Render” to export your video to your computer from this Sony video editing software.
Top 4. Adobe Premiere Pro
Transitioning to a much more industry-standard choice, Adobe Premiere Pro has a comprehensive and professional editing experience. While it isn't Sony-specific, it supports Sony video formats and hardware, making this alternative to Sony video editing software indeed as effective as the Sony Vegas Pro for editing Sony videos. It supports high-quality video formats and provides everyone with extensive tools for sound editing, video effects, color correction, and more.
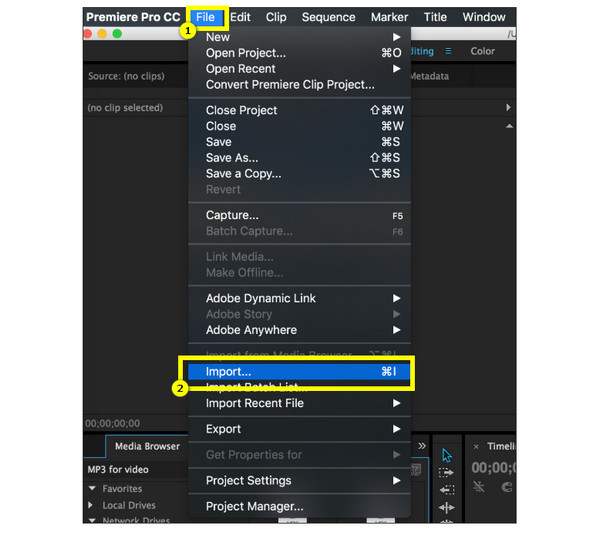
Step 1Once Adobe Premiere Pro is open, upload your Sony video files by clicking on “File” then “Import”. Put all videos into the timeline by dragging them.
Step 2Start editing now with the “Razor” tool for cutting and rearranging clips as necessary. Add transitions and effects, or adjust some colors in the “Effects” panel. Then, open the “Lumetri Color” panel for a detailed color grading, such as adjusting exposure, shadows, etc.
As for audio, you can change the levels, use audio filters, and even sync sound with your Sony videos.
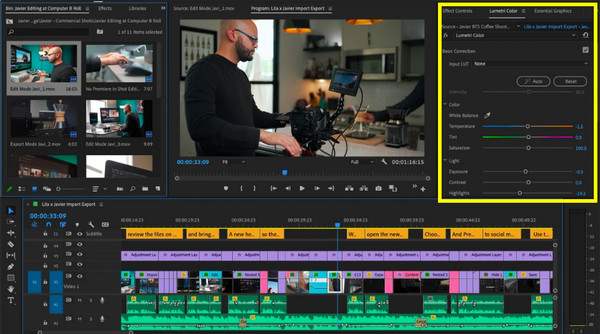
Step 3Finally, your edits are complete! Go to “File” then “Export”, and “Media”, then determine the format you want, the codec, and settings, and click on “Export” with this Sony video editing software.
Top 5. Final Cut Pro
Finally, you come to Final Cut Pro, Apple’s video editing software, primarily famous for its high-performance features and optimized workflow for Mac. This Sony video editing software features an intuitive interface and a robust set of tools for both professional and first-time editors. It offers full support for various formats, including Sony’s AVCHD formats and other footage from Sony cameras.
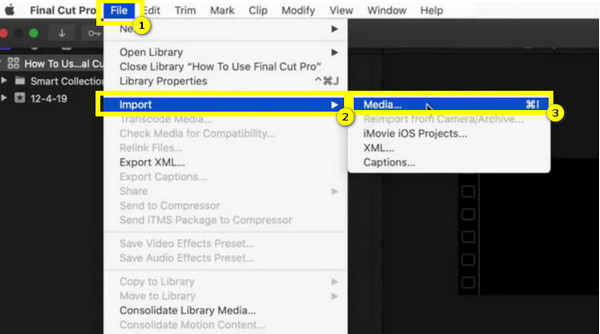
Step 1On your Mac, run the Final Cut Pro and select the Sony video you wish to edit by going to “File”, then “Import” and “Media”. Drag the added clips onto the program's magnetic timeline and organize them.
Step 2Trim clips using the “Blade” tool from the “Pointer” menu; apply effects by opening the “Effects” browser, then go to “Color Inspector” to change the color of your footage and the “Color Wheels” for color correction and grading.
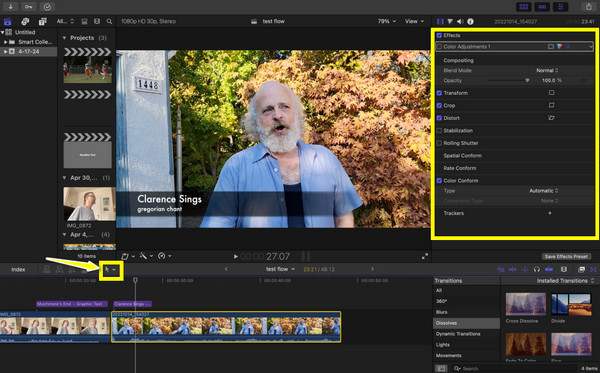
Proceed to the audio tracks; you can use the “Audio Enhancements” if needed.
Step 3Upon completing all edits, go to “File” then “Share”, choose your desired format and resolution, then click on “Next” to finalize and save your video.
Conclusion
The Sony Vegas Pro editing software is always ready to help when editing Sony videos, offering unique features tailored to your Sony footage. Aside from that, other tools are well suited for every type of video editor, like Final Cut Pro for Mac users and Adobe Premiere Pro. But, for the best option to get a comprehensive, friendly, and powerful editor, the 4Easysoft Total Video Converter is that tool! So, get it now and experience an all-in-one solution for your Sony footage.
100% Secure
100% Secure