
How to Save DVD Discs to Mac with High Quality for Easy Playback

Posted by Paula Pailaga to Rip DVD Sep 30, 2024
Physical DVDs are prone to scratches and damage that could lead to movie loss. You probably want to prevent that from happening to your DVD collections. Well, the best way to do this is to transfer DVD movies to your Mac computer! Don’t know how to do that? Then, continue reading this post, for it features 3 efficient ways to rip/copy/save DVDs to Mac! So, without any further delay, explore them now!
Guide List
The Direct Way to Save the Original DVD to Mac Disk Utility The Best Way to Save DVD to MP4 on Mac with High Quality How to Save Unprotected DVDs to Mac through Handbrake FAQs about How to Save DVDs to MacThe Direct Way to Save the Original DVD to Mac Disk Utility
The first way you can save a DVD to your Mac is to save it directly to your Mac’s Disk Utility. Disk Utility is a built-in helpful tool for Mac that can create a virtual image of the disk. It will save your DVD to a .cdr file that you can transfer to various devices or for archiving or backing up. However, you can only use this method if your DVD is not encrypted with protection. If it is protected, then consider the following method. But if it is not, then here are the steps on how to save a DVD to Mac:
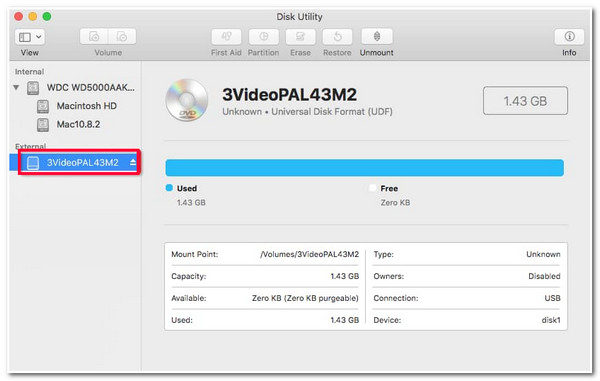
Step 1On your Mac, insert the DVD into it. Then, launch the "Disk Utility" program and select the "inserted disc" from the list under the "External" section. After that, click the "Click New" button.
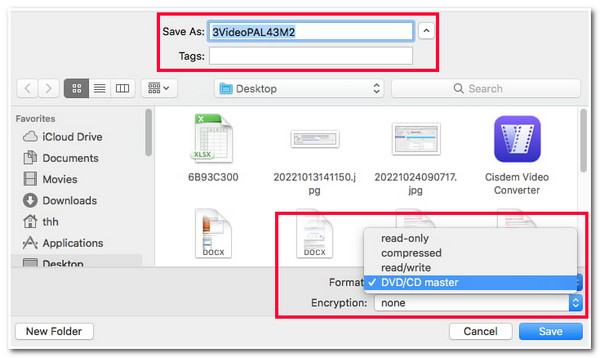
Step 2Next, access the "Save As" section and choose your "Name" and "File destination". Then, ensure that the image "Format" should be set to "DVD/CD master" and "none" for the "Encryption" option. After that, click the "Save" button.
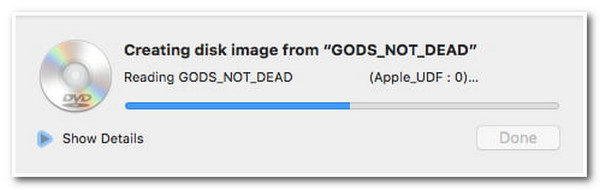
Step 3Once the disc image is created, the "new disc" image with the .cdr file extension will be visible on the left side of the Disk Utility window.
The Best Way to Save DVD to MP4 on Mac with High Quality
Multi-core processor that provides a smooth and flawless DVD ripping process.
Title selection section where you can easily choose the desired chapters of DVD.
Compress the video size while preserving the original high quality of the DVD movie.
Support video editing features, such as adding subtitles, audio tracks, effects, etc.
100% Secure
100% Secure
How to Save DVD to Mac Using 4Easysoft DVD Ripper:
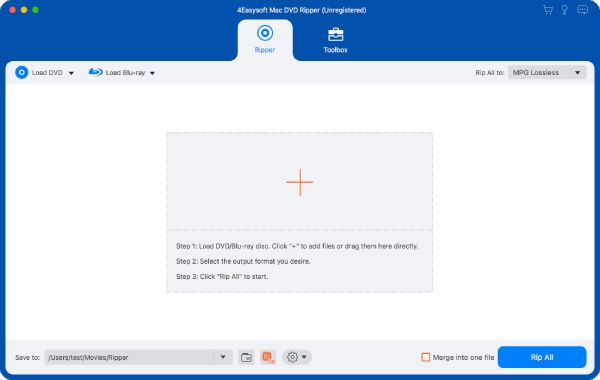
Step 1Download and install the 4Easysoft DVD Ripper tool on your Mac. After that, launch the tool and insert the DVD into your computer’s disc driver. Then, click the "Load DVD" dropdown button on the tool and select the "Load DVD Disc" option.
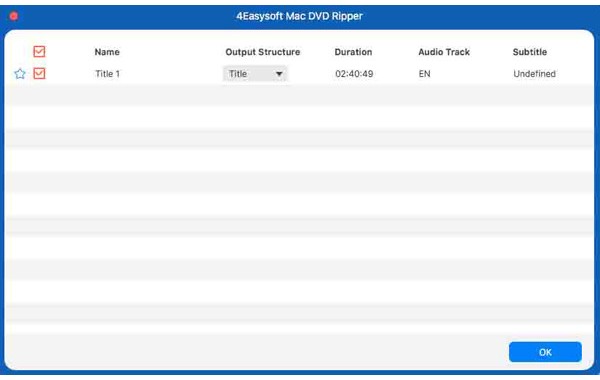
Step 2Next, click the "Full Title List" button, and on the new window, select all the Titles you wish to rip/copy by clicking their corresponding "checkboxes". Once you select all of them, click the "OK" button.
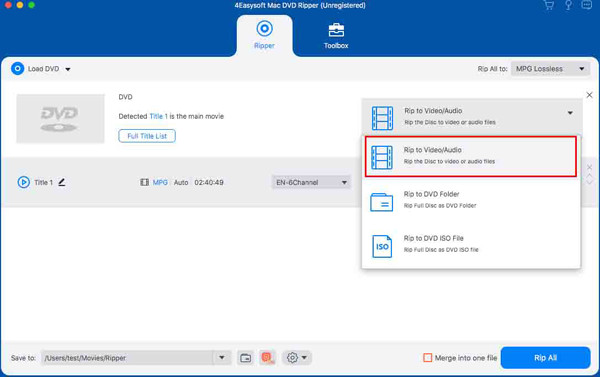
Step 3Then, select the "Rip to Video/Audio" option from the dropdown menu and click the "Rip All to" button to access the tool’s offered media formats. On the new window, click the "Video" tab and select the "MP4 Same as source" or "4K Video" option.
Step 4Once you finish the above setups, click the "Rip All" button to initiate your DVD's ripping and converting process. Once finished, you can access your Mac’s local file to see a converted DVD movie! And that’s it! That’s how you use this tool to rip DVD to MP4!
How to Save Unprotected DVDs to Mac through Handbrake
Otherwise, you can use Handbrake if you are looking for a free tool that can help you copy DVDs to MP4. This open-source video transcoder tool can rip DVDs and convert them into MP4, MKV, and WebM. However, this tool only works if you have a libdvdcss file in Handbrake’s installation folder. That file provides Handbrake the ability to bypass DVD encryptions. But this is only limited to partial CSS-protected DVDs. You might ask yourself, "How do I save a DVD to my Mac using Handbrake?" Well, here are the steps you must follow:
Step 1Download and install the "Handbrake" and "libdvdcss" on your computer. Once you have downloaded the "libdvdcss" file, transfer it to Handbrake’s installation folder. Then, launch the tool and insert the DVD you wish to rip and convert.
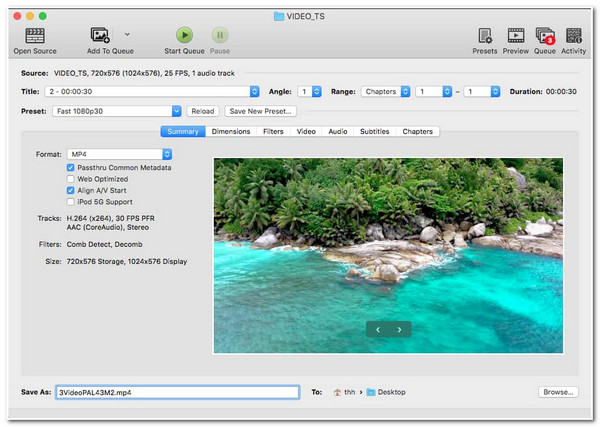
Step 2Then, click the "Source" section and click the "Open" button to load the inserted DVD. Next, head to the "Title" dropdown and select the "Titles" you wish to rip and convert. Then, on the "Summary" tab, click the "Format" dropdown button and select the "MP4" format.
Step 3Next, click the "Browse" button at the lower right corner and select a folder where you wish to save the ripped DVD. Then, click the "Start" button at the upper part to initiate the ripping and converting process. That’s it! That’s how you use Handbrake to save the DVD to MP4.
FAQs about How to Save DVDs to Mac
-
Aside from MP4, what format does Mac support?
Apart from MP4, you can convert DVD content into an MOV format. Apple develops this format for QuickTime players and Apple devices.
-
Where can I download the libdvdcss file?
To download the libdvdcss file, you can visit libdvdcss - VideoLAN on your browser. From there, you can click the releases button, choose the 1.4.3/ version, and wait for your browser to download it. Once done, you can move the file to the Handbrake installation folder.
-
Is it illegal to rip copy-protected DVD’s content?
Yes, but you will not be punished if you do this for personal use. But, if you publicize the DVD’s content and sell it online or on physical business premises, you will face various punishments.
Conclusion
There you have it! Those are the 3 efficient ways to rip/copy/save DVDs to Mac! With these tools, you can preserve DVD movies and transfer to Mac. If your DVD is encrypted with protection, you can use the 4Easysoft DVD Ripper tool to handle them. This tool supports decrypting DVD protections and ripping content to various media and device preset formats! Once you are done ripping and converting the DVD content, you can save it directly on your Mac! To discover more, visit this tool’s official website today!
100% Secure
100% Secure