Reliable video converter, editor, and compressor for daily tasks.

How to Trim Video with QuickTime Without Losing Quality

Posted by Paula Pailaga to Edit Video/Audio Jun 23, 2025
Trimming videos is an essential skill, whether you're editing a project for work, social media, or personal use. If you're a Mac user, learning how to trim video with QuickTime can save you time and hassle. We will show you detailed steps for cutting a video with QuickTime on a Mac. Moreover, this post will highlight QuickTime’s limitations and tips, and offer professional alternatives if you need more advanced editing features.
Guide List
Part 1: Detailed Steps on How to Trim a Video with QuickTime Part 2: Limitations and More Tips to Use QuickTime Player on Mac Part 3: Professional Way to Trim Videos without QuickTimePart 1: Detailed Steps on How to Trim a Video with QuickTime
Let’s start with how to trim a video with QuickTime. QuickTime Player is a built-in app on every Mac; its interface is simple but has just enough power to handle basic video edits. So, if you’ve got a clip that’s too long or has some unwanted parts at the beginning or end, you can cut it in just a few clicks.
Steps to Trim a Video with QuickTime:
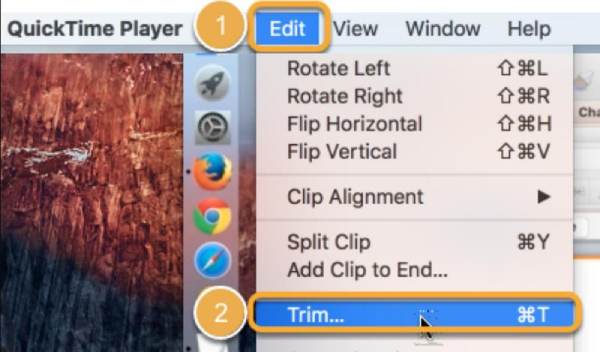
Step 1Open your video file using QuickTime Player. From the menu on the top bar, click "Edit" and then choose "Trim".
Step 2You will see a yellow bar for trimming appear at the lower part of the clip. Drag the left and right handles to select the part of the video you want to keep.
Step 3Preview the selection by clicking the "Play" button. Once you're satisfied, click "Trim" to cut the video.

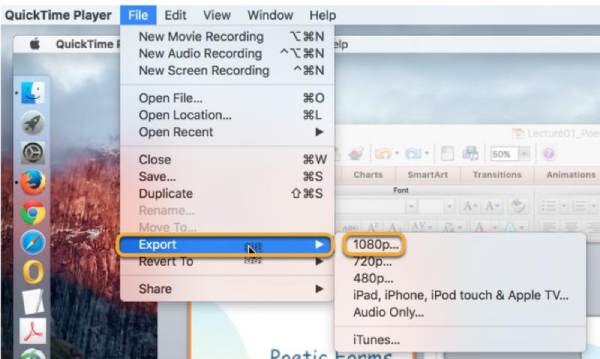
Step 4Go to "File" and then click "Save" or "Export" to download your trimmed video from QuickTime.
Part 2: Limitations and More Tips to Use QuickTime Player on Mac
Now that you’ve got the basics of how to trim video with QuickTime Mac, let’s talk about the limitations of QuickTime and throw in some helpful tips to make your video editing even easier. Here are some critical considerations when trimming videos using QuickTime. These apply whether you're trimming a quick screen recording or working on a regular video project.
Limitations of Trimming with QuickTime:
• No multi-cut or split editing: You can only trim from the start or end of the video. If you need to remove a section from the middle, you'll have to cut and save multiple clips separately, then stitch them together using another app.
• Lack of timeline editing: There’s no detailed editing timeline like you'd find in professional video editors—just a basic trim bar.
• Limited file format support: QuickTime works best with MOV and MP4 files. You should convert the video first if you're using uncommon formats.
• No undo option after trim: Once you hit "Trim," there's no going back—unless you’ve saved a backup. Always save a copy of your original video!
• No transitions or effects: You can’t add fades, text overlays, or audio tweaks directly within QuickTime.
Extra Tips for Using QuickTime on Mac:
• Always duplicate your original video before trimming, so you have a backup in case you want to start over.
• Use "Export As" instead of "Save" to choose your preferred video quality and format. This is helpful when preparing videos for email, YouTube, or mobile.
• Combine with iMovie if you need to do more than just trim. QuickTime works great for quick cuts, and you can use iMovie to add text to video or reverse video for more advanced edits.
• Use keyboard shortcuts: Press "Command + T" to open the trim tool faster.
• Preview before trimming: Hit the Play button to check your selection before committing to the trim.
Part 3: Professional Way to Trim Videos without QuickTime
If you’ve found yourself wanting to do more than just the basic cuts from how to trim video with QuickTime, or if you’re not using a Mac, don’t worry. One excellent option is 4Easysoft Total Video Converter, a user-friendly tool available on Windows and Mac. You can freely trim any part of the video. It features a robust toolkit with simple operation, enabling you to enhance color balance, adjust playback speed, add watermarks, and more.
Trim videos precisely by manually setting start and end times or using a slider.
Cut multiple segments from one video in a single go and merge them into one file instantly.
Able to add filters, effects, watermarks, subtitles, and adjust audio levels.
Compatible with both Mac and Windows, and supports over 600 video/audio formats.
100% Secure
100% Secure
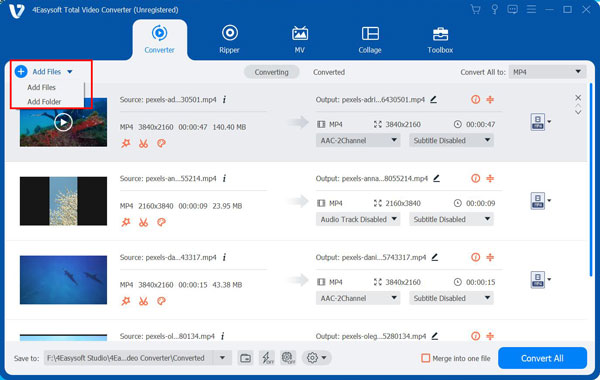
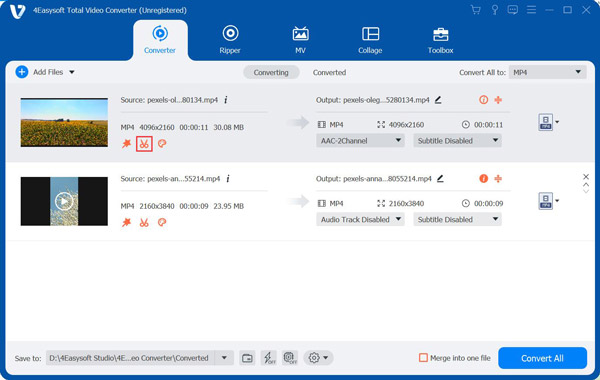
Step 1Launch the tool and sign up if prompted. To import the video you want to trim, click the "Add Files" button in the upper-left corner and select your file, then click "Open".
Step 2Pick the video from the list and click "Cut" located below the video thumbnail to open the trimming interface.
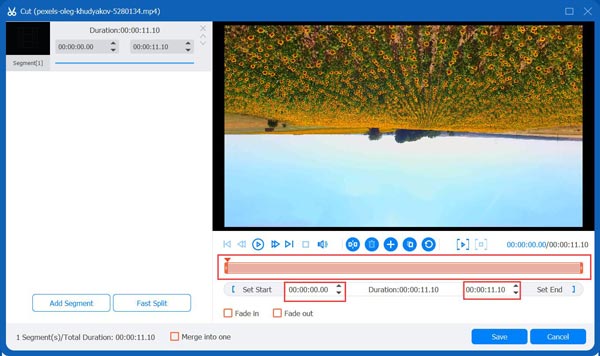
Step 3Use the sliders on the timeline to mark the start and end points of the section you want to keep—the area highlighted in red will be retained. Alternatively, you can manually input the exact start and end times in the "Duration" field.
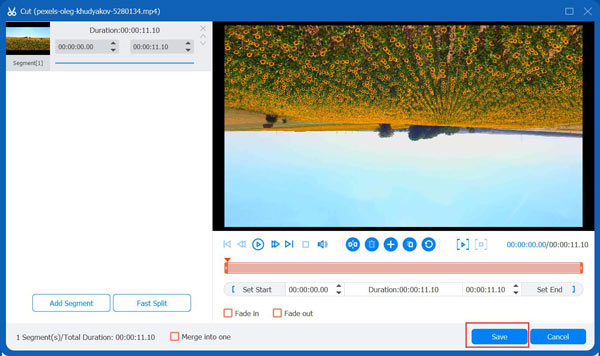
Step 4When you're satisfied with your selection, click "Save" to confirm your trimmed segment. Finally, click "Convert All" to export and save the edited video.
Conclusion
Trimming videos is not as complicated as you imagine. For Mac users, trimming video with QuickTime is a great starting point—it’s simple, fast, and already built into your system. But if you’re looking for more control, multiple cuts, 4Easysoft Total Video Converter is hands down the better choice. It offers advanced features without a complex learning curve. Its powerful trimming tools and format support make it the best option. For Windows users, you can also try using Windows Media Player to trim videos.
100% Secure
100% Secure