Record, edit, and share video from all sources.
Useful Snipping Tools for Mac [Comprehensive Tutorials]

Posted by Paula Pailaga to Screenshot Jul 11, 2025
Windows has always had its own screenshot tool, so does the Mac have the same snipping tool that works well and efficiently? How to use it? If you want more editing features and HD quality screenshots, which alternative snipping tool on Mac should you choose? In this article, we will address these questions in turn. Introduce six methods and tools for snipping on Mac.
Guide List
How to Use the Default Shortcuts Snipping Tool on Mac Snipping Tool on Mac: Using the Screenshot Shortcut Menu Professional, Convenient, and High-quality Snip Tool for Mac Clean Shot X - Versatile Mac Snipping Tool TextSniper - Mac Snipping Tool can Convert Text and Voice Monosnap - A Snipping Tool on Mac Focused on Detailed FunctionsHow to Use the Default Shortcuts Snipping Tool on Mac
First is the Mac built-in snipping shortcut. This is the fastest, safest, and most free method if you don't need to edit it and don't have requirements for the output format.
Pros
It is safer without third-party software required.
Low memory consumption.
Cons
Compared to a single function, no editing function.
Have no change on the output format.
For the whole screen snipping:
The built-in snipping shortcuts on the Mac are the fastest way to capture the entire screen. It's also simple to assemble and requires no additional software or setup. It comes in handy when troubleshooting technical problems or sharing information with coworkers.
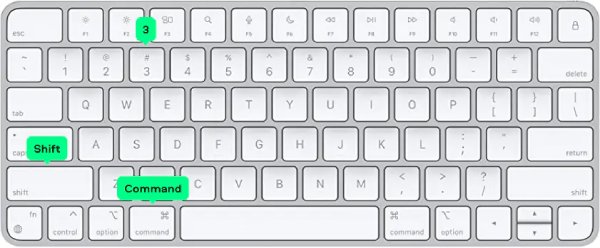
Step Press Command + Shift + 3 at the same time. The screen will then blink to indicate that the screenshot has been captured. This screenshot will be saved to your desktop as a PNG file with the date and time.
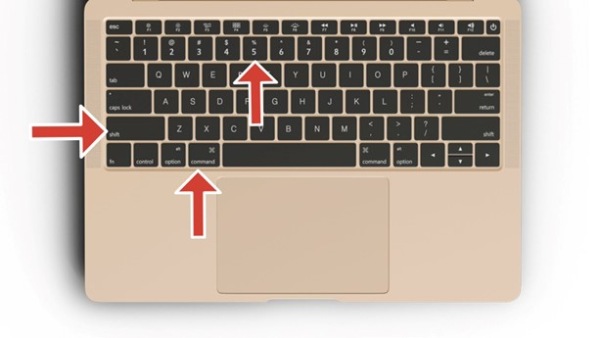
For the partial screen snipping:
If you only need to intercept a part, you need to press "Command + Shift + 4 keys". Then wait for the cursor to turn into a crosshair tool. Click and drag to select the area to be captured, then release the mouse or trackpad. You'll get a screenshot of the interface you've chosen. The screenshot will be saved to your desktop as a PNG file.
Snipping Tool on Mac: Using the Screenshot Shortcut Menu
Suppose you need some advanced settings or simple cropping, such as timed screenshots or saving images to the clipboard. You can use the Mac screenshot menu as the snipping Tool on Mac.
Pros
It is simple to operate, with a primary focus on the screenshot function.
With basic settings and snipping options like a countdown.
Cons
No advanced editing crop function.
Step 1Press "Command + Shift + 5" Mac screenshot shortcut. The screenshot menu will appear, displaying a panel with various screenshot options. There are three options available:
• Capture everything on the screen
• Capture a fragment of the screen
• Capture Window
Step 2It also features an options menu that allows you to change the location where you store your screenshots and videos. Just set it and start taking screenshots with this snipping tool on Mac.
Professional, Convenient, and High-quality Snip Tool for Mac
Although the shortcuts with the Mac are handy, it can't edit screenshots. Moreover, it cannot take long screenshots, and it may occasionally lag causing Mac screenshot not working. Therefore, you need a reliable and professional snipping tool for Mac, such as 4Easysoft Screen Recorder. It can choose any shape of snipping area, with high quality. It supports adding annotations to screenshots and offers other editing features, such as cropping. It can save time finding other software for secondary editing.

Customizable hotkeys, like mouse shortcuts and start recording shortcuts.
The screenshots have high clarity, and you can customize frame rate, etc.
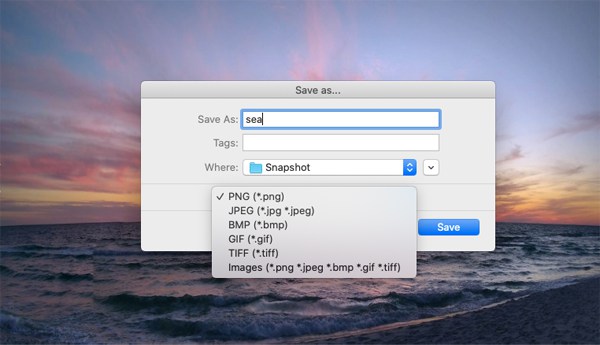
Supports multiple screenshot output formats conversion like PNG and JPG.
With various modes, including scrolling and pop-up window screenshots.
100% Secure
100% Secure
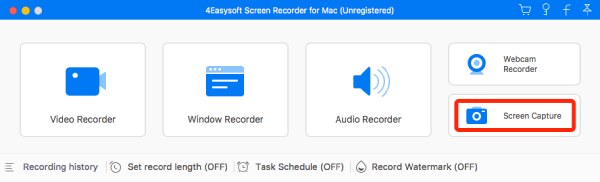
Step 1Launch 4Easysoft Screen Recorder. Go to the main interface and click "Screen Capture" and return to the page where you need to snip on Mac.
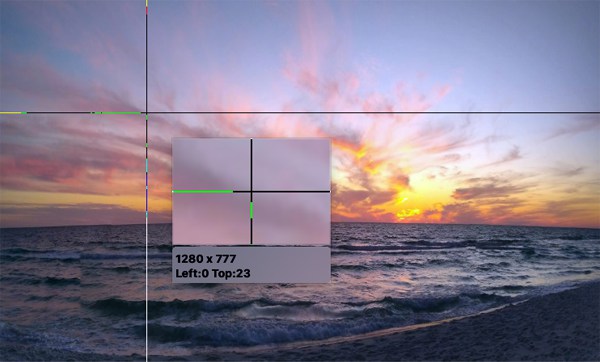
Step 2You can choose between scrolling or pop-up snipping mode using the "Screen Capture" feature. When your mouse turns into a cross, you can snip the area you need.
Step 3The window will then appear as a toolbox. Clicking it will allow you to add arrows, text, lines, and more. After customizing it, you can click the "Save" button on the right side of the toolbox to save your changes.
Clean Shot X - Versatile Mac Snipping Tool
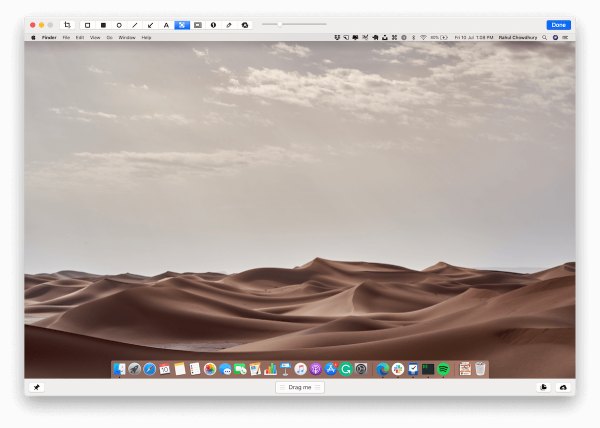
The wide variety of editing features makes CleanShot X stand out even more. In addition to the basics of a snipping tool on Mac, it can also add annotated text, create mosaics, and highlight essential parts. It can also stitch multiple screenshots into one and capture scrolling. This Mac snipping tool allows you to mark specific areas with points and upload them to the cloud, copying links with just one click. It is easy for you to share your creativity with others.
Pros
Plenty of avenues for sharing.
Editing is feature-rich, with the ability to add mosaics and highlights.
Cons
Without a trial version.
Features are more complex and may not be friendly
Step 1Open CleanShot X, and you can click the upper left corner "Screenshot" to start using this snipping tool on the Mac. You can also set hotkeys and save the path in the "Settings" section.
Step 2Then, go to "Shortcut," where you can choose all types of snipping shapes and hotkeys.
Step 3To select the type of screenshot, you can click on the "Program Menu" bar and then choose the type of screenshot, such as scrolling or snipping.

TextSniper - Snipping Tool on Mac can Convert Text and Voice
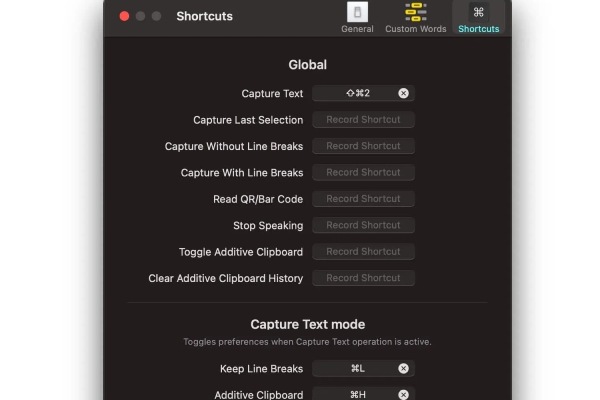
If you are more inclined to intercept the image and identify the text, you can choose Textsniper. It has customizable snipping shortcuts on Mac and can be saved in the menu bar for ready access. It also supports optical character recognition technology, which recognizes text quickly in pictures and lets you edit it freely. It supports multiple screenshot formats and then recognizes them.
Pros
Snipping is quick and customizable.
Recognizing and extracting text is fast and saves time.
Cons
Without a trial version.
Screenshot editing features are limited, and extraction is complicated.
Step 1Press "CMD+Shift+2" to snip or choose "snip text" to start. Then select the target area.
Step 2If you need extra text, press "CMD+V" to copy the text into the pasteboard or your notes.
Monosnap - A Snipping Tool on Mac Focused on Detailed Functions
Monosnap is also a great snipping tool for Mac. It can be hidden in the corners of the screen for easy access at any time. Monosnap offers a variety of options for capturing and editing screenshots and videos. Additionally, it features a mosaic blurring function and supports direct upload to YouTube after editing. If you need to capture a specific area of the screen, you can use its 8x magnifying glass for precise screenshots.
Pros
Easy to snip and ready to use at any time.
Functions are practical, such as eight times magnification and information blurring.
Cons
Cloud storage can only be enabled for a fee.
The screenshot function is more complicated for beginners.
Step 1
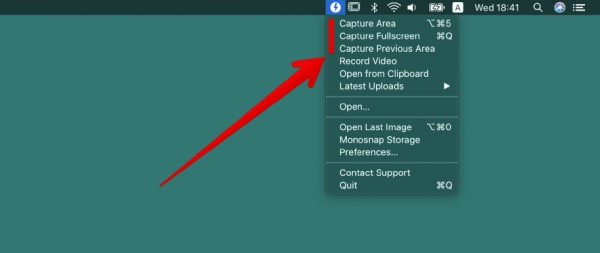
Step 2If you need to count down the time, you can select the area and hold down the Alt button to enable the timer for 5 seconds. To move, hold down the spacebar and drag the designated area.
Conclusion
Although it comes with powerful built-in Mac snipping tools, some users may still require additional features, such as scrolling screenshots and annotations. 4Easysoft Screen Recorder makes these tasks easier, and it is a better snipping tool choice for Mac. Its multiple screenshot modes, free editing of screenshots, customized shortcuts to start and end screenshots, and other features are all likely to take your screenshot efficiency to the next level. Try it for free now and see how convenient it is!
100% Secure
100% Secure