Transfer and manage all data between iOS devices, device and computer, and iTunes and devices.
How to Transfer Music from iPod to PC with/without iTunes and iCloud
 Posted by Paula Pailaga to iOS Backup&Restore Oct 08, 2022
After you buy a new PC, you may want to transfer all music from your iPod to PC and listen to them when working, studying, relaxing. Connecting your iPod to the computer via USB cable and transferring data directly is easy but time-wasting. Don’t worry! You will find a professional tool to help you transfer music from iPod to PC quickly within one click. Here are also 2 more methods to transfer data wirelessly. Keep reading to learn the detailed steps.
Guide List
Part 1: The Easiest Way to Transfer Music from iPod to PC [Fast&Safe] Part 2: How to Transfer Music from iPod to PC through iTunes Part 3: The Detailed Steps to Use iCloud to Transfer Music from iPod to PC Part 4: FAQs about Transferring Music from iPod to PCPart 1: The Easiest Way to Transfer Music from iPod to PC [Fast&Safe]
If you don’t want to spend too much time finding the music folder and then choose them one by one to transfer, 4Easysoft iPhone Transfer must be your best choice. This tool will automatically scan all of your local music and transfer them in one click. Moreover, it provides many useful tools, such as making ringtone with your music, managing the iTunes library, converting HEIC to JPG, etc. Learn the detailed steps on how to transfer music from iPod to PC.

Transfer music, contacts, photos, and all data from iOS devices to computer/iTunes.
Support managing and editing data directly with the help of photo manager, contact assistant and music editor.
Sync your iTunes library with all music and videos on your computer or iOS devices.
Enable you to delete the transferred data and free up more space on your iPod.
100% Secure
100% Secure
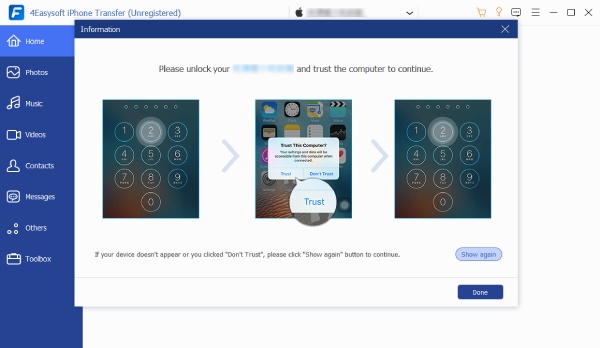
Step 1Free download 4Easysoft iPhone Transfer and connect your iPod to the PC via USB cable. If you are using iOS 13 or later, you need to tap the Trust button on your iPod when you receive the popping-up window.
Step 2If you want to transfer music from iPod to PC, click the Music button from the left tab and it will scan your iPod automatically. You can browse all music on your device or click the Playlists button to see your music with different styles.
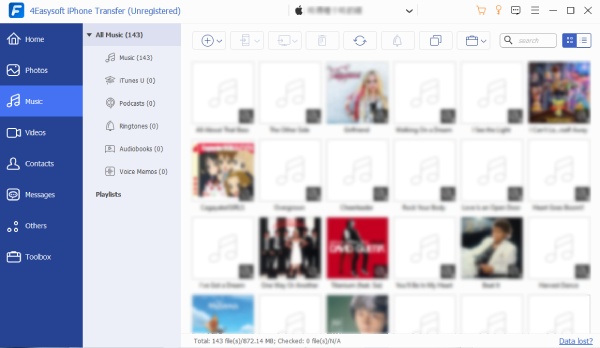
Step 3After that, you can click the Export to PC button at the top bar and select the desired folder to save your music. In a few minutes, you will successfully transfer all music from your iPod to PC.

Part 2: How to Transfer Music from iPod to PC through iTunes
You can also use iTunes to transfer music from iPod to PC. But this way will only sync your music files on iTunes of your computer, and you need to download it again to listen to them in local. Although the entire process is relatively complex, you can follow the steps below to transfer music from iPod to PC with iTunes:
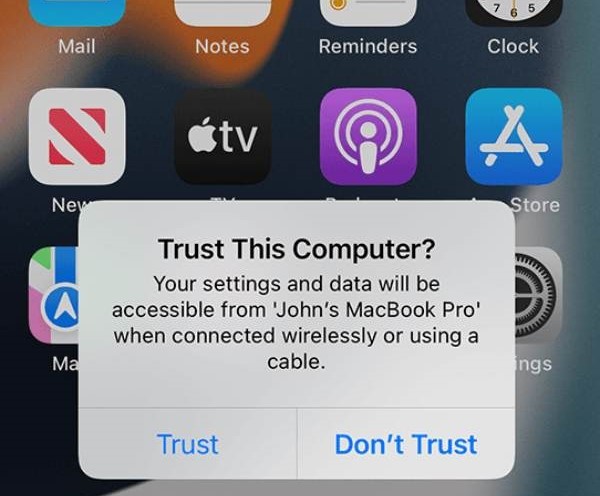
Step 1Firstly, connect your iPod to the PC with a stable USB cable and launch iTunes on your computer. If you are using iPod Touch, you will receive a popping-up window on your iPod. Just tap the Trust button to confirm the data transfer.
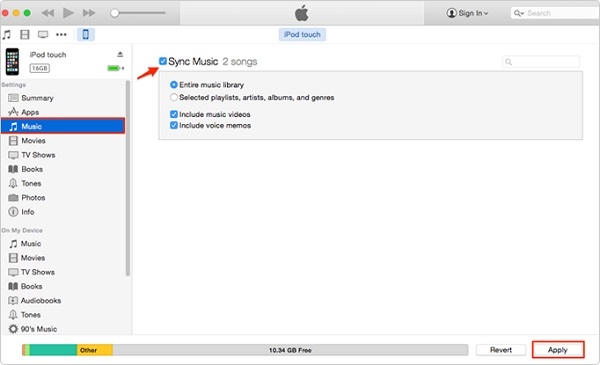
Step 2Click the Device button on iTunes and choose the Music tab. Tick the Sync Music checkbox and change the settings according to your need. Then click the Apply button to sync and transfer music from iPod to PC.
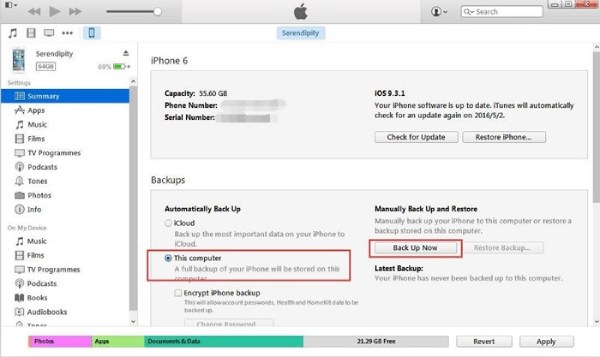
Step 3If you want to listen to those music in local, you can backup the music to your computer. Click the Summary button from the left bar and choose the This Computer option. At last, click the Back Up Now button to continue.
Part 3: The Detailed Steps to Use iCloud to Transfer Music from iPod to PC
Transferring music from iPod to PC through iTunes will ignore other audio files in local, so you can also use iCloud to help you. Here are the steps:
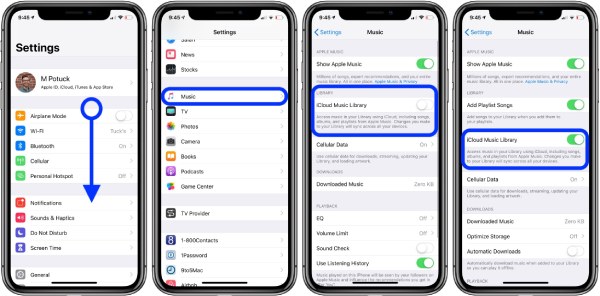
Step 1At first, you should turn on the iCloud Music Library on your iPod. Normally, this functions is on by default. You can check it in the Settings app. Then scroll down to tap the Music button and turn on the iCloud Music Library option.
Step 2After that, launch iTunes on your PC and check the iCloud Music Library option from the Preferences button. Then, all of your music will be synced automatically. You can find them from the Albums tab and download them to transfer music from iPod to PC.

Part 4: FAQs about Transferring Music from iPod to PC
-
Can I transfer music from iPod to Windows 10 through iTunes?
Of course, you can. iTunes is available on Windows 7 and later versions, so you can sync and download music with iTunes on your Windows 10.
-
How to transfer music from iPod to PC with Dropbox?
Just like iTunes and iCloud, Dropbox is also an online data saver. You can upload all your music to Dropbox on your iPod, and then use the same account to log in Dropbox on your PC. In this way, you can sync and transfer music from iPod to PC without USB cable.
-
How to transfer music from iPod to Windows Media Player?
Firstly, you need to use the above three efficient methods to transfer music from iPod to PC. Then launch WMP and click the Organize and Manage Libraries buttons. Click the Music button to add files from the desired folder. And you can convert MP3 to WMA for better listening.
Conclusion
Now, you have known how to transfer music from your iPod to PC easily. Using the default iTunes and iCloud is safe but complex, and you need to choose, sync, and download music by your own. Have a free trial on 4Easysoft iPhone Transfer to transfer music from iPod to PC in one click. More editing functions are provided for you as well.
100% Secure
100% Secure